Sunday, December 30, 2012

Make it Monday #97 (Take 3)

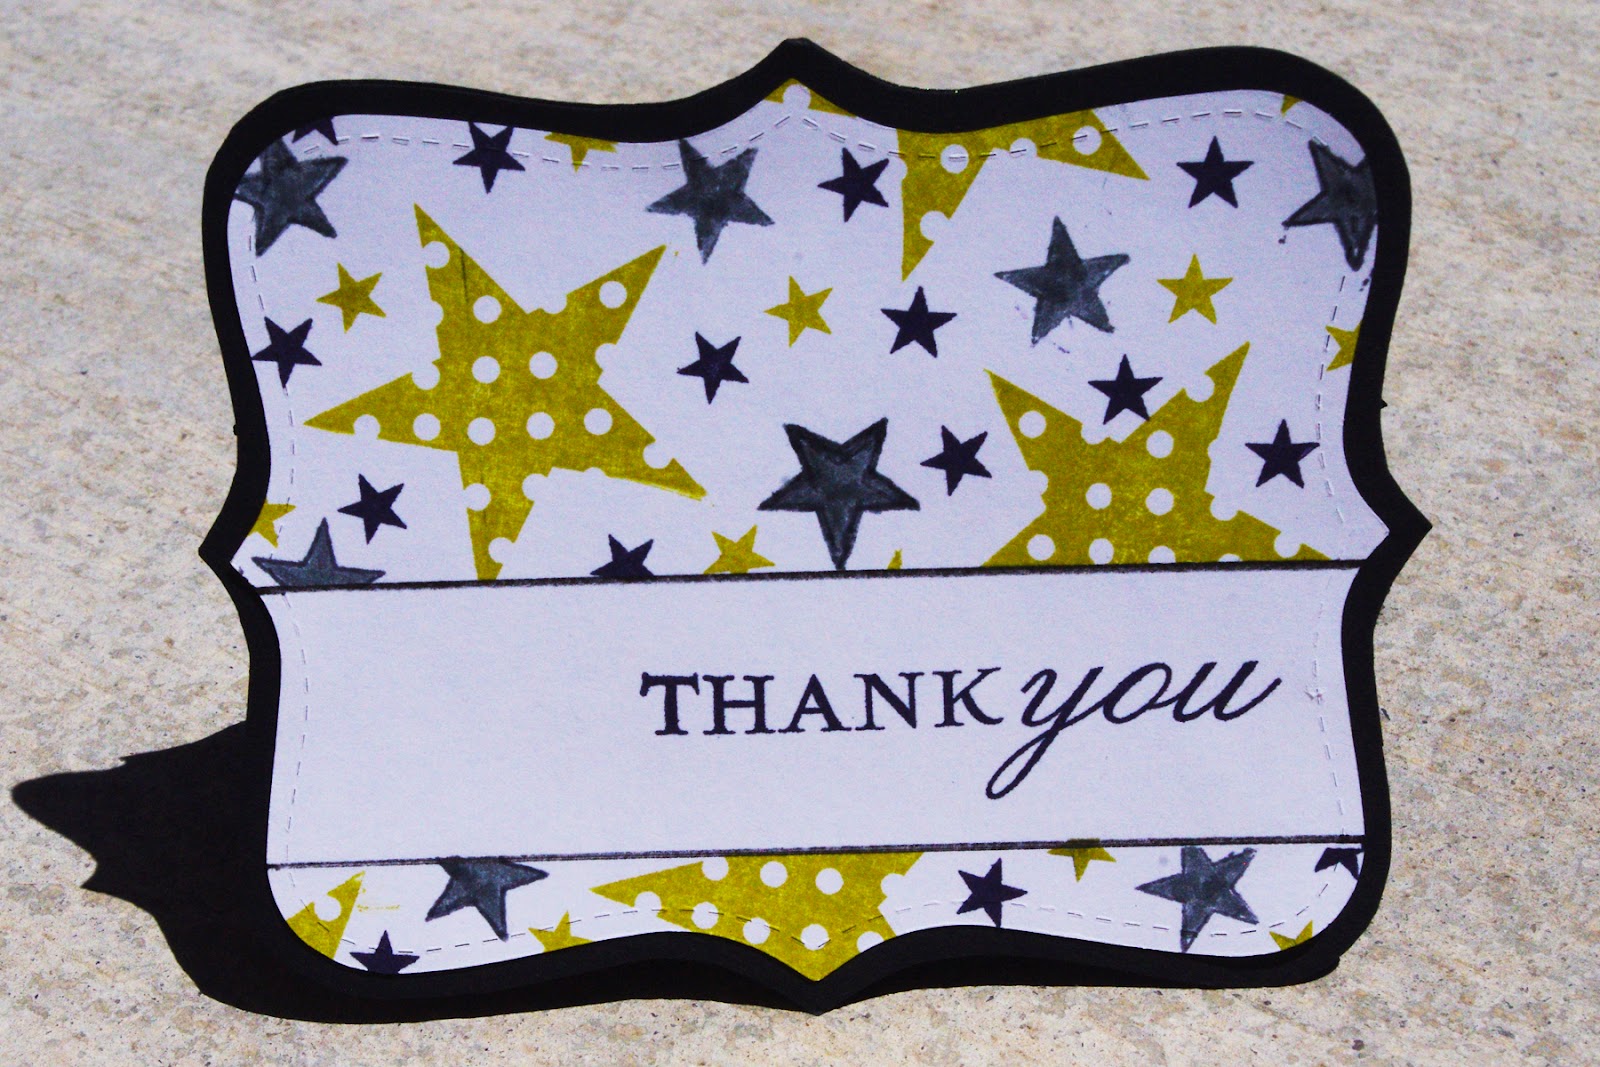
I made this card for  PTI's Make It Monday #97: 2012 A la Carte.  I had the intention of using it for a 10 minute card dash as well, but my baby woke up in the middle of my first and second attempts making the card, and then I had to come back to it three or four times to get it finished up, so the 10 minute idea was definitely lost.  And actually I ended up making this card twice because there were a couple things about the first card that bugged me, but I loved the chevron background I had created.  My husband thought the first card was okay at first, but after showing him my second card I asked him if I should even bother sending the first card to someone or if I should just pull the buttons off and trash the card.  He said I could send it to my mom. (That's a really nice way of saying that it doesn't look that great, but your mom loves you and appreciates any card you send.)  

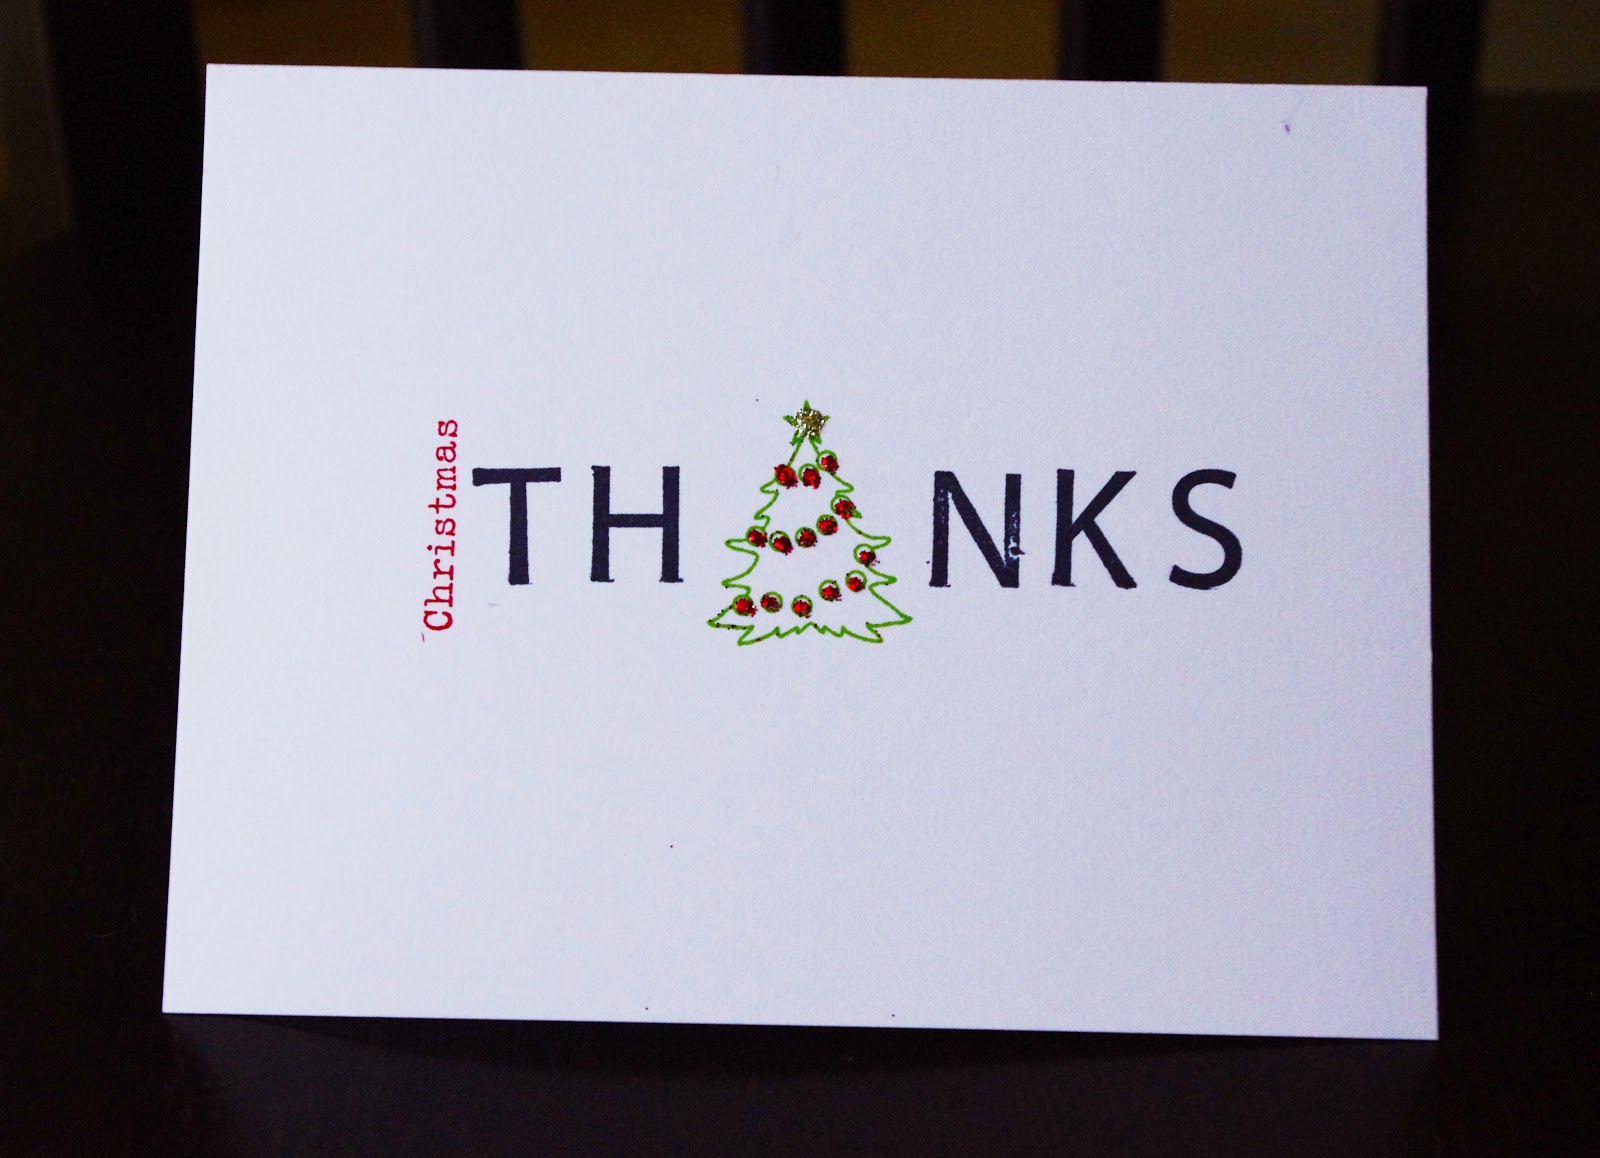
My first attempt making this card only used Make It Monday #82: Cutting StampsI cut the candy canes 5 cent stamp in Friendship Jar Holiday Fillers, so I could just use the words candy and cane separately to make the red part of the chevron pattern.  However, as the card evolved I started thinking about some of the other previous Make It Mondays, and I ended up using Make It Monday #90: Creating Focal Point Sentiments with Stamps & Dies and Make It Monday #94: Detail Glitter Technique again like I did on this card.  (I have to use glitter as much as I can while it is out because I know in a very short time I won't be able to handle the mess it creates anymore, and I'll pack it all away...probably for a while.)

Supplies (all PTI unless otherwise noted)
Stamps: Chocolate Alphabet Small (CTMH), BB: Chevron Stripes, Friendship Jar: Holiday Fillers, Polka Dot Basics
Ink: Fresh Snow, Real Red (SU)
Paper: Soft Stone, White
Other: Block Alphabet Die Collection, Snowflake Punch (Marvy Uchida), Garnet Glitter (Martha Stewart), buttons, embroidery floss

Thursday, December 27, 2012

Card 2 for 10-Minute Craft Dash #9, CSC83, & MIM #97


I made another Christmas thank you for the following three challenges (click on each photo to go to the challenge):
I made the card last night and waited to photograph it until this morning, which was silly because it's still snowy today and the sky is completely gray. There isn't a lot to this card, so it only took me 5 minutes 43 seconds to finish.  To my surprise, the most time consuming part wasn't the selective stamping (christmas) or the glitter, but rather aligning the letter stamps on the acrylic block.
This card was so quick to finish that just for kicks I decided to see how long it would take me to make three more since I had pulled out two sheets of white cardstock. I set the timer again and finished all three in 9 minutes and 33 seconds, and I spent the whole last minute just dusting off the extra glitter from the cards.  If only I could write on the insides that quick. :)
For the Make it Monday Challenge #97: A la Carte, I went back and used MIM #94: Glitter Detail Technique.  Obviously if I hadn't been doing the 10 Minute Craft Dash as well, I would have been a little more precise with applying the glue, but I still love how just a little glitter adds so much.
Supplies
Stamps: Friendship Jar: Holiday Fillers (PTI), Short Order Alphabet (SU)
Ink: True Black, New Leaf (PTI)
Paper: White (PTI)
Other: Martha Stewart Glitter (White Gold & Garnet)


Wednesday, December 26, 2012

Christmas Stockings

This post is mostly for my family (I promised I would show them the finished product), and it explains a lot about where my very limited crafting time has been spent over the last month.  We were one stocking short this year, and when I saw Camille Roskelley's Merry stocking pattern (love her!), I decided I had to make all of us new stockings.  Let me preface this by saying that I am not a quilter and hardly a sewer, so this task was pretty ambitious.  Thankfully, one of my sisters loves quilting (and is amazing at it), so she helped a ton with the quilting part on the chevron and the pinwheel stockings.  And this tutorial was amazing if you are thinking of sewing anything with hexagons.  I don't think I could have done done the hexagon stocking without it.  Her tutorial made the pattern directions make sense, and maybe even simplified it a bit.  I love the fabrics I used, and I'm mostly pleased with the way they turned out (although I only finished them two days before Christmas, so there was no time to actually quilt them).  The only major snag was having to make up my own way to attach the cuff and tag (and I'm sure if I knew more about sewing the cuff directions would have made sense and I wouldn't have had to make my own version up.)  Okay, enough chit chat.  Here are the stockings.

My favorite....this was the most labor intensive because the hexagons are completely sewn by hand, but I love how it turned out and so does my husband (which is good because it is his stocking.)
 
The cuff bugs me on this one, but it's my fault because I was determined to work this fabric in because I love it so much.  I'll probably redo this one.  I really love how this stocking looks (pom-poms and all...wish I'd seen it before I did mine.)
This isn't a great picture, but I love how this one turned out, too...though I wish I had paid more attention to the way the penguins were facing when I did the cuff.
One final shot of them all. :)

10 Minute Craft Dash #9, CSC83 & MIM #97

Update: I was super excited to see that Paulina, the 10 Minute Craft Dash creator, chose this card as one of her favorites for Challenge #9. Thanks so much, Paulina!

Today I decided to participate in three challenges: 10 Minute Craft Dash #9, CAS-ual Fridays Challenge #83 (CSC), and PTI's Make It Monday #97: 2012 A la Carte using the previous Make It Monday #90: Creating Focal Point Sentiments with Stamps & Dies.
  
This was my first time doing 10 minute craft dash and CSC.  Their combined challenges were to create a CAS holiday-themed card in less than 10 minutes, which was the perfect challenge because if forced me to keep things simple, work quickly, and just go with it (even if it means ignoring slightly smudged stamping and unequally spaced letters.)  My work area is a mess and I was a nervous wreck, but I finished in 9 minutes 44 seconds!  I was so excited that I actually made the deadline that I ran downstairs to show my husband the card.  When he saw me he asked, "Are you over-heating?" When I get nervous and stressed my face and neck get really flushed, and apparently I was red as a tomato. :)  For PTI's MIM, I went back and did MIM #90: Creating Focal Point Sentiments with Stamps & Dies. 

Anyway, here is my holiday thank you card.  We were spoiled with gifts and I think I might mass produce these to send out.  My favorite part about this card the color scheme because it matches the decorations on our tree and the stockings I made this year.
I'm actually shocked that I was able to die cut as much as I did, but I knew what dies I wanted to use, so I pulled them all out, and I pulled out my tiny avery sticker labels (which I like to use to position my dies..they hold well, but peel off the paper and dies easily). The labels held everything in place, so I could run all 6 dies through at one time.

SuppliesStamps: Mat Stack 3, Movers & Shakers Sentiments (PTI)
Ink: New Leaf (PTI), Real Red (SU), Cool Carribean (SU)
Paper: white (PTI)
Dies: Block Alphabet, Fabulous Frames, Tiny Tags (PTI)
Other: Honeydew Twine (the Twinery), Xyron Sticker Maker


PTI December Blog Hop - Take 2


This is my second card for PTI's December "White & White" Blog Hop.  After I did my first card, I decided to go super CAS. This card was a quick one.  The polka dots are stamped in the negative space of the die cut and then the whole panel is popped up.
Oh, and here's the beautiful inspiration photo.
Supplies
Stamps: Polka Dot Basics 2 (PTI)
Ink: Sahara Sand (SU)
Paper: White (PTI)
Other: Script Alphabet Die Collection (PTI)

December PTI Blog Hop: White & White

It's been a super long time since I posted here...or played along with a Blog Hop at PTI, but since all of my Christmas gifts are finished, I had a few minutes tonight to make a card.  I loved the inspiration photo...  
but I've never made an *all* white card, so it was a bit of a challenge.  A good challenge, though.   The photos are pretty dark, but I promise everything is bright white or sparkly silver in person.  My husband thinks it looks like a wedding thank you.  I kind of agree.

Supplies
Stamps: Think Big Favorites #19 (PTI)
Ink: VersaMark Champagne
Paper: PTI (white), SEI
Other: Martha Stewart Glitter (white gold), PTI button (vintage cream), Fabric Fancies flowers (silver), ribbon

Saturday, June 30, 2012

PTI Make It Monday #72: Embellishments

This week PTI's Make It Monday Challenge was to make your own embellishments.  I enjoyed putting the layers together for the flower on this card.  I usually keep things more simple (especially lately), so this was stepping a little out of the box for me. The patterned paper was orginally a plaid, but I noticed that the strips I had cut made sort of a chevron pattern when I alternated their directions, so I decided to go with that...it's doesn't line up perfectly, but it's good enough. :)
Supplies
Stamps: Round & Round (PTI), Turning a New Leaf (PTI)
Ink: Buckaroo Blue (SU), So Saffron (SU)
Paper: scraps (from really old Making Memories & Chatter Box papers)
Other: Simple Circles Border Die (PTI), Eyelet Lace Die (PTI), Buttoned Up #1 Die (PTI), Flower Punches (Marvy Uchida), raffia

Friday, June 22, 2012

Make It Monday #71: Masked, Bordered Sentiments (Card 2)

Here's my second attempt for this week's Make It Monday at Papertrey with masked, bordered sentiments.  I saw the color scheme in an ad in a magazine, and loved it, so I ripped the ad out knowing that I would use it someday.  I stumbled upon it yesterday when I was cleaning out a file, so I decided to use it today to make my card, and I love it even more now.  It was also my first time using Papertrey's BB: Chevron Stripes.  I knew I would love this set...not sure why it took me so long to buy it.
Supplies
Stamps: Background Basics: Chevron Stripes (PTI), Giga Guidelines (PTI)
Ink: Chocolate Chip (SU), More Mustard (SU), Real Red (SU), Sage Shadow (SU)
Paper: Ocean Tides (PTI) , Stamper's Select White (PTI)
Other: Cappuccino Twine (The Twinery), Goldrush Marker (CTMH), button (MM)

Thursday, June 21, 2012

PTI Make It Monday #71: Bordered Sentiments

It's been a while since I've been able to make a card for PTI's Make It Monday Challenges.  This week the challenge was making bordered, masked sentiments.  This card was really quite simple, which is good because I'm really behind on thank yous and I have a bunch to make.  Plus all the cardstock was scraps, and I love when I can use those up.
Supplies
Stamps: Friendship Jar Summer Fillers, Giga Guidelines, Star Prints (all sets PTI)
Ink: True Black (PTI), Basic Grey (SU), Kiwi Kiss (SU)
Paper: black and white cardstock
Other: Top Note Die (SU), Black Marker (CTMH)

Friday, May 25, 2012

May Papertrey Blog Hop

 
It's time for another blog hop at Papertrey.  I loved the colors in the inspiration photo (as a random side note, these are also the colors in my kitchen), and the mixing of patterns, so I focused on those elements for my projects. 
PTI's May Blog Hop Inspiration Photo
I guess I'll start with the boxes.  I actually made these last, but this is what the recipient will see first, and I think they really pulled the whole gift together.  I made everything that was going to go inside the boxes first, so I could customize the boxes to fit the contents perfectly. 
The boxes are made of mostly PTI papers (Simply Chartreuse, Stamper's Select White, True Black).  The tag on Box #1 (green lid) was punched out with Stampin' Up's Curly Label Punch and stamped with stamps from PTI's Friendship Jar Fillers.  Box #2 (the white lid box with the patterned front) was made with several stamps including Trendy Trees from Stampin' Up, Turning a New Leaf from PTI, and a butterfly stamp (that I love!) from Michael's $1 bin.  I had orginally intended this to be part of a card front, but never got around to finishing the card, so I just put it on top of the box.  It's actually a pretty fun pattern (I stamped it based off of a pattern from some some fabric that I saw), but I forgot to get a good shot of it. 
Box #1
Box #2
This isn't the best picture, but one of my favorite parts of Box #1 is the inserts inside it that I made to separate the bracelet and accessories into tiny compartments.  The process was a bit of trial and error, but in the end I finally got it right, and I was thankful again for having a Scor-Pal.
Every time I look at PTI's Simple Circles Border Die it reminds me of a bracelet, so I finally decided to make one. It's made out of felt, so it is soft, and I just used Velcro on the ends, so it is easy to put on. To make it more fun for my nieces, I put Velcro in the middle of the bracelet and made four different accessories that they can attach to it.  I used different felt, flowers, buttons, fabric patches, and dies to create the bracelet attachments (see supply list below).
Now for the insides of Box #2.  Okay, so I know I've made a bunch of hair accessories over the last few months, but I couldn't help myself. 
 
The little clips at the bottom are made mostly out of the scalloped circle from PTI's 1 3/4" Limitless Layers Circle Collection.  I die cut two scalloped circles - one in black and one in white.  Then I cut out every 5th scallop on the white one to make it look more like a flower.  The large chevron flower on the headband is made out of PTI's Large Scallop Border Die.  I used the same technique I used in these (just without the notches).  I used the same technique for the black flower that I used on the yellow flower in this post.  For the white flowr I put two of the flower-looking circles from PTI's 1 3/4" Limitless Layers Circle Collection on top.  I cut out every 4th notch on the top one to give it dimension.
Hair Accessories & Bracelet Supplies
Dies: Large Scallop Border, 1 3/4" Limitless Layers Circle Collection, Simple Circles (PTI); Bigz Beautiful Butterflies (SU); Flower Layers #3 (Sizzix)
Buttons: Sweet Leaf (CTMH), Black (from my stash)
Other: Black Floss (MM), fabric patches (MM), Fabri-tac, Velcro, felt (Hobby Lobby)
Box Supplies
Stamps: Friendship Jar Fillers (PTI), Background Basics: Text Style (PTI), Trendy Trees (SU), Turning a New Leaf (PTI), butterfly stamp (from Michaels $1 bin)
Ink: Basic Grey (SU), Kiwi Kiss (SU), True Black (PTI)
Paper: Simply Chartreuse (PTI), True Black (PTI), Stamper's Select White (PTI), Basic Black (MM)
Other: Curly Label Punch (SU), Ribbon, Scor-Tape

Tuesday, May 15, 2012

Make It Monday #66: Border Die Flowers - Round 2

I love making felt flowers with border dies, so I decided to make another one for this week's Make It Monday Challenge.  I used the large scallop border die again (see my other large scallop border die flowers here and here), but this time I snipped a tiny triangle out the of the top of each scallop before I started pleating the flower.  I pleated at every notch (including the ones made by the die) for the small flower (bottom left) and only the notches I cut for the large  flower (bottom right).  If you look really closely at the flowers you might be able to see what I'm talking about.
One thing I love about these flowers is that they lay really flat, and even when I doubled them up, they didn't really add too much bulk to the card.
Supplies (all PTI unless otherwise noted)
Stamps: Botanical Silhouettes, Turning a New Leaf
Ink: Buckaroo Blue (SU), Spring Moss
Paper: Dark Chocolate, Kraft, Chatter Box Paper Scraps
Other: Large Scallop Border Die, Vintage Buttons, Felt

Make It Monday #66: Felt Flowers From Border Dies

When I saw this week's Make It Monday to create a felt flower out of a border die, I knew I had to play along because I've been having fun making felt flowers from border dies the last few months (see this post and this post).  But then I decided I wanted to stretch myself a bit and try to come up with a different flower than the ones I've already done, so I started die cutting and experimenting.  I ended up using the negative/left over felt after die cutting PTI's large scallop border die to create both flowers on the card.  For the large flower, I just took the entire negative strip and pleated it as I turned it in a circle.  And for the flower bud, I just folded a portion of the negative strip over a couple times.  It looked kind of funny at the bottom, so then I cut a single scallop and layed it diagonally across the front to hide the mess.  That made it look more like a bud, which is what I was going for anyway.  Oh, and I used my x-acto knife to cut a slit for the branches to slide through, so it looked like the flowers were actually inside the jar.
Supplies
Stamps: Botanical Silhouettes, Friendship Jar Summer Fillers, Turning a New Leaf (all PTI)
Ink: Chocolate Chip (SU), Old Olive (SU), Tea Dye Duo (PTI)
Paper: Kraft, Ripe Avocado, Rustic Cream (all PTI)
Other: Large Scallop Border Die (PTI), Linen & Canvas Impression Plate, Hollyhock button (CTMH), felt, twine

Thursday, May 10, 2012

PTI Make It Monday #65 Take 2

I still had the scraps from the scraps :) I used on this project sitting out still, so I threw together a quick card today for PTI's Make It Monday Challenge to use scraps to create a patterned background. I pulled a bit more of the yellow and blue this time, and I loved the cupcake so much that I had to make another one. :)
Supplies
Stamps: Baby Button Bits (PTI), Background Basics: Text Style (PTI)
Ink: Buckaroo Blue (SU), Chocolate Chip (SU), Pumpkin Pie (SU)
Paper: Rustic Cream Cardstock (PTI); Monarch and Sunflower Cardstock (MM); First Blush Designer Cardstock Collection (Prima Marketing Inc.); and scraps from Mosaic Memories (Recollections), Garden Party (DCWV), and Chloe's Closet DP (MM)
Other: 1 3/4" Limitless Layers Die Collection (PTI),

Pages with Papertrey April Sketch

It's taken me a month to find time to do this, but I finally finished my page for Leigh's April Pages with Papertrey sketch.  Here's the sketch.
I love these sketches because they take a lot of the guess work out of a scrapbook page.  I had to adapt it a fair amount to make the pictures I wanted to use work.  I just couldn't narrow them down, so I was determined to find a way to make them all work on the page.  It's really a simple page and hardly uses any supplies at all.
This circle border took forever to make.  There is actually a page in Me & My Big Ideas' Boy Specialty Cardstock that had circles on it, but they were spaced out with a white background.  Just cutting a row of them looked funny, so I ended up individually punching out each circle then adhering them on a piece of Scor-tape.  Not sure if it was worth the trouble, but it's done. :)  Oh, and here's a close up of PTI's block alphabet dies...love them and can't wait to get PTI's new script alphabet dies.
Supplies
Paper: Boy Specialty Cardstock (Me & My Big Ideas), Honeydew Cardstock (MM)
Other: Block Alphabet Die Collection (PTI), 1/2" Circle Punch (SU), Scor-tape

PTI Make It Monday #65: Background Patterns From Patterned Paper Scraps & Monday with Melis Challenge

I was actually really excited to see this week's Make It Monday challenge at PTI because I have a terrible time throwing away scraps from papers I really like. I have a huge stash of scraps, and these particular triangle scraps were left over from a banner I made for a baby shower last September. I loved the orange and teal together, and when I looked at them I immediately thought of this adorable picture my sister-in-law took of my sister's youngest daughter. I absolutely love her, and I think this picture captures just how adorable my little niece is.
I cannot claim the layout as my own. I recently looked at Jessica Sprague's blog, and I saw this layout on one of Jessica's online classes. I guess I couldn't get it out of my head because when I started putting this page together I realized it was looking strikingly similar to Jessica's layout.
Here is a close up of the background I pieced from the scraps.
I also created this layout with the Mondays with Melis Challenge #3 from a few weeks ago in mind.  This particular challenge was titled "Shake Up Your Style!", and you had to create a card (obviously I didn't do a card) with the following 4 things:
1. A new to you style -- I have had these Walnut Ink sprays from Tsukineko forever and I have never used them...until today. And now I know why...I'm not very good at the grunge look. :)  I ended up changing my layout and hiding most of what I had sprayed on.
2. A cupcake or something sweet
3. Buttons
4. Background Stamp
My little cupcake from Baby Button Bits (PTI) fills the last three challenge requirements.  I stamped Background Basics: Text Style (PTI) on the cake part of the cupcake.
Here are a couple more detail shots.  I decorated for a football themed party a couple months ago and had a bunch of scraps leftover from some flags I made with paper and dowels.  I saw the scraps in my pile when I was pulling the ones out for this layout and I thought of those flags, so I decided to make itty bitty versions of them with paper and toothpicks.  
 
Supplies
Stamps: Baby Button Bits (PTI), Background Basics: Text Style (PTI)
Ink: Buckaroo Blue (SU), Walnut Stain Distress Ink (Ranger)
Paper: Rustic Cream Cardstock (PTI), Seasons Collection: Fall Brown (Provo Craft), First Blush Designer Cardstock Collection (Prima Marketing Inc.), and scraps from Mosaic Memories (Recollections) and Chloe's Closet DP (MM)
Other: Doily Details Die (PTI), Large Scallop Border Die (PTI), Buttercream & Lemondrop Twine (The Twinery), Juniper Brads (CTMH), Cocoa Marker (CTMH), Terra Cotta Walnut Ink (Tsukineko), Autumn Buttons (CTMH), Scallop Square Punch (SU), toothpicks