Wednesday, August 31, 2022

Trick or Treat

Good morning!  I have another Halloween card to share with you today.  And though simple, it's a favorite of mine.

I started out to make a shaker card, but after cutting Pretty Pink Posh's Cauldron Shaker Die out of some black glitter cardstock, I thought it looked pretty great on it's own and switched gears.  

I just love bold, simple designs.  They make me smile!  I used the Circles Stencil on my background.  Isn't this color pretty? Then I used the cauldron as the center of both the card and the sentiment.  Can you see how the cardstock sparkles? I don't know why that little detail makes me so happy, but it sure does! 

The sentiment was made using the older Trick or Treat Script Dies.  The scale was just right for this card.  Happy sigh.

I hope you are having a happy day wherever you are.  Thank you for spending some of your time to visit. :)

Friday, August 26, 2022

Concord & 9th Feature Friday + GIVEAWAY

Good morning!  I cannot believe that August has flown by so quickly!  It has been an absolute joy to create with Concord and 9th this month!  Today is my final Feature Friday post, but the fun news is that Concord and 9th has been kind enough to offer a $25 gift certificate to GIVEAWAY to my readers.  Just click on over to my Instagram account to get entered in to win.  

Today we are featuring two fabulous bundles: Autumn Hues and Freshly Picked.  They are easy and fun to create with and made me all excited for fall.  My cards started with a color palette that I absolutely adore: MidnightStardustSorbetPeacock, and Wheat.

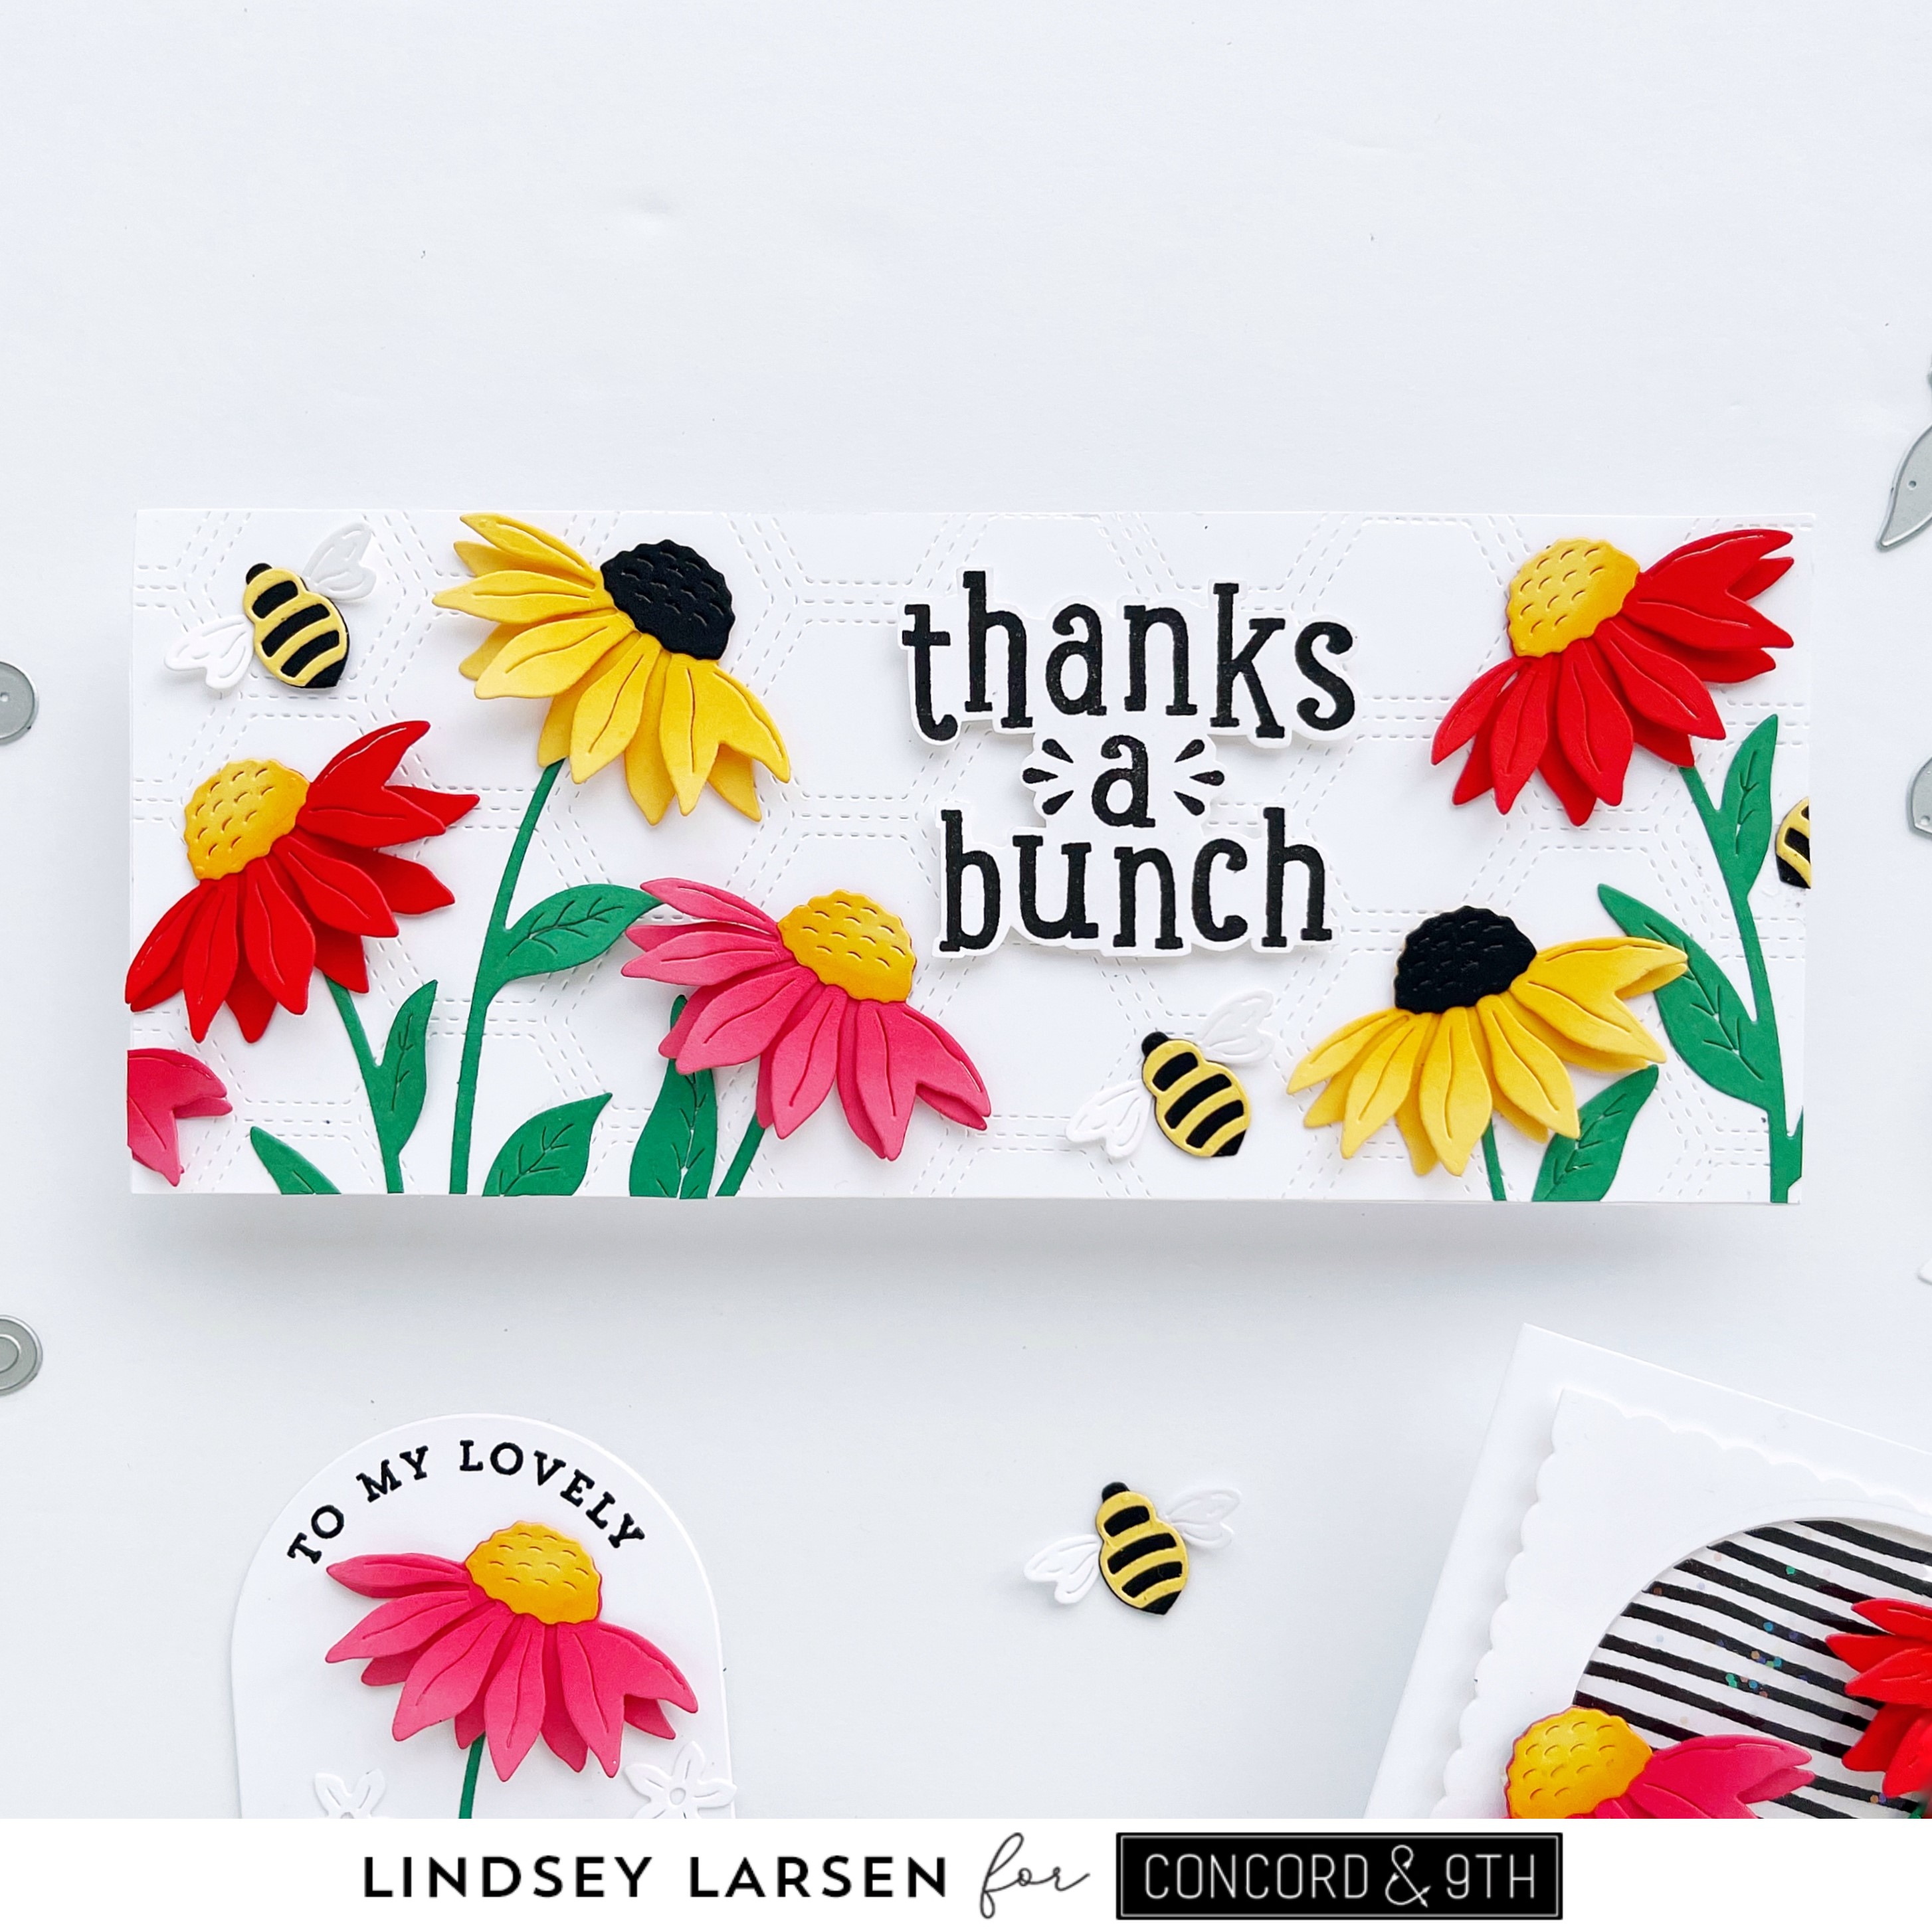
I pulled out all of the larger stitched leaf dies and cut each leaf with one color of cardstock and then began arranging them on my background.  

As it happens so often, once I finished the background, I loved it so much that I did not want to cover it up. ;) So I hemmed and hawed with how to finish my card.

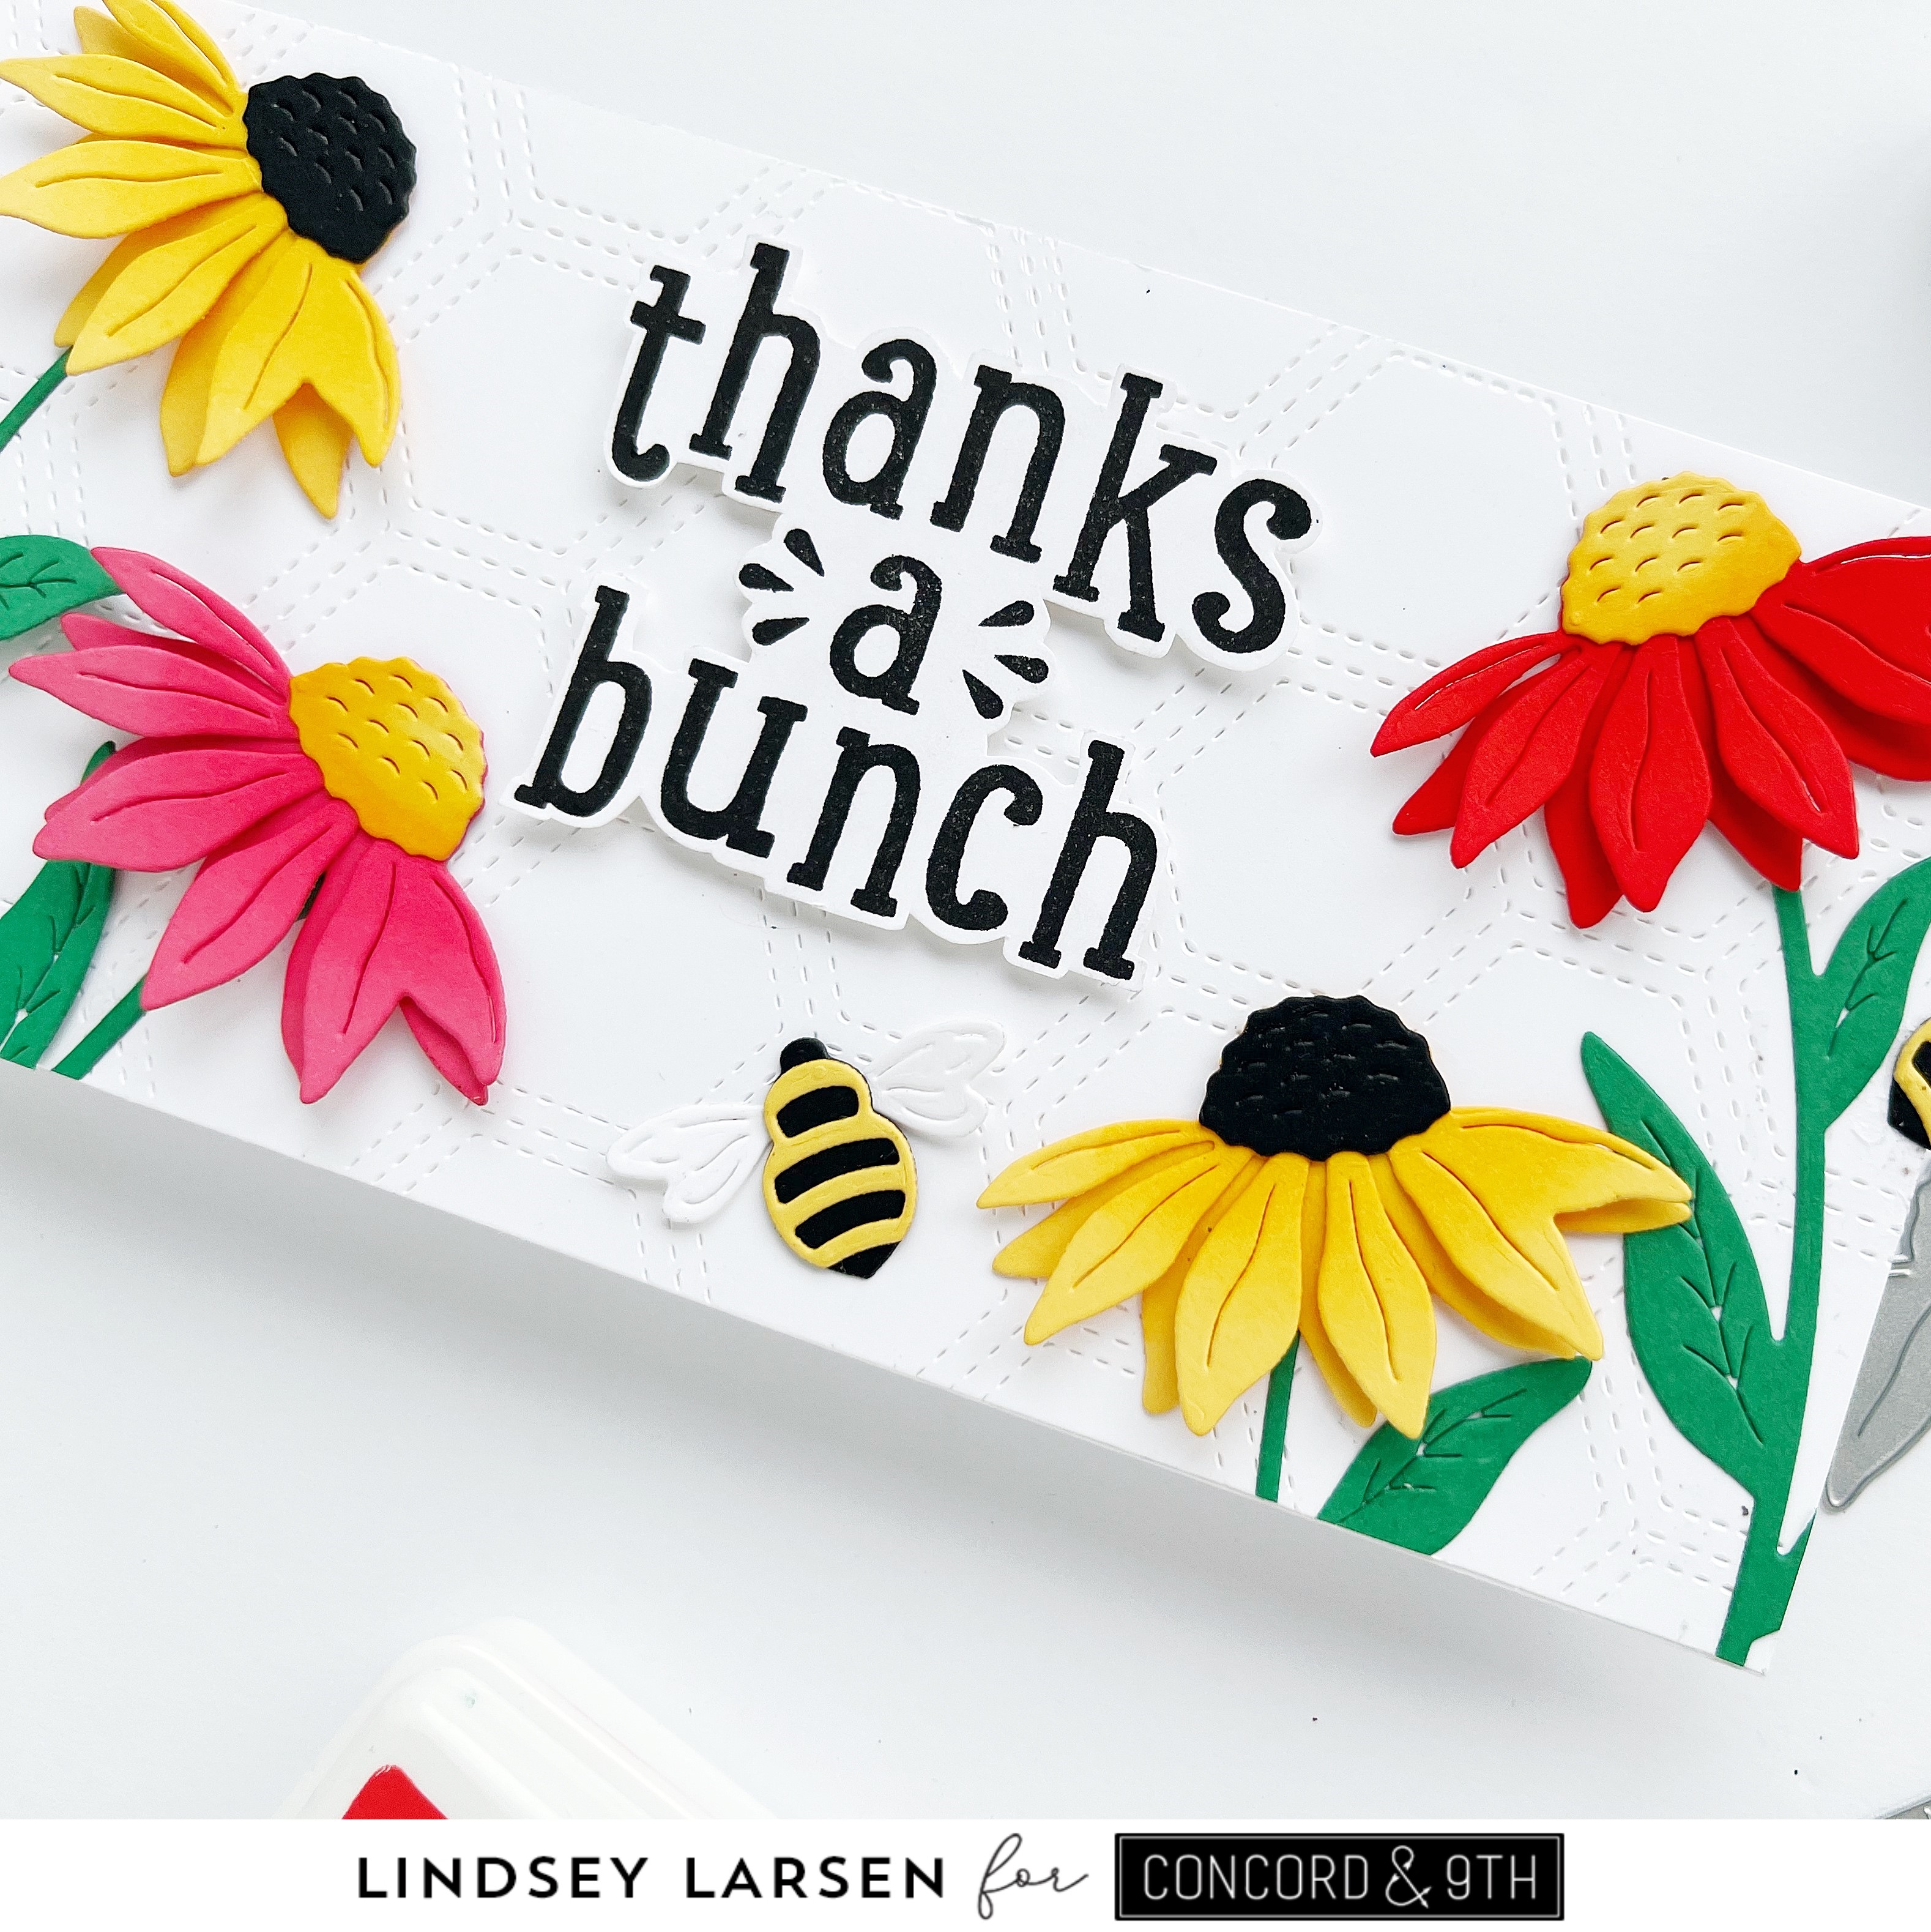
Included in the Autumn Hues Dies is a great banner that coordinates with several sentiments in the Autumn Hues Stamp Set.  With a little snip on one end, I turned the banner into a tag and then punched a hole so I could thread it through some twine.  

I used two sentiments in the Autumn Hues Stamp Set, selectively inking just "thankful" on one of them and embossed them in white on Midnight and Wheat cardstock.  Because I like my bows to hang just so, I added a tiny bit of glue behind the bow tails in a few spots, so they lay exactly how I put them.  

I also think it is worth mentioning that the Autumn Hues Bundle also includes the fabulous Autumn Hues Turnabout Stencil Pack, making creating leaf backgrounds and a circle leaf wreath a cinch.  I didn't use it on this card, but you'll definitely see it in the future. 

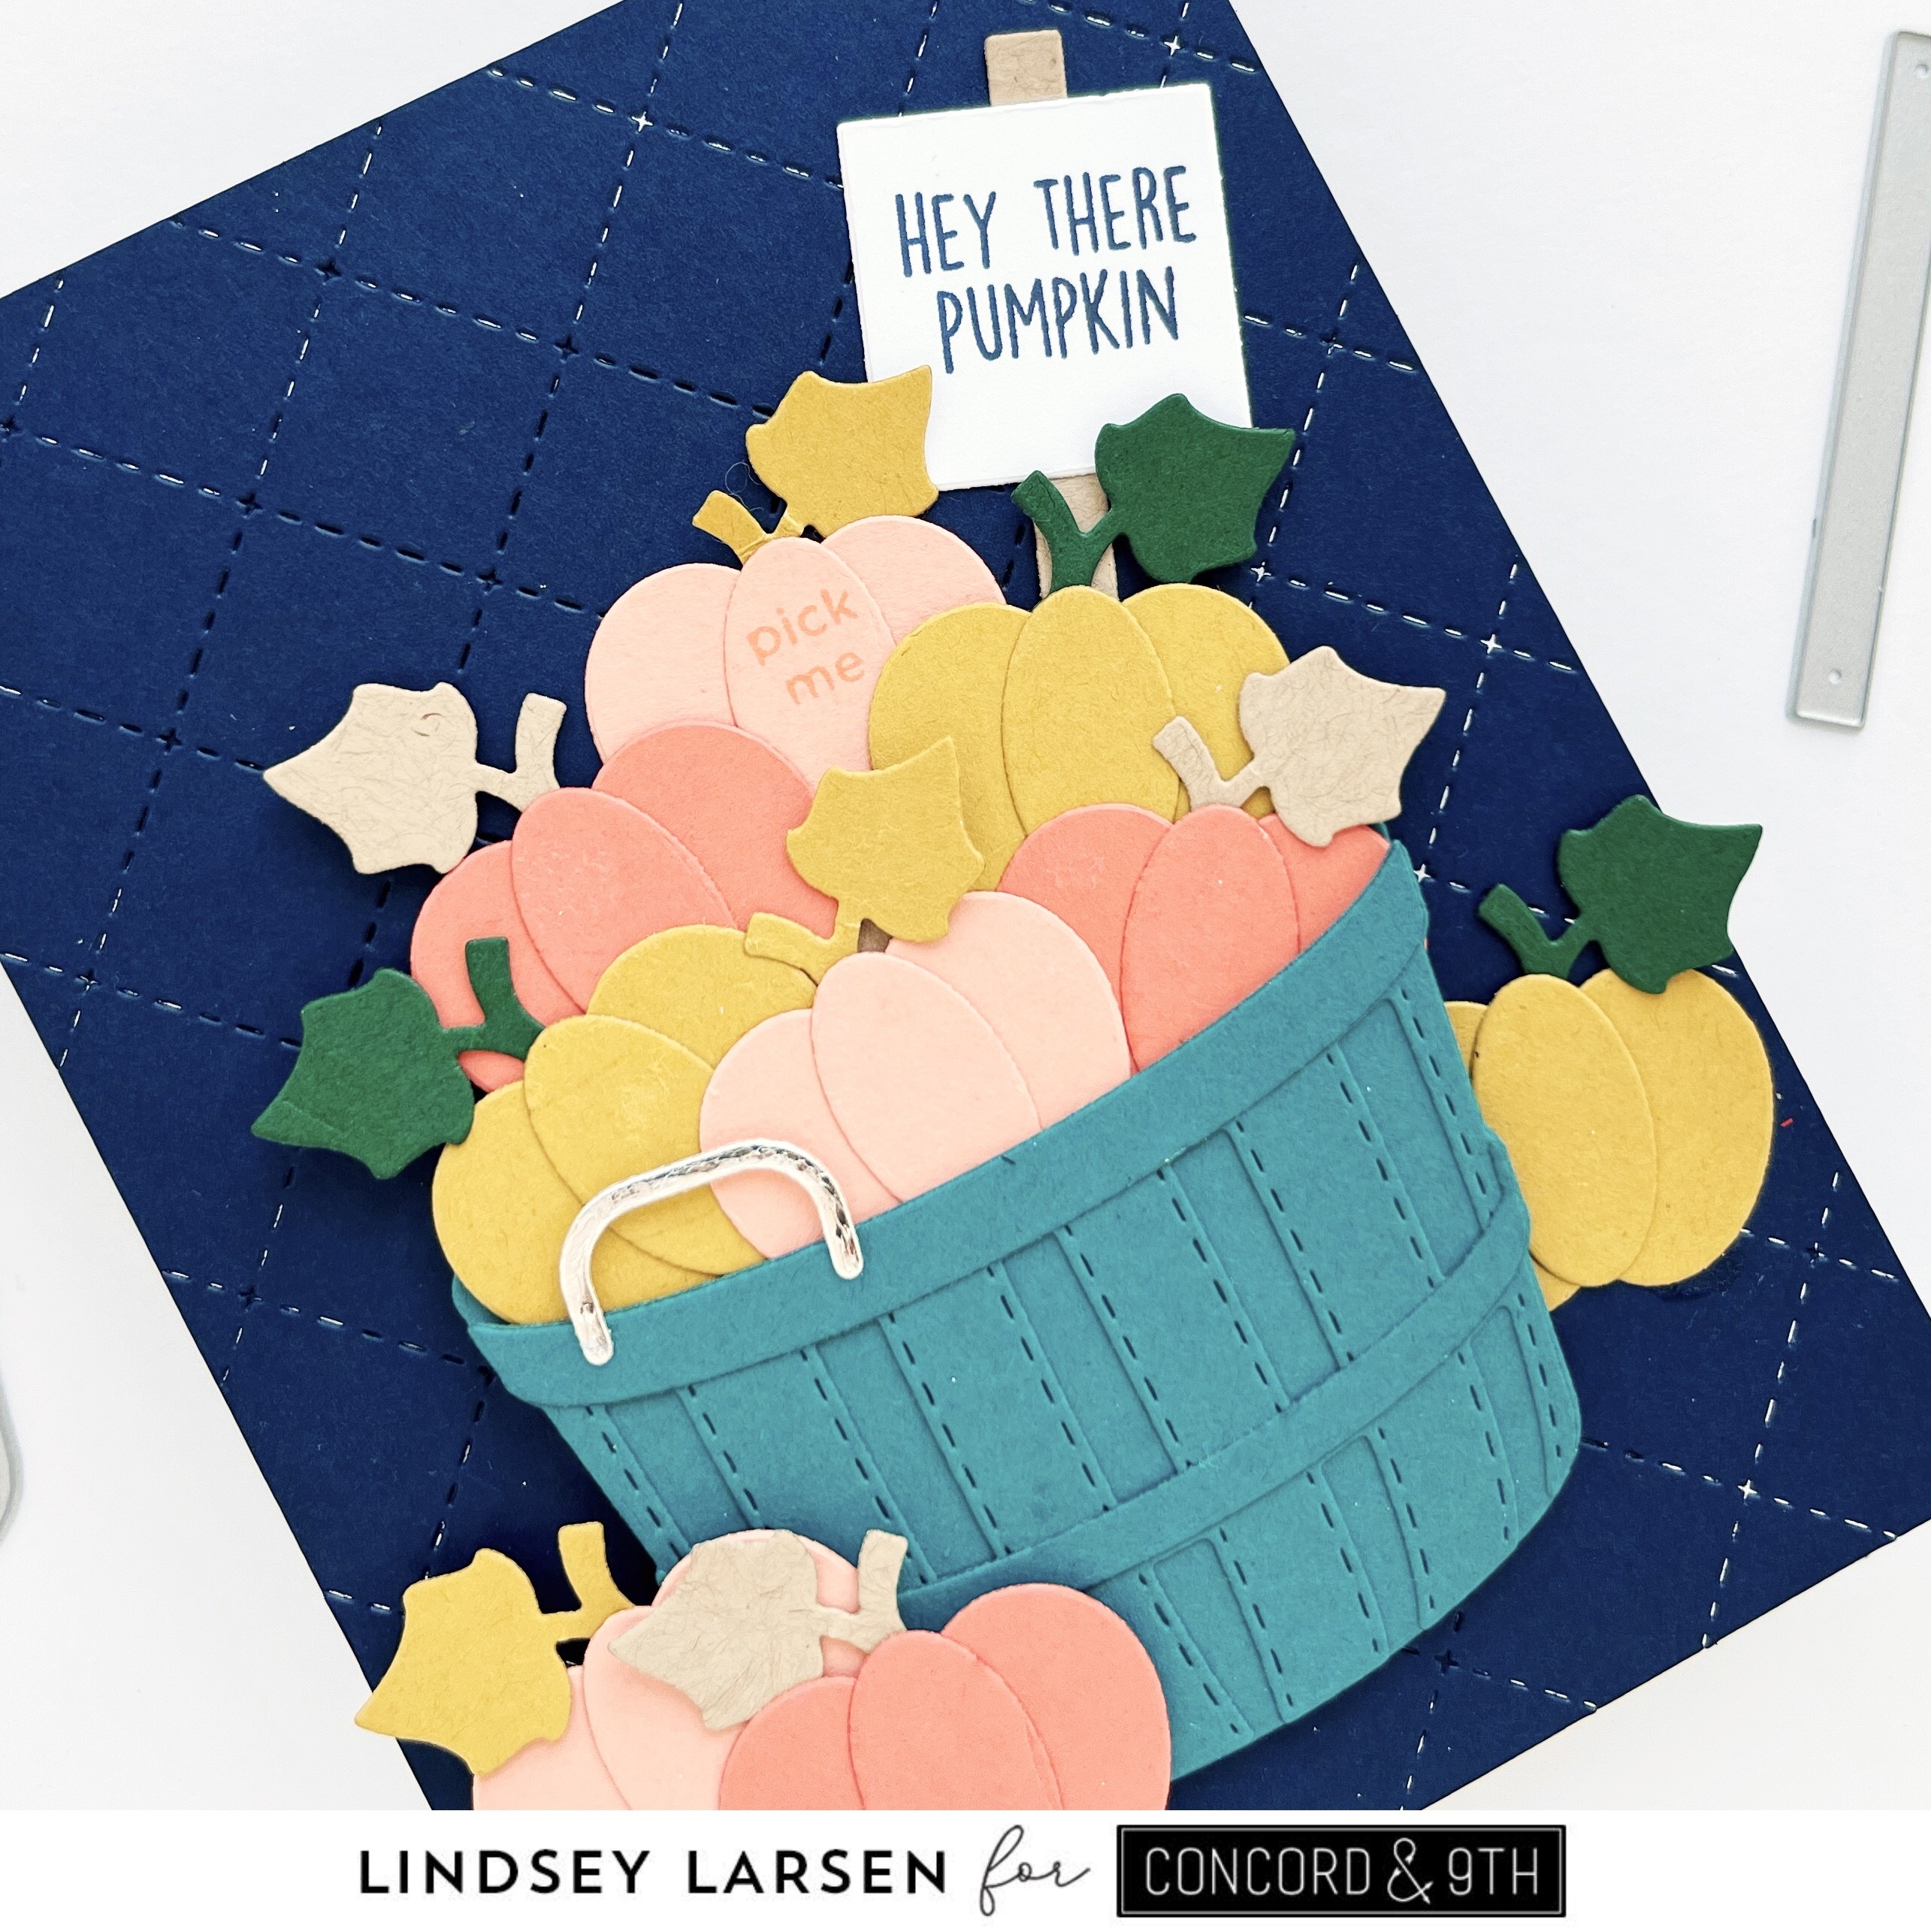
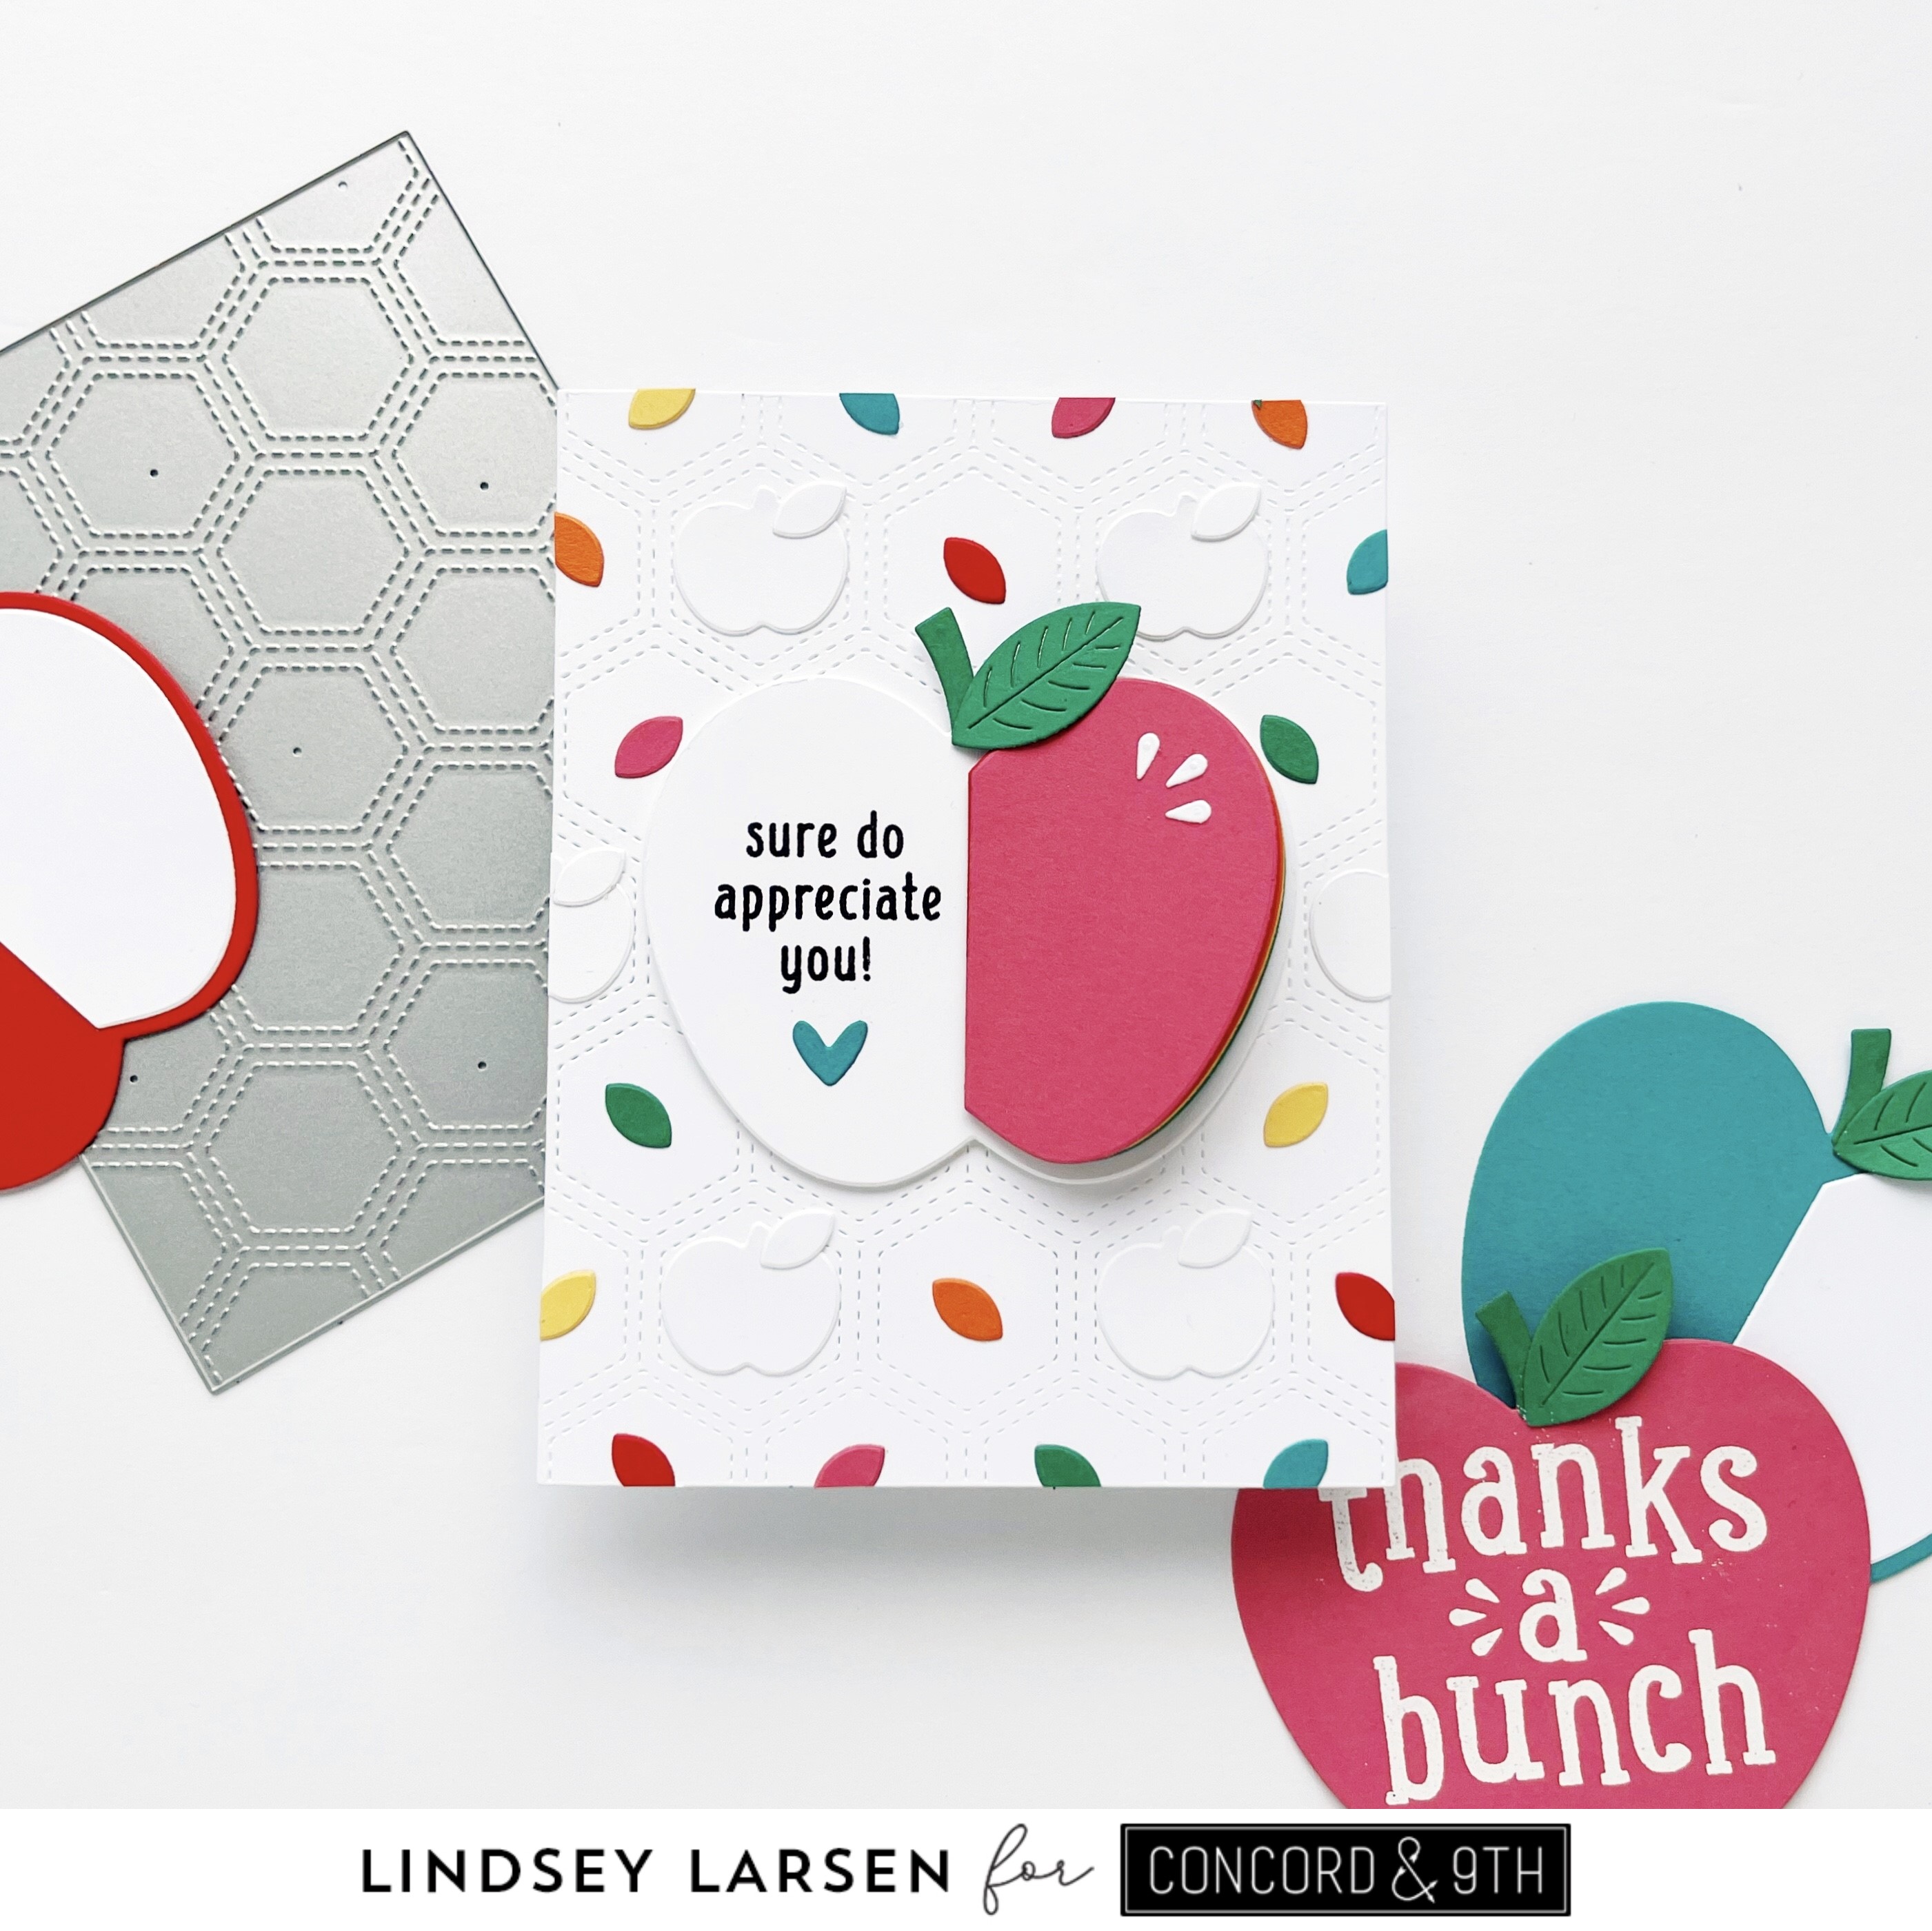
Okay, my next card uses the Freshly Picked Bundle.  This bundle is loads of fun and includes lots of options to fill the cute basket.  Plus, it has an interactive element that is brilliantly designed.  I used the same color palette as my previous card, but I expanded it by adding Grapefruit and Evergreen.

I looked through the Freshly Picked Dies and chose to fill my basket with pumpkins (which are actually the apple die cut with an oval die added to the center).  They include stems facing both directions, which I always appreciate.

After die cutting a whole bunch of pumpkins, I started on my Peacock colored basket.  The basket is made of five dies plus two handle options, but I promise they are cinch to put together.  The solid and stitched front layers line up easily and they get adhered to the back of the basket.  They even include gluing guides for you, which are especially helpful if you want to include the interactive element.  You can stop with just these three pieces (it looks cute just as is), or you can add the two basket bands and pick your handles.  I chose the short handle and cut it out of a metallic silver cardstock.  

Next, I added the sign and a sentiment from the Freshly Picked Stamp Set stamped with Midnight Ink.  They have several sentiments in this set that coordinate with the different filler options.  

Now here comes the really fun part.  Do you see that little pumpkin in the middle with "pick me" stamped on it?  When you pull it up, it reveals a second sentiment.  

Isn't that adorable?  The track they created to help this slide smoothly is absolutely brilliant and they even have gluing guides embossed into the die cut itself as I mentioned before.  The whole process is very user friendly. 

Then it all tucks right back in.  This makes me smile so much!  Oh, one last thing I forgot to mention...the background!  I chose to use Midnight  as a striking contrast. (I know what you are thinking...who am I am? And where is the typical white background? Haha.)  :) And I used the beautiful Quilted Card Front Die, a previously released favorite of mine.  

This was a long post!  Thanks for sticking with me!  Now, make sure you head on over to my Instagram account, so you can get entered in to with the Concord & 9th gift certificate.  Each designer has one up for grabs, so you have several chances to win.  :) 

Thursday, August 25, 2022

Candy Treats

Hello, friends!  I have a pretty sweet Halloween card to share with you today, but it would work great for tons of other occasions.  I'm thinking birthdays, valentines, even Christmas.  

I'm a huge fan of the new Candy Treats Dies from Pretty Pink Posh.  A couple months ago, I saw a picture on Pinterest with a pink door and a pumpkin wreath in graduated colors.  (You can see it here.)  It completely inspired this card.  I just used candy instead of pumpkins. :) 

I die cut the Candy Treats Dies four times using various shades of pink and orange.  I pieced the candies and treats together, then arranged them on my card in a wreath/frame shape, starting with the largest shapes and filling in with the smaller ones.  I popped each candy up with foam for some added dimension.  Then I added some Pearl White Jewels, which are fun because they reflect the colors on the card. 

Next I triple cut the Boo Script Die and placed it in the center of my wreath with an embossed sentiment from the Celebration Scripts Stamp Set below.  I felt like the card was still missing something, so I added liquid glitter details to some of the candies and called it a day.


Do you see how easily you could switch out colors and sentiments to use this same design for all sorts of occasions?  I just think these candies are so fun!  I hope that you have a wonderful week, friends.  Thanks for visiting!

Tuesday, August 23, 2022

BOO!

Hi!  The air has turned cooler here (I know it is only temporary, but I'll gladly take it), which put me in the mood to start sharing more of my fall and Halloween projects.  A month  ago I made several cards with the goal of using different fall color schemes for each one, some traditional some not so much.  This one falls in the not so much category.  

I first dry embossed the Layered Ghosts Stencils.  It's tricky to see in the photos but adds some fun dimension. Then I used all three stencils to ink on the ghosts and stars in Hero Arts Unicorn White and Black Soot Distress Ink.

Next, I built my sentiment.  To create "BOO", I used the Balloon Alphabet Stamp Set and coordinating dies.  I just didn't ink up the little tail at the bottom of the letters, and then fussy cut that little bit off the die cut. 

The embossed sentiment is from the new Halloween Envelopes Stamp Set.  I thought it was a pretty perfect pairing with these ghosts.  The final touch was adding a few clay stars that are part of the Spooky Fun Clay Confetti mix.

Well, that's all for me today.  Thanks so much for stopping by!

Saturday, August 20, 2022

Ghost Friends

Hello, friends!  I shared this card over on the Pretty Pink Posh Blog last week, but I loved it so much that I wanted to share it here, too.

I used the new Ghost Friends stamp set and dies, the Wonky Stitched Rectangle Dies (LOVE them!) from August's new release as well as an old favorite of mine.   

You can check out all the details/supplies as well as read how I put it together on the Pretty Pink Posh Blog HERE

Friday, August 19, 2022

Concord & 9th Feature Friday: Honeycomb & Apples

Good morning!  Today’s Feature Friday for Concord and 9th is all about apples and honeycomb.  We are featuring the Apple Orchard Bundle and the Honeycomb Patterns Bundle, and I think you'll be wanting to add these to your craft collection. ;)

I'll start with the Honeycomb Patterns Bundle.  These hexagons are so fun to work with!  The Honeycomb Quilt Top Dies makes lining up the individual hexagons a breeze.    

I had so many ideas, but decided to go with an ombre pattern on this one.  I love the color blue and Concord and 9th has so many gorgeous blues.  From the top down I used MidnightPeacockOceanside, and Aqua Sky.

This card is made entirely with dies and because the Honeycomb Quilt Top Dies include two rows of hexagons, you can cut six at a time.  This speeds up the cutting process a lot!  I used mostly the solid hexagons, but the set also includes a few with cut out shapes inside the hexagon as well as the "hi" hexagon that I used on my card. 

PS If you want to see some other ways to use the  Honeycomb Patterns Bundle, you can check out this post that I shared last week.

Next up is the super cute Apple Orchard Bundle.  I absolutely LOVE the size of the apple in this die.  It is large enough to stand alone as a shaped card or tag and just the right size to fit on a card front.  it's perfect.  
Starting with the Honeycomb Quilt Top Die as my base, I built a pattern using the small apples and leaves in the Apple Orchard Dies. With school just starting, I had crayons on my mind, so I chose a rainbow of colors - HoneysucklePoppy, MarmaladeButtercupClover, and Oceanside.
The Apple Orchard Dies include a whole apple as well as an apple slice.  Though it looks cute with just one slice, I thought why not make a rainbow of slices?  It's a fun little surprise when you get a peek at the side of the card.  
Again I used HoneysucklePoppyMarmaladeButtercupClover, and Oceanside cardstock.
The sentiment is one of several included in the Apple Orchard Turnabout Stamp Set.  
You can see another of the larger sentiments included in the set on the big pink apple in the photo below. 
Thanks so much for joining me today.  You'll definitely want to also check out the Concord and 9th Blog because the other guest designers have created some amazing projects to share with you today.  They definitely wowed me!

Friday, August 12, 2022

Concord & 9th Feature Friday

Surprise!  Surprise!  I'm delighted to share that I am guest designing for Concord and 9th this month.  It's a true joy to work with them.  August's release is packed full of the things that I love.  It's going to be a good month! :)  For today's Feature Friday we are featuring the darling new Friendly Florals Bundle.  When I first heard the name I knew I was going to love this set, and I most definitely do!

These stamps and dies were so much fun to create with, and I have three projects to share today, so let's get started!  First up, the birthday card.  
I started by die cutting the two flower layers in Honeysuckle and Poppy and the centers in Buttercup cardstock.  Next, I used Concord and 9th's new small blending brushes (they are fabulous by the way) to add some shading.  I used the coordinating Honeysuckle, Poppy, and Buttercup inks on each piece plus a little Marmalade ink on the bottom edges of the flower cones. Finally, I die cut the two flowers stems in Clover cardstock.  
One thing worth noting is that the stems bend in opposite directions, which is awesome and allows you to orient the flowers in whatever direction you would like.  After adhering the layers, I fluffed up the petals, and the dimension is so pretty!
I wanted to frame out these beautiful flowers, so I die cut the scalloped panel from the Triple Step Floral Frame Dies, and then used the oval in Friendly Florals Dies to cut out the center. I stamped the wavy stripes from the Pick a Pattern Stamp Set onto the oval and adhered it directly to my card base.  I added some Lawn Fawn chunky glitter and used dimensional foam to pop up my frame.
I cut the large "friend" sentiment from the Friendly Florals Dies in black and layered it atop the white shadow.  Then I placed it on the large dimensional banner also included in the set.  I added a second sentiment (happy birthday from the Delicate Blossoms Stamp Set) that I embossed on Honeysuckle cardstock.  And then I just sat back and smiled from ear to ear because I love these flowers so much!
Next up is a little tag I pieced together with some leftover bits and pieces. While creating my last card, I wasn't sure which colors I wanted where, so I ended up with extra flowers, sentiments, and banners. 
I used a leftover Honeysuckle flower and added a few of the tiny blossoms in the Friendly Florals Dies.  
The Friendly Florals Stamp Set has several sentiments that curve beautifully along the oval die in the set, so I stamped one and then added the friend banner at the bottom.  
I kind of love the symbolism of this big, beautiful flower standing out above the rest when paired with this sentiment.  I feel like it emphasizes just how special this friend is.  
My final project is extra special because it reminds me of my mom.  I love coneflowers.  LOVE them!  One of the reasons for that is because my mom has had purple coneflowers and Black Eyed Susans growing in her yard for years and years.  I have some growing in my yard now, too, and I smile every time I see them.  
To create this card I cut and blended ink on more flowers in HoneysucklePoppy, and Buttercup.  I was going for a more playful and natural arrangement on this one...like they would grow in your garden. :) A slimline seemed the way to go, so I could fit as many flowers as possible.
For a bit of added interest, I arranged the flowers (leaving a space for the sentiment) on top of a card base embossed with the new Honeycomb Quilt Top Dies.  I did a little partial die cutting and embossed twice in order to have the cover plate fit the entire length of the card. 
I thought this sentiment was a perfect pairing with this bunch of flowers.  It is from the new Apple Orchard Turnabout Stamp Set, and I think it brings an instant smile.  I did a little fussy cutting on this one to trim it out.  
The final addition was a few of the bees from Friendly Florals.  This bundle has lots of fun extras.
Thanks so much for stopping by today!   It's fun to be able to share something that brings me so much joy with others.