Wednesday, December 28, 2022

Pretty Pink Posh - The Fun Continues...

Hello!  Today is a happy day.  I am excited to share that I will be continuing on with the Pretty Pink Posh design team.  I am ever so grateful for this opportunity and feel so blessed to be working alongside such incredible people.  I certainly feel like a little fish in a big pond.  


Paulina is one of the most generous people I know, so of course she has a giveaway going along with the happy announcement.  You'll definitely want to visit the Pretty Pink Posh Blog, so you can enter to win.  I thought I would make a card to go along with the announcement.  Being on this team certainly feels like a warm hug and brings a lot of joy to me just like flowers do, so that inspired my card.  

I pulled out the beautiful Floral Corners stamp set and coordinating dies and colored them with zig markers.  I often shy from coloring images, knowing it is not my strong suit, but I love this set.  I colored three of the floral corners (there are two different floral sprays), and arranged them so my basket would be overflowing.  

Speaking of the basket, it is from the Fall Basket Dies, another favorite of mine.  I distressed the basket by swiping the ink pads directly to the die cuts using Concord and 9th's Dove ink and Breeze ink from The Stamp Market.  Then I added the Hugs Script die for the sentiment.
I blended Breeze ink onto my cardbase and stacked two Pretty Petals Background die cuts on top.  I wanted something to ground my basket, so I cut a strip of white paper and added a scallop from the Stacked Edges 3 Dies.  The final touch was a sprinkling of Marshmallow pearls.
Thank you so much for visiting today and sharing in my good news.  I know a few of you visit regularly and it means so much to me.  You truly are appreciated!  Don't forget to head over to the Pretty Pink Posh Blog, so you can enter to win that giveaway.  I would love for the winner to be one of you!  Have a wonderful week, dear friends!

Wednesday, December 14, 2022

Mitten Tag

Hello, friends! One of the things I get most excited about for holiday crafting is making tags.  Though small in scale, they can pack a big punch and make a beautiful addition to a gift or a plate of goodies.  

Pretty Pink Posh's new Mitten Shaker Dies are perfect for a large shaped tag and pair beautifully with the Winter Foliage dies.  I think they are a match made in heaven!  I decided to use a more earthy color palette with a soft brick red, pine green, muted grey, and white...and I kind of love it. 

Because I chose not to have use the shaker element, I simple traced the outline of the Mitten Shaker on brick red paper and trimmed it out.  I adhered the white mitten outline on top, but I wanted to make sure the back of my tag looked nice and neat, too, so I die cut the mitten outline in brick red as well and adhered it to the back.  (Note: Before adhering it, I punched a little hole, so that I could thread the twine through.)   
The fun part was dressing up the front of the tag.  I simply adore the Winter Foliage dies and the variety offered.  These dies are hands down one of my most favorite dies ever, so I layered several of the different leaves and pines along with the poinsettia.  

A little tip: The pine sprigs are pretty delicate, so adding an extra piece of cardstock to the shim helped them cut cleaner.
I had so much fun creating this tag, and I have plans to recreate it in all sorts of color palettes.  These dies make beautiful tags quick, easy, and totally doable this season.  I hope you'll give them a try! 

Friday, November 18, 2022

Layered Pine Tree Card

Hello!  Today's card is perfect for mass producing or those last minute cards that we all seem to need as the holidays draw nearer.  (Please tell me I'm not the only one scrounging for cards at the last minute!)  But just because time is limited doesn't mean the card can't still be beautiful, right?  And if you know me, these clean and simple cards are really what makes my heart happy anyway, so let's get started.

This card comes together in a snap!  Start by blending on your background with the beautiful Layered Foliage Winter Stencils.  I used all three layers here, but by using just a single ink color, I made the process even quicker.  
For a simple but impactful focal point, I cut the largest tree in the Pine Tree Dies (LOVE them!) four times in varying shades of coral.  I scored down the middle of each die and layered them for an ombre effect.  I adhered just down the center line, so I could fluff them up at varying heights.  This allows for some awesome dimension and ups the interest factor.
I finished the card off by embossing a sentiment from the new Holiday Sentiments stamp set.  This set is so useful!  With so many options, it's easy to find the perfect sentiment for your project.
And there you have it!  I'm hoping you find yourself with all the holiday crafting time you need ;) but just in case, I hope this simple but still special Christmas card encourages you that you can totally do this!  Squeeze in just a smidgen more of time and send that extra card to someone who needs it! 

Tuesday, November 1, 2022

Poinsettia Tag

Good morning!   I thought I would switch things up today and make a tag.  Tis' the season, right? This quick and easy Christmas tag uses the fabulous Winter Foliage dies by Pretty Pink Posh.  I know, I know.  I can't stop using them. 

For my tag base, I pulled out my long time favorite tag from the Birthday Circles Dies.  I cut it in white, and then backed it with a deep purple. 

For the focal point, I cut the Winter Foliage dies in silver and white.  You could always create the flower in just a single color, but I love mixing colors and even patterns in the layers.  To create my poinsettia, I used the largest flower base in silver and white with a white smaller flower on top.  My favorite way to make the flower look full and a little more organic is to just slightly offset each layer.  Each flower seems to have a sweet spot for layering. 

I used the tiniest flower and the triple berry die cut in silver cardstock for the center.  I cut both sizes of leaves in teal and then tucked in a couple berry sprigs.  Don't you just love the stitching detail on each of the layers?

Thanks so much for joining me today!  I am having so much fun creating with this new release, but making this tag has me missing Tracey McNeely's 25 Days of Christmas Tags.  I sure loved that!  But at least I always think of her when I make a tag now, which definitely brings a smile, so that's still a win. :) 

Thursday, October 20, 2022

Merry & Bright

Good morning!  I just wanted to quickly pop in and give you a peek of a card I shared on the Pretty Pink Posh blog yesterday. It uses those amazing Winter Foliage Dies again.  I’m quite fond of this one.  You know me and simplicity. ;) You can check out my post HERE. And it happens to be part of another day of hopping, so by commenting over there you will have another chance to win a gift certificate.  Just sayin’. :)

Monday, October 17, 2022

Pretty Pink Posh October Blog Hop + GIVEAWAY

Good morning!  Welcome to Day 1 of Pretty Pink Posh's October Release Blog Hop!  You should have arrived from the amazing Tammy Stark.  

Alright you guys...I am super excited to share this card with you today.  I've been waiting for weeks! (And my family can tell you how patient I am when I want to share something I'm really excited about...just ask my sister who I have already begged multiple times to let me give her her birthday present early because I just don't think I can wait until the end of the month.) 

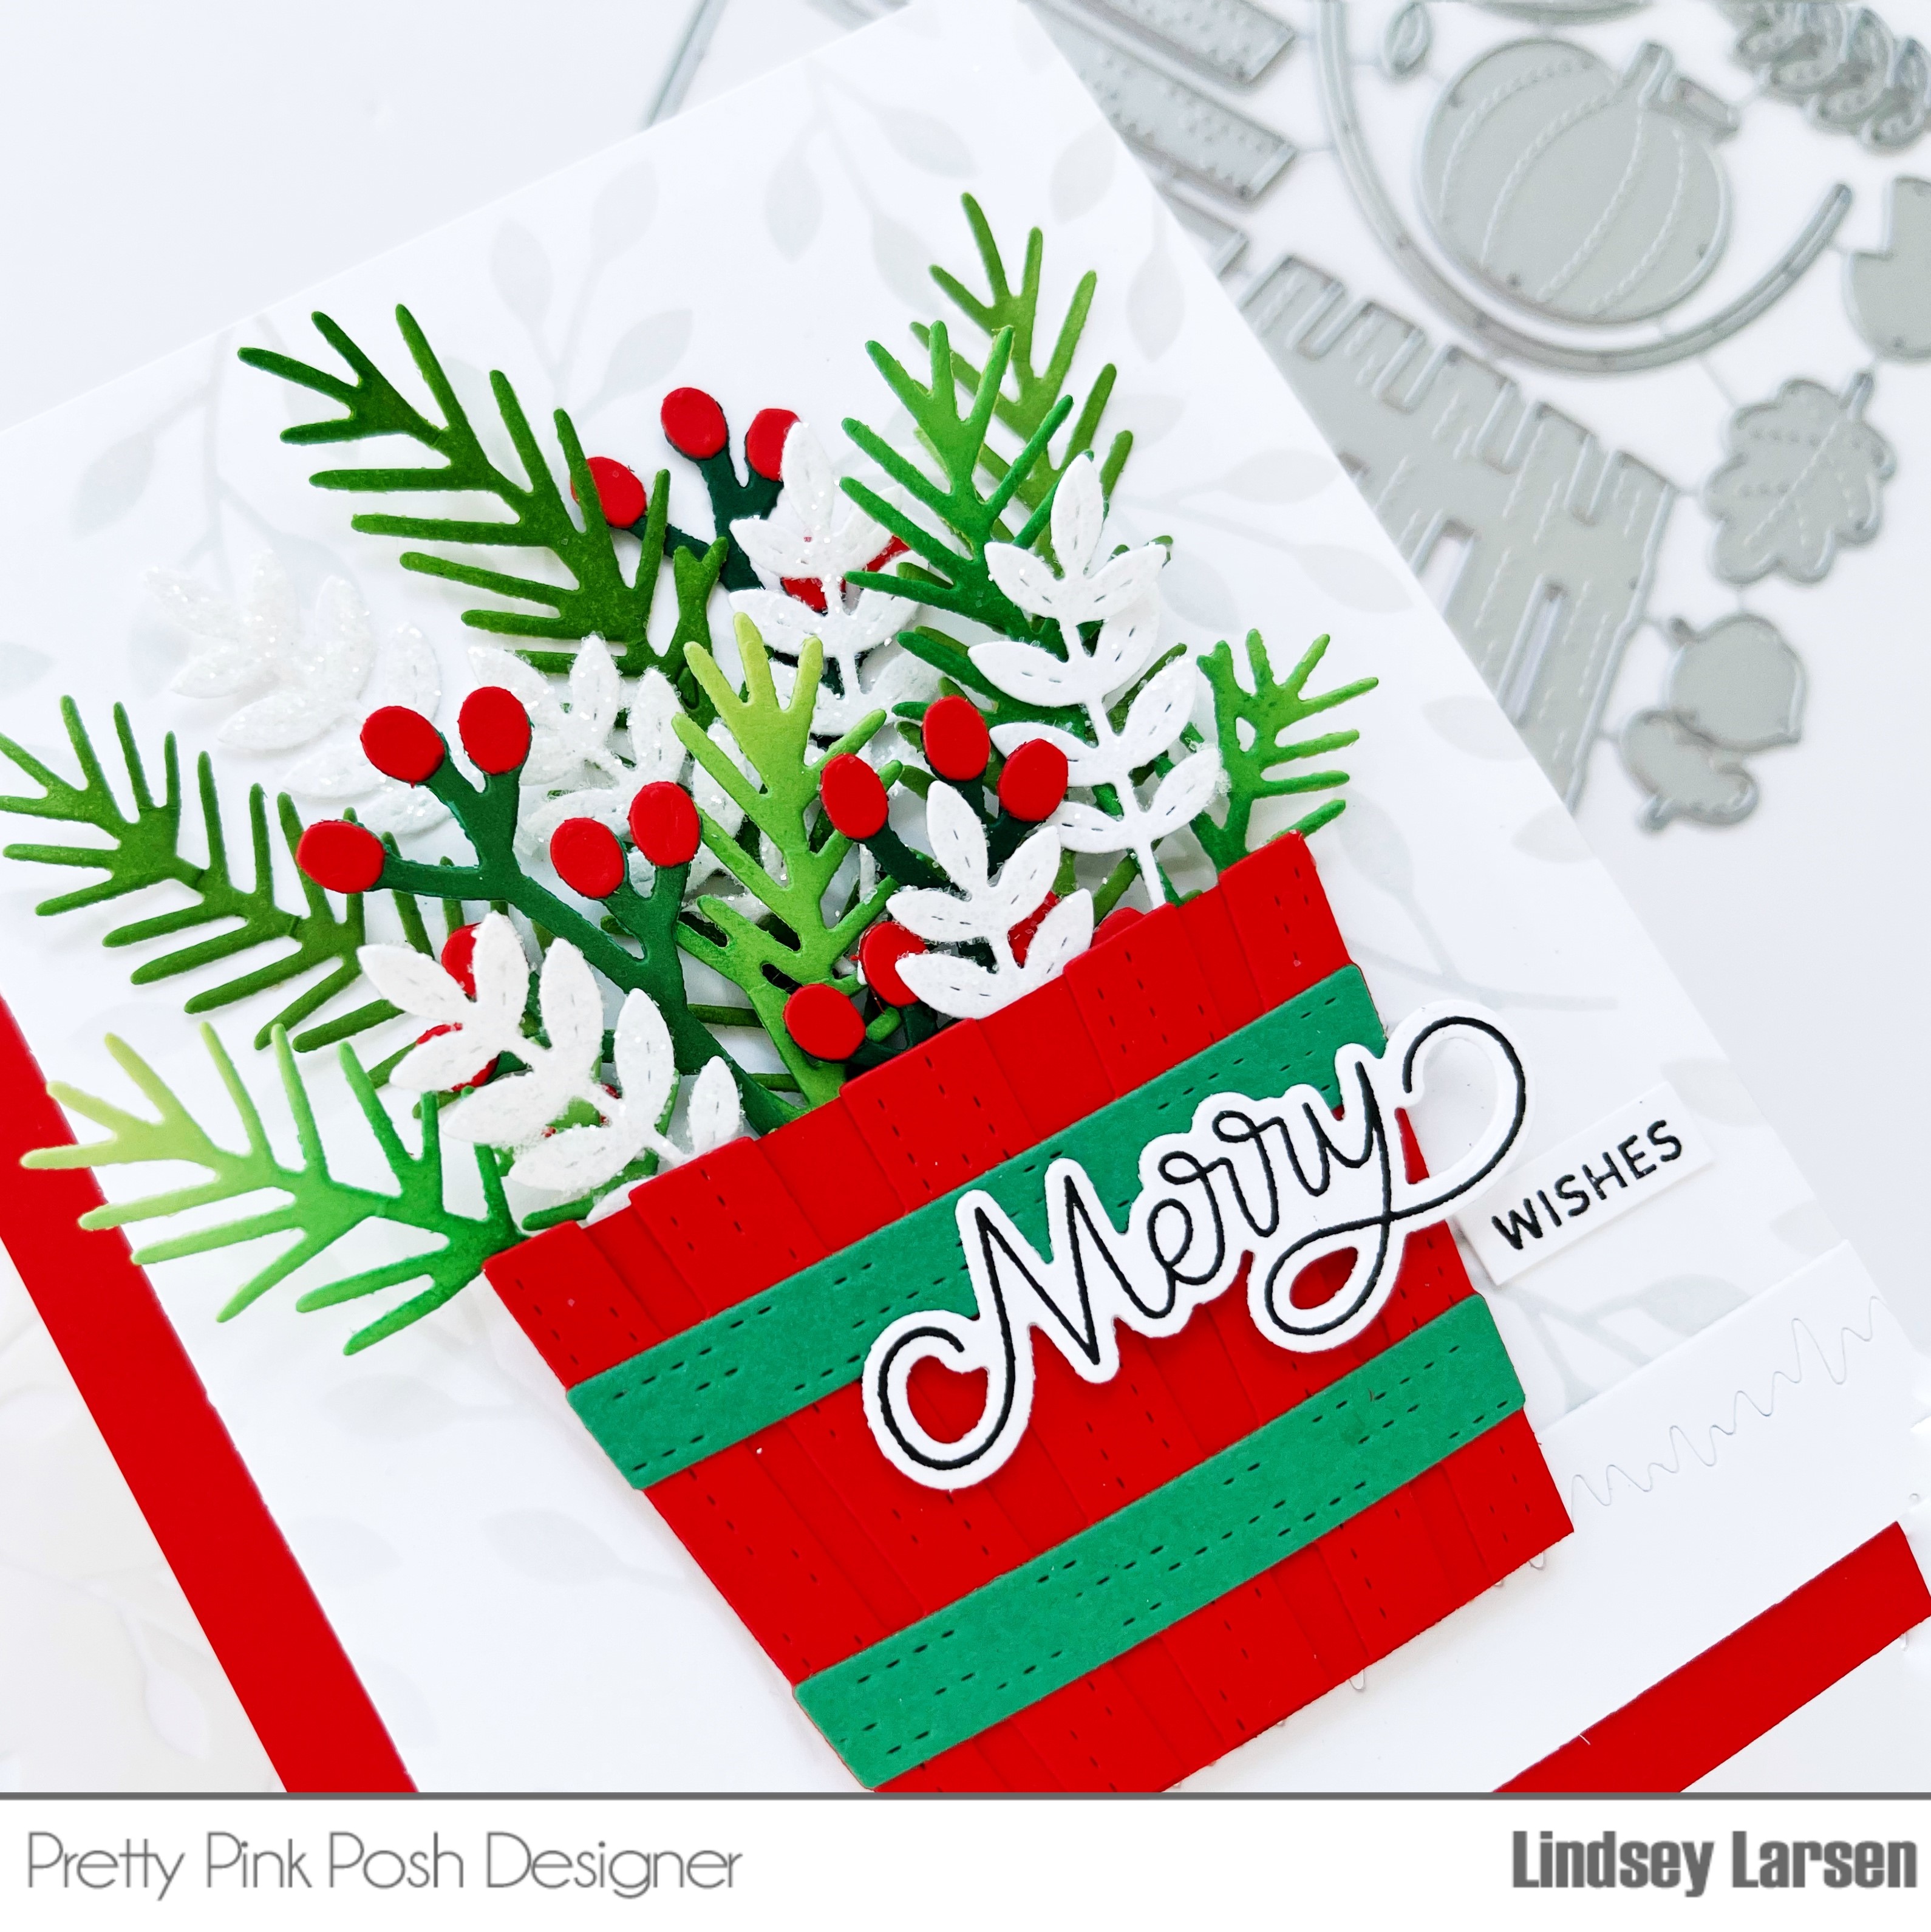
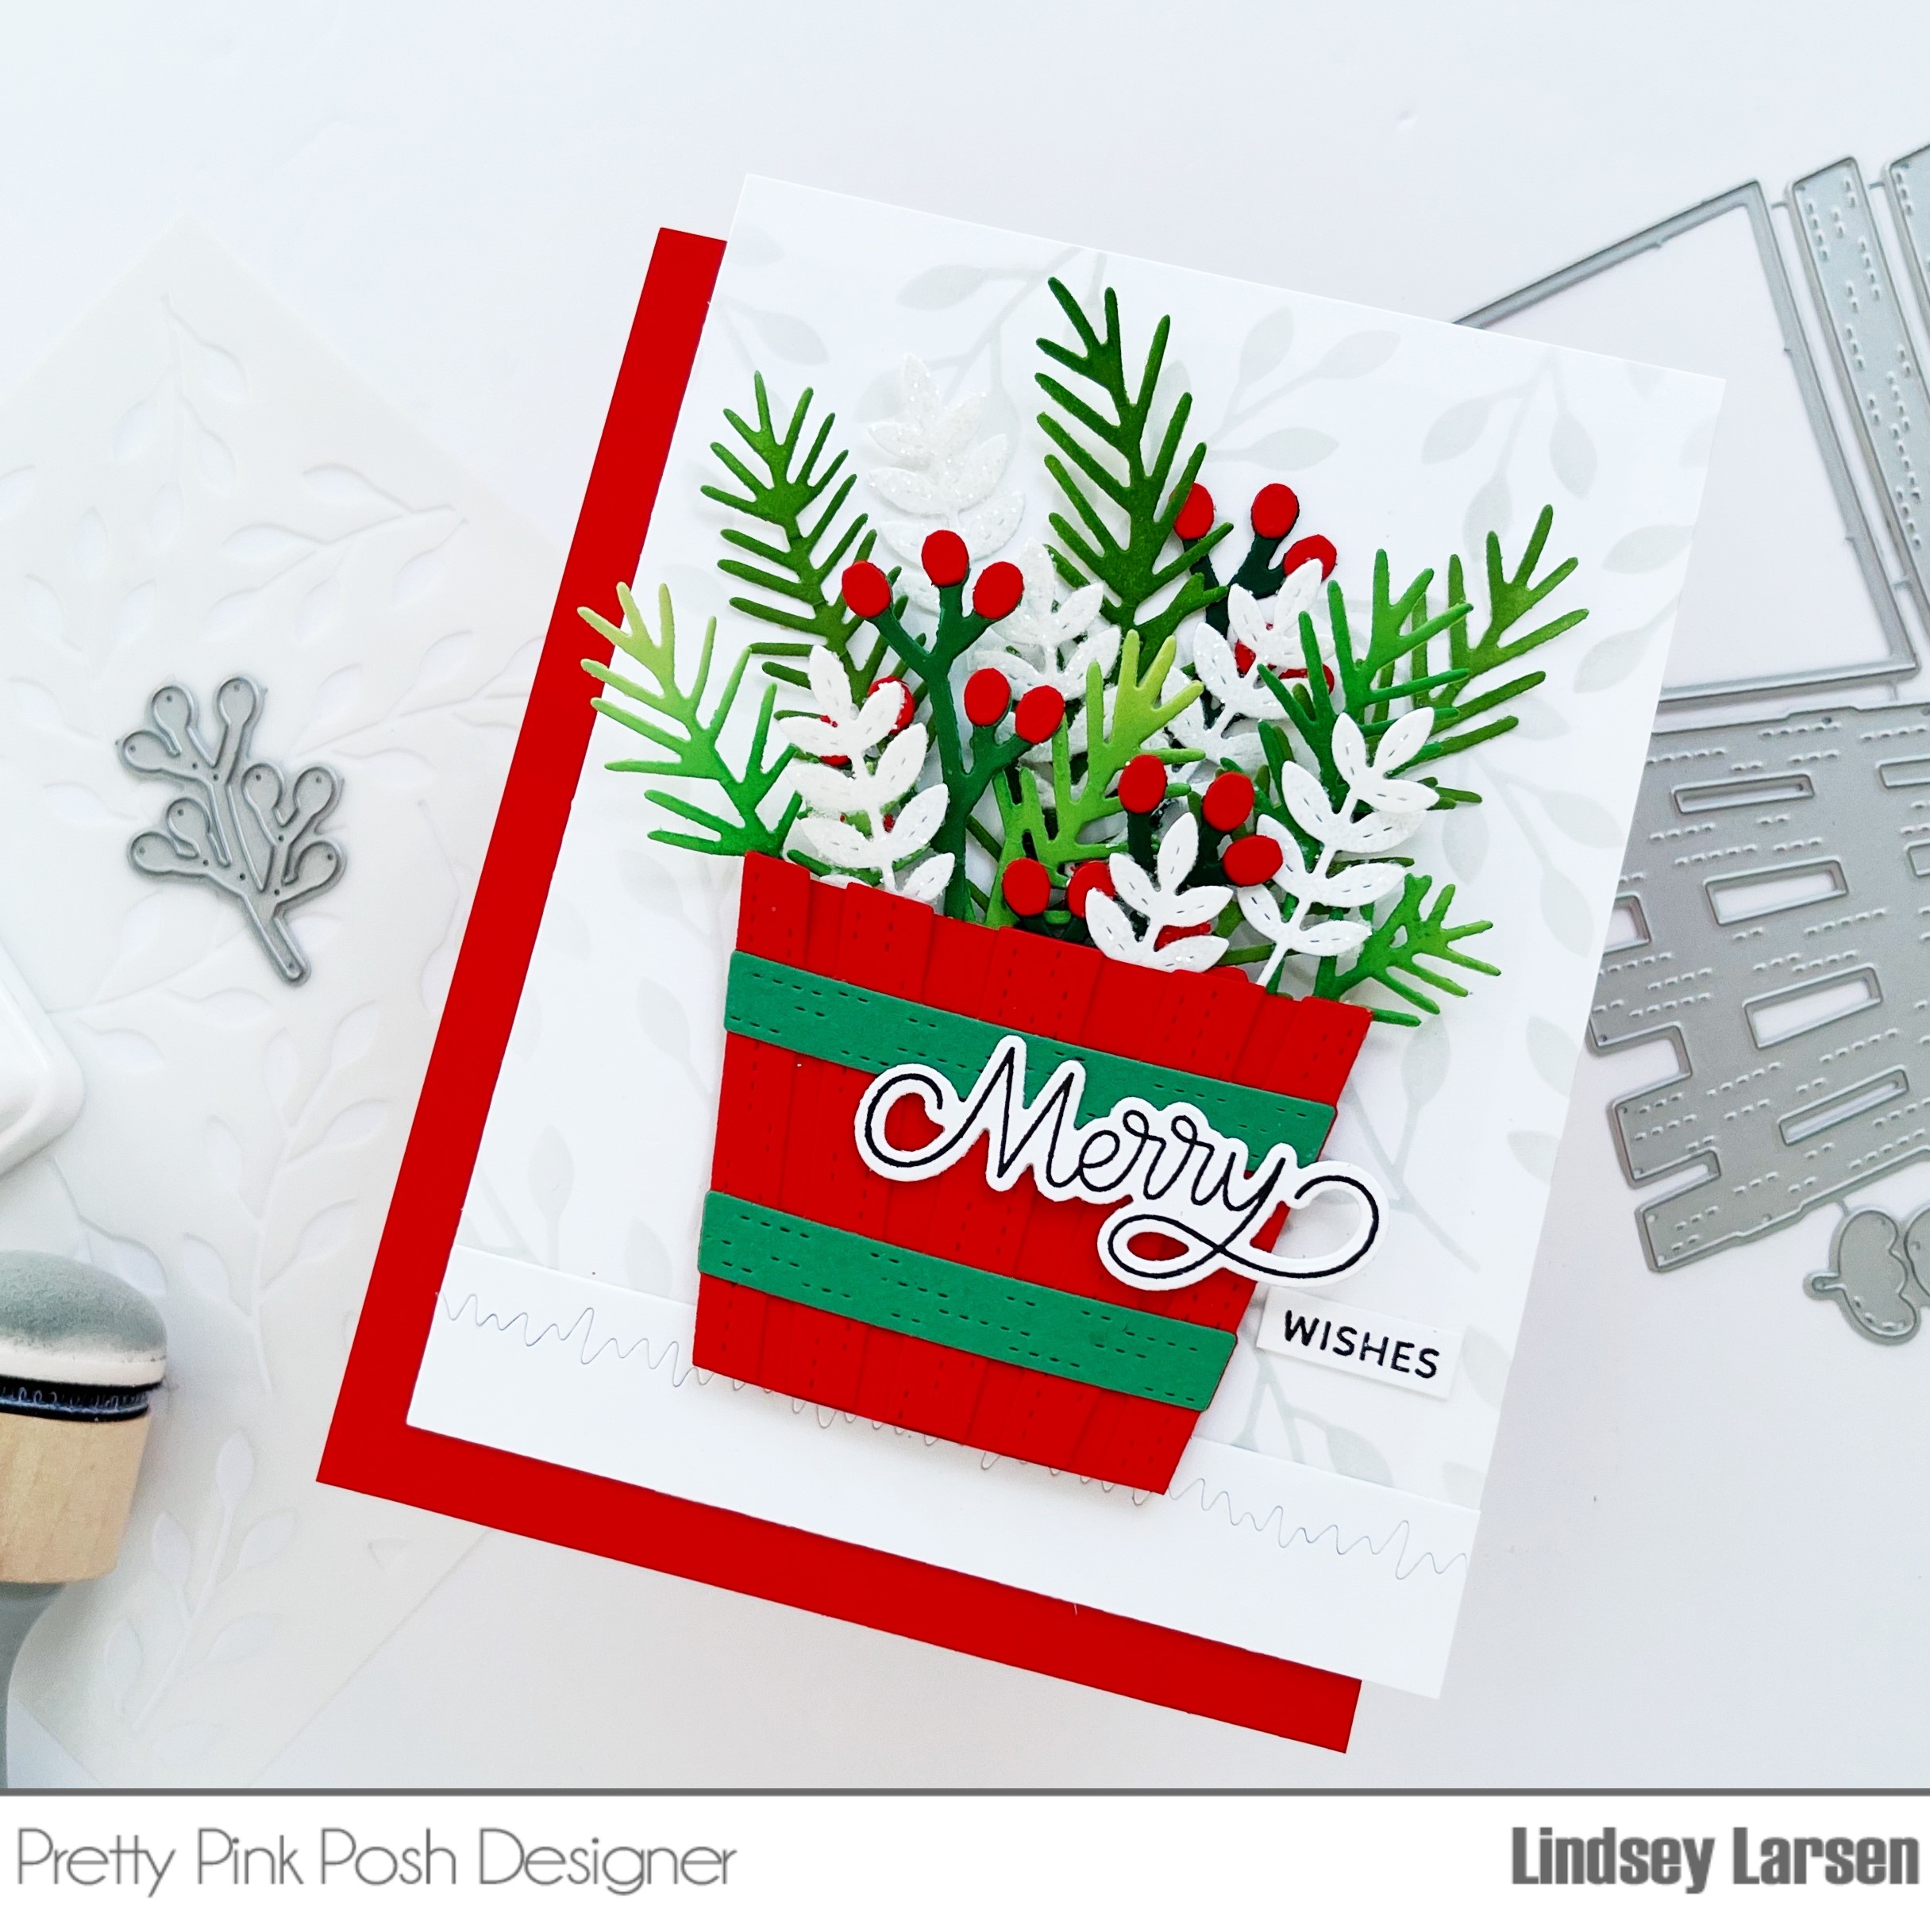
Okay, I am completely smitten by the new Winter Mugs Dies.  I love them!  LOVE love them!  I've totally decked them out for Christmas here, but the dies actually include some darling Halloween and Fall elements as well.  

Truth be told, the inspiration for this card came from Pottery Barn.  They had a photo of some stacked Christmas mugs, and I knew instantly that I wanted to create my own version of that. I pulled out Concord & 9th's Poppy and Evergreen cardstock and got to work.  

I die cut three mugs and dressed up each one.  The evergreen mug is adorned with a snowflake (also included in the Winter Mugs Dies), the white mug is stamped with "joy" found in the new Pine Wreath Stamp Set, and the poppy red mug is decorated with holly leaves and berries from the new Winter Foliage Dies.  Then I filled it to the brim! 

A little note about the berries.  It's actually just one circle berry die, but I wanted it to look like the berries overlapped, so after cutting the berry, I put the circle die partially over the die cut and cut a notch out of it.  By doing this, the notch perfectly lines up with the other berries.  

Okay, onto the fillers.  I used a shimmery grey cardstock to cut lots and lots of berries, pines, and leaves using the new Winter Foliage Dies. (Spoiler alert: these are hands down my favorite dies.  You'll see in the coming days that I literally cannot stop using them.  They make an appearance on pretty much everything I make these days, and if they aren't on there, I exercised some serious restraint to not use them.)  I stuffed my cup full of foliage, and then I added two layered candy canes from the Winter Mugs set.  

On my slimline card base, I blended Dove ink lightly through the Layered Snowflakes Stencils.  Then I stacked my mugs a little skiwampus.  The mugs have a slit cut in them, which makes them easy to fill and stack.

This card is extra special because I actually die cut extras and had a card making session with my mom and aunt who was visiting from across the country.  It brought me a lot of joy to see how excited they were with their cards when they were finished making them.  

Thanks so much for visiting today!    You are in for a real treat as you finish hopping along.  Your next stop is the super talented Kristie Marcotte.  Just in case you missed a stop, I'll include the full hop list below. 

Blog Hop

Don't forget to leave a comment at all the stops.  There are three $30 gift certificates up for grabs (one winner for each day of the hop).  Winners with be picked randomly along the hop.  Comments must be left by 11:59 PM PST on 10/24/2022.  (Winners will be announced on the PPP Blog). 

Sunday, September 25, 2022

Pretty Pink Posh STAMPtember Exclusive - Coffee Friends

Hello!  I'm happy to be participating in Simon Says Stamp's STAMPtember festivities today sharing the Pretty Pink Posh exclusive STAMPtember collaboration set called Coffee Friends.  This is a fun set that will carry you through the fall and winter seasons, and if coffee isn't your thing, it can surely work for hot cocoa as well.  

I started by stamping a couple of the cups using Altenew's Rouge and Paper Bag inks.  I dressed them up a bit by masking and blending a little color around the band of one cup and adding a little heart to the other. 

I set my cups aside and pulled out Pretty Pink Posh's Layered Foliage Stencils.  I used just the leaf stencil and blended Altenew's Caramel Toffee, Paper Bag, and Rouge inks to create a frame around my card. 

Then I used the same colors to stamp the tiniest heart stamp included in Coffee Friends around the frame.  Finally, I splattered on various inks and added some Metallic Gold Jewels.

To finish my card, I stamped one of the sentiments included in Coffee Friends, popped up the cups, and stamped little steam swirls above them.  

Thanks so much for visiting today!  Remember, there is a limited quantity of this exclusive set, so make sure you quickly head over to Simon Says Stamp to snatch up the Coffee Friends Stamps + Dies before they sell out!

Thursday, September 22, 2022

Fall Basket Christmas Style

Good morning, friends!  I've been so eager to share today's card with you! I fell in love with the Fall Basket Dies from Pretty Pink Posh the moment I saw them.  One of the reasons I liked it so much is that I knew that it could be used all throughout the year.  I've been having tons of fun using it for autumn cards, but I knew right away that I wanted to make a Christmas basket.  

This card represents a lot of memories for me.  My mom used to have a red and green apple basket, so that's what I did here using Concord & 9th's Poppy and Clover cardstock. The filled basket reminds me so much of the trimmings for our Christmas tree.  In fact, I covered one of the branches from the Fall Basket Dies with white glitter to look just like some of the leaf picks I use. 

But even more than that, this basket reminds me of my mom and my grandma.  They both decorated the most beautiful Christmas trees each year.  Long before Pinterest or Instagram or anything of the like, my mom and grandma were changing color schemes each and making pin-worthy works of art.  Unfortunately it was also before phone cameras or many photographs in general so I don't have pictures of them, but I cherish the memories.  One of my sisters has the same talent.  I do not, and so the basket on this card makes me smile because there have been lots of years that my mom has showed up with a bag of picks or ornaments or just a little something extra that my tree "needed".  She's great at elevating what you have. :)  

Okay, so a little bit about how the card came together.   I started by stenciling the background in Dove ink with the Falling Branches Stencil (easily one of my favorite stencils to date!). Then I assembled my Fall Basket  and started die cutting fillers.   

The white leaf sprig is from the Fall Basket Dies.  The berry branch comes from the Fall Foliage Dies, and I cut it with C9's Poppy and Evergreen cardstock.  Then I cut several of the Pine Sprigs Dies using Sprout Cardstock and blended Parsley Ink and Evergreen Ink on the pines for some color variation.

I added a squiggly strip cut with the Nature Essentials Dies across the bottom of my card front.  I think it is supposed to be grass, but the positive and negative cuts together reminded me of stitching on a table cloth, so that is how I used it.  I placed my filled basket on top and finished my card with a sentiment from the Holiday Scripts Stamps Set and Dies

Thanks so much for reminiscing with me today.  I hope you are headed into a lovely weekend!

Friday, September 16, 2022

Pretty Pink Posh September Blog Hop + GIVEAWAY

Hello and welcome to day 3 of the Pretty Posh September Blog Hop!  You should have arrived here from the super talented Dana Kirby's blog.  Make sure you hop along as there are three $30 gift certificates up for grabs. (More details below)

It's been so much fun to see how all the designers are using the new products, and I hope that I can inspire you today.  I've pulled out some of my most favorite products from this release for today's card.  

I just can't get enough of stencils lately, so I started with the Layered Foliage Stencils.  I've noticed that if the word "foliage" is in a product name I'm probably going to love it. :) I did a little unconventional blending here (at least for me) and blended three triangle shaped sections on my card base using Melon, Papaya, and Island inks from the The Stamp Market.  Then I placed the stencil layers on top and blended with a heavier hand using the same inks plus Jade. 
Next, I used the same inks to blend color onto the pumpkins in the Fall Basket Dies.  Afterward I pulled out some Heidi Swapp Color Shine Sprays and heavily spritzed the pumpkins.  I LOVE the giant blotches that resulted!! 
I arranged my trio of pumpkins on the card front and popped them up with foam tape.  Then I layered three Grateful Script Die cuts and popped them up on the card as well.  I think I could use the Grateful Script Die on every single card I make.  It definitely jumped straight into my all-time favorites category.  
The final touch was adding a frame from the Nature Essentials Dies.  It just needed a little something to draw the eye into the focal point.
Thanks so much for visiting today!  You're next stop on the hop is the amazing Melody Rupple.  And just in case you missed a stop or two along the way, I'll include the full list of stops below.  

Pretty Pink Posh Day 3 Blog Hop

Three $30 gift certificates up will be given (one winner each day).  Winners will be picked randomly along the blog hop, so make sure to visit every stop.  Comments must be left by 11:59 PM PST on 9/21/2022.  Winners will be announced on the Pretty Pink Posh blog. Wishing you luck and lots of inspiration as you hop along!

Wednesday, August 31, 2022

Trick or Treat

Good morning!  I have another Halloween card to share with you today.  And though simple, it's a favorite of mine.

I started out to make a shaker card, but after cutting Pretty Pink Posh's Cauldron Shaker Die out of some black glitter cardstock, I thought it looked pretty great on it's own and switched gears.  

I just love bold, simple designs.  They make me smile!  I used the Circles Stencil on my background.  Isn't this color pretty? Then I used the cauldron as the center of both the card and the sentiment.  Can you see how the cardstock sparkles? I don't know why that little detail makes me so happy, but it sure does! 

The sentiment was made using the older Trick or Treat Script Dies.  The scale was just right for this card.  Happy sigh.

I hope you are having a happy day wherever you are.  Thank you for spending some of your time to visit. :)