Monday, May 31, 2021

Best Dad

Hello and Happy Memorial Day!  It seems fitting that I am sharing a card made for family today since I have been thinking of family all day.  I miss my grandparents a little extra on days like this and wish I still lived close enough that I could visit and decorate their graves to honor them.  It was a favorite family tradition growing up.  Speaking of family traditions, my grandfather taught my dad to golf and it was something that they always enjoyed doing together.  Because of this, I immediately zoned in on the golf images when I saw Pretty Pink Posh's Dad Stamp Set.  
I stamped all the images to create a background, colored them in with markers, and die cut "DAD" using the coordinating dies.  The letters are busy, so they needed a simple background.  I used Nature's Essential's Dies to cut the grass, but I did some some partial die cutting, so only the tips of the grass would cut and I could make the panel much longer than it would typically be.  Using  Nature's Essential's again, I die cut a frame from grey textured cardstock.  It adds just a little somethin' to this otherwise very simple card.  
I love the sentiment "you're the best" that is included in the Dad Stamp Set because I say that all of the time.  I really do think that I have the best dad in the whole world.  I've been richly blessed.  Wishing you lots of blessing this week, too!  Thanks so much for visiting!

Thursday, May 27, 2021

Crayon Rainbows Galore For All the Teachers You Love

Hello!  I'm so excited to share some special projects with you today.  Some of our biggest blessings have been our childrens' school teachers.  They have been amazing!  Every year my gratitude deepens for these incredible men and women.  I had lots of thank yous to make, and here is a sampling of them. I cut and glued at least 100 crayons, probably more, but it was worth it.   Get ready for a long post, but it is full of oodles of pictures, so hopefully you'll enjoy it. (And if you are wondering, my favorite project is last.)

I have been eyeing Concord & 9th's Color Me Happy dies for quite some time now, and when I contemplated Teacher Appreciation gifts this year I knew they would be perfect.  

My first card was very basic and the quickest to put together.  I used primary colors, just like you would pull out of a standard crayon box.  I adhered all the crayons to a smaller square, tied a bow around them, and popped the whole panel up for a little dimension.

For my second card, I used the same idea, but made it a tad more playful.  

I swapped the colors for their pastel counterpart and staggered the crayons.  Just a couple tiny changes, but I think it altered the whole feel of the card. 
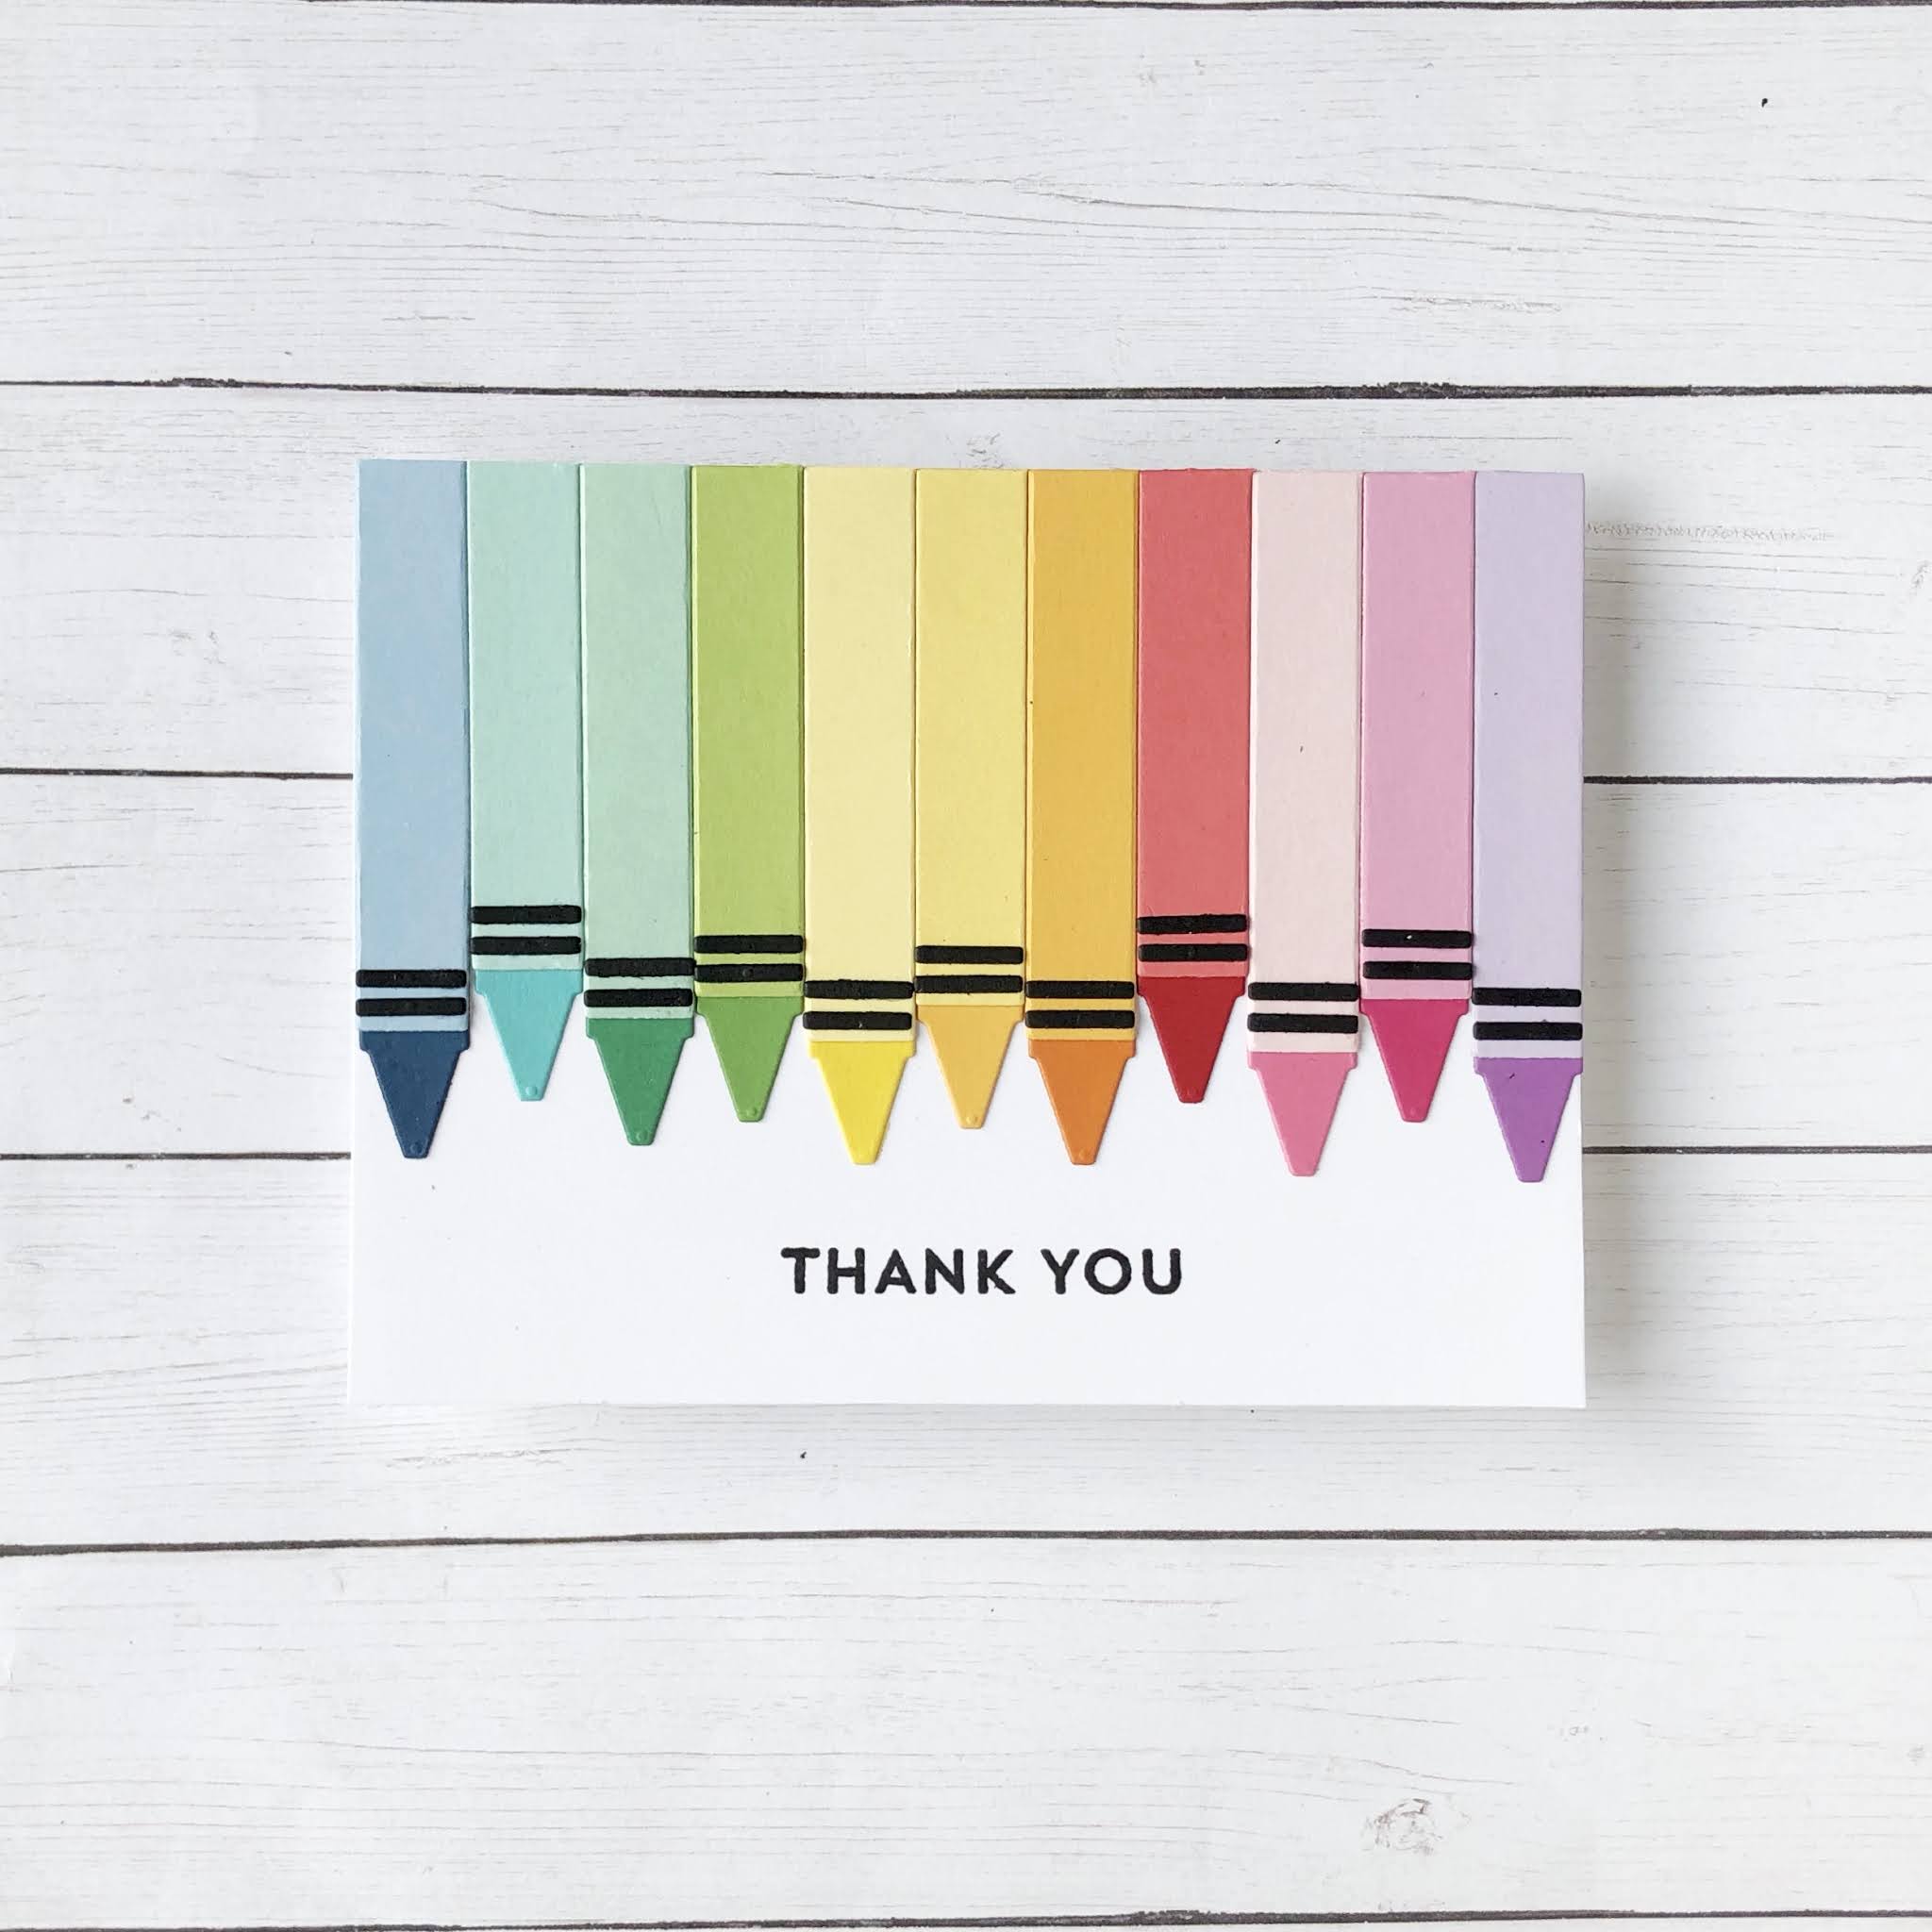
I was having so much fun making little crayons.  SO MUCH!  It was like buying school supplies at the beginning of the school year. :D So naturally I had to make a whole rainbow of crayons. 

And the result made me so happy that once I glued them on, I didn't want to cover any of it up, so I simply cut the "thanks" crayon center from the Color Me Happy dies, and adhered it to a single crayon.  
Why make one rainbow of crayons when you could have two?  
So the next card was born.  I'm not going to lie...these take some time to put together, but if you die cut and glue all the bits of the crayons together, so you just have a giant stack of 100+ crayons to choose from, the card creation process moves along much quicker!  To finish this card, I stamped a simple "thank you" from Concord 9th's Blooms Fill-in Stamp Set.
After all was said and done I had a few crayons leftover.  This time I left the black stripes off just because...okay, truthfully it was so late and I was exhausted and didn't want to have to cut and glue any more on...so I embraced a different look.  Haha.  Anyhow, I cut "thanks" using the Tall Type Alphabet dies, popped up every other crayon for a little dimension, and called it good. 

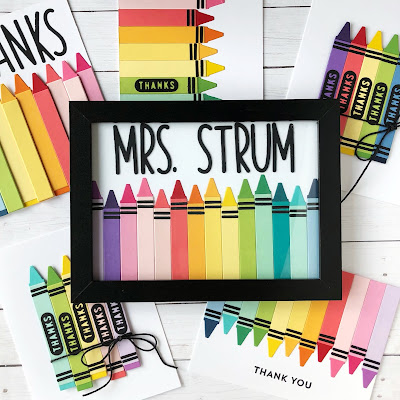
Okay, you get a story for my final and favorite project.  One teacher in particular this year holds an extra special place in our hearts.  My littlest isn't old enough for school yet, but she came every day with me to pick up the other kids from school.  One particular teacher greeted us every single day, sometimes litterally running over to our car to say hello.  My littlest calls her "my friend".  She is the only person she calls "my friend" and it is a term of true endearment.  This teacher is full of sunshine and love and truly brightened our days.  She is moving this summer several hours away, and we all cried when we said goodbye.  We wanted to make an extra special gift for her to take to her new classroom.

This piece is 5x7 in size (well, just a teeny bit less than 7" wide) and 14 crayons fit perfectly across it. I used 28 colors of cardstock....30 if you count black and white....from Concord & 9th, Papertrey Ink, and a one from Hobby Lobby. 

I was thrilled with how perfectly the Tall Type Alphabet dies from Concord & 9th paired with the crayons.  Truly a match made in heaven!
I love how this turned out, but I know  a lot of that has to do with how much we love her.  I probably sound like a broken record, but the joy of creating is exponentially greater when I create with specific people in mind.

One last shot of them all together...

Phew.  Did you make it all the way to the bottom?  Thanks for hanging in there!  Wishing you a bright, colorful rest of your week!

Sunday, May 16, 2021

Happy Birthday with Technique Tuesday (plus sale coupon code)

Good morning!  Today I have the pleasure of joining Technique Tuesday and several card and scrapbook makers to celebrate all things birthday.  And what would a party be without a gift, right?  To celebrate, Technique Tuesday is having a 5-day sale on all their birthday products (so many of which work for a variety of occasions).  Just use the coupon code will be HBDAY21.  Okay, on to the cards!

I really wanted to go with something fun and playful, so I created a duo of cards in bright rainbow colors using one of my favorite techniques - using repeated images to create backgrounds.  Today I'm sharing two ways to do that. 

On my first card I created a rainbow card base with strips of paper and used a repeated die cut from Happy Everything to build the background.  I started in the top left corner and placed as many full HAPPY die cuts as I could.  Because this die has a unique design, there were a few open spots leftover.  If they were on the edge, I filled them in with another partial die cut, and for the few spots in the middle I filled them with the the little asterisk die cut also included in the die set.   

Now those little asterisks created a natural focal point, so I stamped and colored the balloons in Let's Party and placed them right in the center.  Next, I added a sentiment from Let's Party and simply colored the outline letters in black.  I finished the card off with a sprinkling of rainbow jewels.  

On my second card I used repeated images again, but this time I repeatedly stamped and embossed images and sentiments from Let's Party  and Large Birthday to build the background.  

To up the fun factor a bit I blended ink over the white embossed background, but I did not cover the background entirely.  Instead I blended the ink just around the edges to create a frame for the fabulous bow from Bow on the Border.  

This bow typically only cuts the outline on the right side since it is meant to cut on the edge of a panel, but since I wanted it dead center, I trimmed the outline out on both sides.  I also added some dimension by popping up the center and edges of the bow and ribbon tails.

Finally I stamped the Happy Birthday sentiment from Large Birthday and trimmed it in half to create two little flags to tuck under the bow.  I kind of love that the card looks like a gift itself.  

Thanks so much for joining me today!  I hope that you'll pop over to the Technique Tuesday Blog next to see the rest of the line up, and don't forget you have from today (May 16th) through May 20th to save 20% off all birthday products with the coupon code HBDAY21.  Wishing you a happy week, friends!

Wednesday, May 12, 2021

You Nailed It

Happy Wednesday, Friends!   Today I'm using the fun Tool Background Die, which is another great coverplate die in Pretty Pink Posh's May release.  The first card I made with this die was a masculine one, and I loved it, but I knew this die could work in feminine colors as well.  After all, my mom always had a little hammer in the kitchen drawer that had flowers all over the handle.  Plus, this week a couple young women I know graduated from college, and one landed a great job and the other was accepted into law school.  I thought this kind of card could be perfect for them.

When my husband saw this card he said, "I can see why you like these dies.  It's like putting a puzzle together."  And he's exactly right!  I love putting puzzles together, and I hadn't realized it until then, but I think I get the same therapeutic effect when I'm piecing in the different colors into this die cut.  

This card is pretty quick to put together.  Simply run the die through the machine six times, cutting it with white, light grey, gold, silver, dark pink, and light pink cardstock.  I found it was easiest to glue the entire grey layer down to the card base first, and then glue the white outline on top. (It adds a bit of dimension.) Finally, have fun filling in all the pieces in various colors. Sometimes I stacked an extra color underneath (like on the gold hammer head. silver nails and banner), so there would be a bit of height variance, which added some interest to the card.

And that's all!  I'm already itching to create more of these.  I hope you have a wonderful rest of the week!  Thanks for stopping by!

Thursday, May 6, 2021

Pretty Pink Posh Insta Hop (with prizes!)

Good morning!  Today I'm sharing a card in celebration of  Pretty Pink Posh's brand new May Release.  This release is packed with so many awesome new products!  And there is an Insta hop going on with prizes, so hopefully you can pick up some of these new goodies yourself. :)

One of the first new products that caught my eye was the Tulip Cover Plate Die.  There is a lot of potential with this new die from the most simple to a little more complex.  I think I went in the medium range of complexity here, but I've actually made several cards with this die already, and every option is a great one.
I wanted to add a variety of colors, but still keep the clean bold lines, so I paper pieced in solids.  I die cut the coverplate 6 times - twice in white and once each in peach, coral, pink, and mint.  I used one white die cut as my base to adhere all the other colors to.  If you place press 'n seal wrap over each die cut layer to keep all the pieces together, it makes it so much easier to find the piece you need!  
First, I trimmed and adhered the stems to the die cut.  I inlaid the petals next, placed a press n' seal sheet over them to hold all the pieces in place, and then flipped them over and put tape across the back to attach them to the white outline.  Using tape makes quick work of adhering these, and I'm all for speeding up the process. 
Next, I carefully trimmed out the outline of the tulips from the second white die cut and placed that over top.  Then, I adhered traced around the vase portion, and cut and adhered vellum to it.  The vellum is one of my favorite parts on the card!  I love the way it makes it look like the flowers are actually inside.  I adhered the white layer on top of everything else, and then decided, so I ended up with one solid panel.
This deep turqoise would have been fine on it's own, but I wanted to add a little pizzaz to it, so I used stencil to dry emboss it.  Aren't stencils, the best?  They are so versatile!  Included in the the Tulip Cover Plate Die is a little tag and bow.   I die cut those and added a sweet sentiment from Pretty Pink Posh's Spring Robins Stamp Set.  Then I popped everything up to add some dimension.  (Sure love how such a simple thing as that adds so much of an impact to a card.)  And done! 

Make sure to head to my Instagram account to join in the fun!  If Instagram isn't your thing, there is also a separate blog hop going on (go to the Pretty Pink Posh Blog here).  Both are definitely worth checking out...double the fun and double the prizes. Just make sure to leave comments along the way by May 9th.