Just a quick card for CAS-ual Fridays Long & Short Challenge. The challenge was just to create a card with long and short sides. I used an old MME die cut of a bird as a template, cut it out in PTI's aqua mist cardstock, added some sequins to the belly, and mini pearls for the eye and legs. Then, I stamped "thanks" (from Lawn Fawn) in SU's Basic Gray.
Wednesday, January 23, 2013
Sunday, January 20, 2013
10 Minute Craft Dash + Moxie Fab Itty Bitty Challenge
I decided to make a card (the larger car card) for this week's 10 Minute Craft Dash #10 Challenge since my first entry was a game for my son. I wish I could tell you my exact time, but I only know that it was over 10 minutes. I set the timer on reverse (counting down), and when it went off, I still wasn't done. Boo! My first Craft Dash fail. My top 3 time consuming mistakes: my husband coming home from work and coming in to talk to me during the challenge, changing the size of the card three times during the challenge, and building my own sentiment with itty bitty individual alphabet stamps.
I know I used the same car from PTI's Enjoy the Ride on my first craft dash attempt, but since that was my first time using the little car (even though I've owned this set 2 1/2 years), I decided I had to try it out on a card. My favorite part of the whole card are the little hearts getting puffed out of the little exhaust pipe (that I added by stamping a portion of the cakestand in Lawn Fawn's Bake Me a Cake set). I realize that isn't where an exhaust pipe sits on a car, but that was the best place I could figure out to put it on this car.
Here's a comparison of the two.
Okay, so it bugged me that I didn't make the 10 minute challenge with my car card, so I attempted Craft Dash #10 one more time...and this time was a success! I finished in 9 minutes 44 seconds. I built the cake with Lawn Fawn's Bake Me a Cake set, adding the text in pink pirouette from PTI's BB:Text Style. Next I stamped and cut out the happy banner from PTI's Tag-it's #10, then stamped birthday on the cake. I topped it off with some glitter and some rhinestones.
Happy <3 Day Supplies
Stamps: Enjoy the Ride (PTI), Background Basics: Retro (PTI), Bake Me a Cake (Lawn Fawn), Sans Alphabet (CTMH)
Ink: Pink Pirouette (SU), Basic Gray (SU), Spring Moss (PTI)
Paper: White (PTI), Spring Moss (PTI), Gray
Other: Flipping Out Die (PTI)
Happy Birthday Supplies
Stamps: Bake Me a Cake (Lawn Fawn), Background Basics: Text Style (PTI)
Ink: Basic Gray, Pink Pirouette (SU), Spring Moss (PTI)
Paper: Spring Moss, White (PTI)
Other: Sterling Glitter (Martha Stewart), Rhinestone Stickers (Recollections)
Happy Birthday Supplies
Stamps: Bake Me a Cake (Lawn Fawn), Background Basics: Text Style (PTI)
Ink: Basic Gray, Pink Pirouette (SU), Spring Moss (PTI)
Paper: Spring Moss, White (PTI)
Other: Sterling Glitter (Martha Stewart), Rhinestone Stickers (Recollections)
Saturday, January 19, 2013
10 Minute Craft Dash #10
Update: Yay! This project was chosen as one of Paulina's Craft Dash #10 Favorites. I was surprised and excited when I saw because I knew that I was taking a chance on this project...it's not a card and I realize that doesn't appeal as much to many.
I was really excited to be able to participate in 10 Minute Craft Dash #10 this week. While I love making cards, I've decided that I need to devote a little more of my crafting time to things that would actually benefit my little boy. So I made a list of things that I want to make for him, and one of those things was a touchy-feely book/cards because my son loves the touchy-feely "That's Not My..." series from Usborne Books. Plus, we desperately need little *quiet* activities to carry in the diaper bag when we go to church. So here they are:
Oh, I almost forgot. I finished the cars in 9 minutes 56 seconds. Yeah, only 4 seconds to spare...I was almost a complete nervous wreck. Hopefully it is okay that I did each of the colors separately. I was going to mix them, but I changed my mind because because we are working on learning colors right now, too.
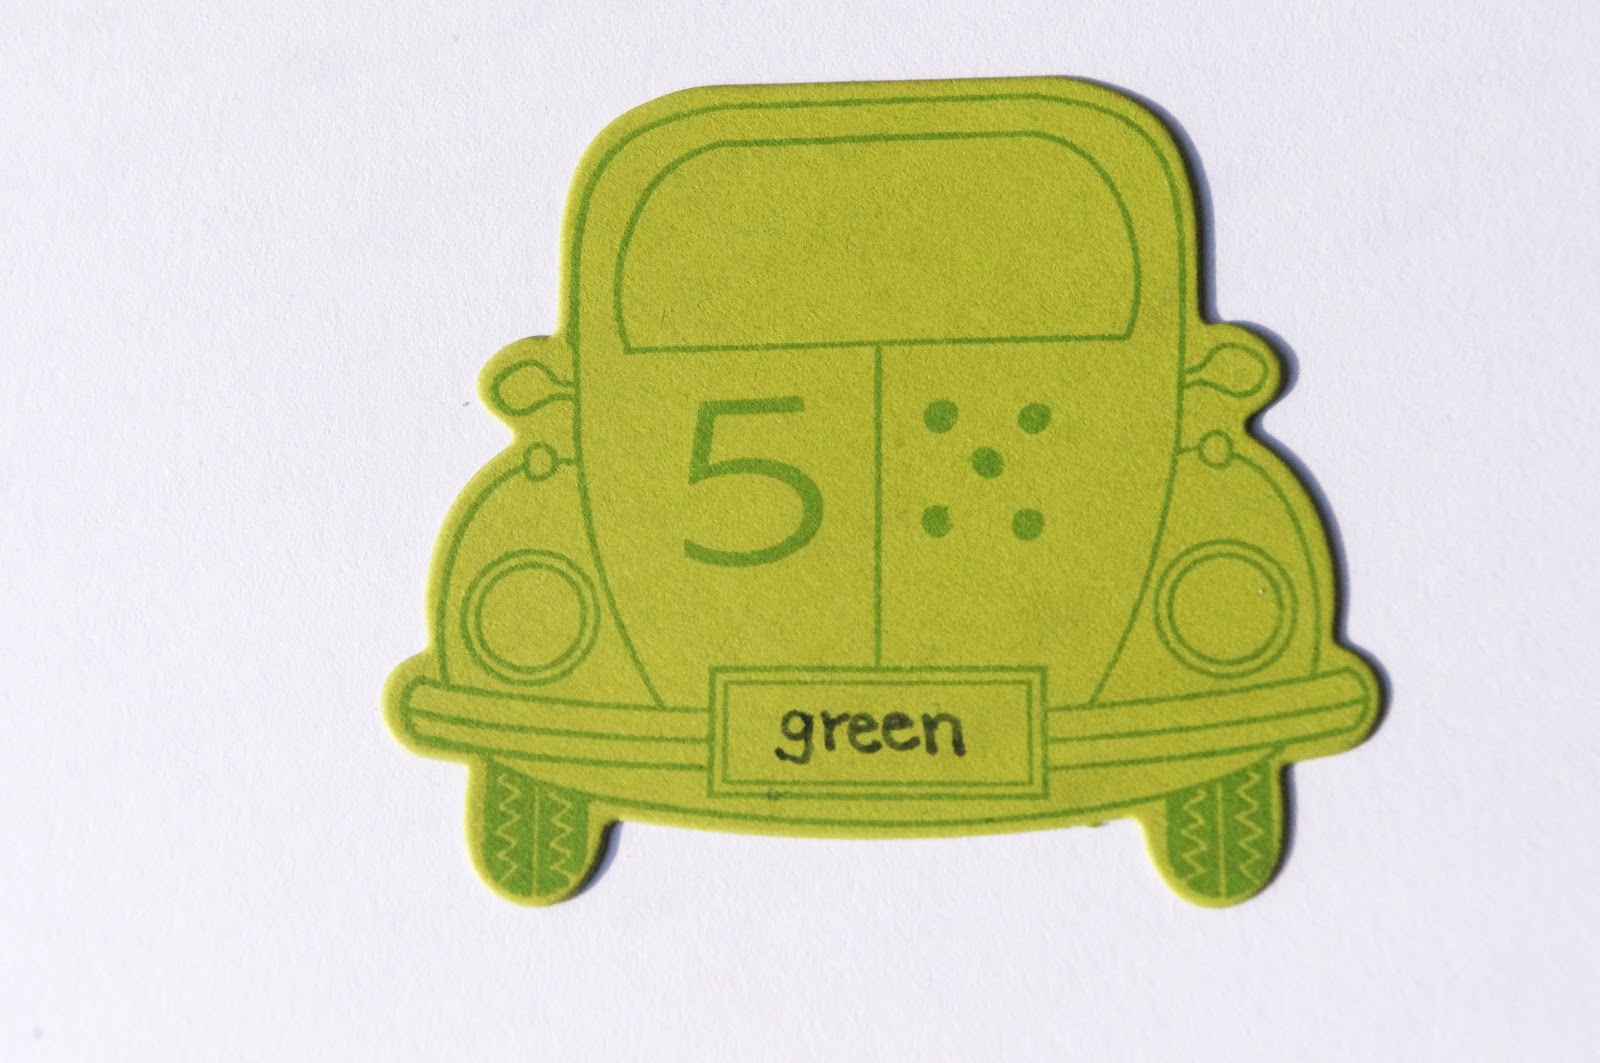
I die cut the cars twice in each color, stamped the front of one in each color, and then used my X-acto knife to cut out a portion of the hood out for the touchy-feely part to peek through. I made the little bumps on the green car with glossy accents, I used rubber mesh on the gray car, and the pink car has some pink satin fabric.
This was so much fun, that I decided I might as well make some cars for a matching game, so I reset my timer and in 8 minutes 2 seconds (mostly just so I would work quickly and not waste time) made some more cars. You may wonder why I chose the particular numbers on the hoods. Well, I realized while I was doing this that I really ought to eventually make them in all the colors, so I quickly thought about the general order that I would introduce the colors to him taking into consideration primary/secondary colors, color preferences that he is showing, and the few color words he can say. And that's how I came up with 5, 6, and 11.
Well, as soon as I finished, I kept thinking about the other colors and finally just decided that I had most of the supplies out already, so I might as well finish them now. That was also the moment that I realized that I probably shouldn't use the matching game for the Craft Dash Challenge because the whole project was going to have 11 colors, not just three. So I found the other eight colors and made two of each, so eventually we can play a matching game. I'll probably hole punch these, too, and stick them on the ring with the touchy-feely cards.
Touchy-Feely Car Supplies
Stamps: Enjoy the Ride (PTI), Loads of Love (SU)
Ink: Blush (CTMH), Basic Gray (SU), New Leaf (PTI)
Paper: Pink Pirouette (SU), New Leaf (PTI), Gray
Other: Enjoy the Ride Die (PTI), X-Acto Knife, pink satin fabric, rubber mesh, Glossy Accents, Binder Ring
Expanded Matching Game Supplies
Stamps: Enjoy the Ride (PTI), Fresh Alphabet (PTI)
Ink: Blush (CTMH); Basic Gray, Brilliant Blue, Chocolate Chip, Elegant Eggplant, Pumpkin Pie, Real Red, So Saffron (SU); Fresh Snow, New Leaf (PTI)
Markers: Autumn Terra Cotta, Chocolate, Grey Wool, Outdoor Denim, Pansy Purple, Sunflower, Tulip (CTMH)
Paper: Pink Pirouette (SU); Lemon Tart, New Leaf, Pure Poppy, True Black, White (PTI); Eat Your Carrots, Grapesicle, Waterslide (MM); Brown, Gray
Other: Enjoy the Ride Die (PTI), pink and white colored pencils
Wednesday, January 16, 2013
PTI MIM #100: Packaging Cards with Oversized Embellisments
There are always new supplies I want in the
paper crafting world, but I'm trying to downsize. My stash has gotten
too big for my space. Plus, I have so many things that I just had to have, but
have never or barely used. I'm terrible about not using the things I love the
most because I'm afraid that I won't like how my project will turn out and then
I won't have that item anymore. Silly, huh? Anyway, I've made a
mini-resolution to use my stuff...or get rid of it. So that's what I did with
this card. I love yellow and grey, and these papers fall into the "I bought these because I love, love, loved (and still do!) them but never used them" category.
I also knew I wanted to use this card for this week's Make it Monday at PTI because it is oversized in two ways - the flower hangs off the side and the flower is fat (that's probably not the best word to use, but my brain is tired today). I love glassine bags, but don't have any on hand, and I actually really want to stick this card in the mail, so I decided to make an envelope box. I realize this will cost extra to mail, but I don't care. It's useful, and I'm sure I'll make more of these.
The outside of the envelope is simple. I couldn't do too much because I need room to write the addresses and have to leave the typical spaces for the post office to do their thing. I realize I'm not the first person to make an envelope box, but this is the first time I've made one, and I put a lot of thought in how I wanted it designed. I did make 3 until I got just what I wanted, but practice makes perfect right? I obviously needed it to be just the right size for the intended card, but I also wanted as few flaps to glue down as possible, and I wanted the flaps to be completely hidden. I also wanted it to be simple, and something I could easily adjust for future cards. The best part is that it only takes one 8.5x11 sheet of cardstock, which I always have on hand. It's finished dimensions are 6x4.5x.25.
I lined the inside of the envelope with the same papers I used on the card, and then on the outside I wanted the washi tape look, but don't have any (I know, I should probably jump on that bandwagon), so I just ripped some paper and glued it on. Here it is with the card tucked inside.
Envelope Box Supplies
Stamps: Mehndi Medallion (PTI), Fifth Avenue Floral (SU)
Ink: Basic Gray (SU), Lemon Tart (PTI)
Paper: Breeze Paper Pad (MME), Cowboy Paper Pad (MME), White (PTI)
Card Supplies
Stamp: Signature Greetings (PTI)
Ink: Basic Gray (SU), Tea Dye Duo (PTI)
Paper: Breeze Paper Pad (MME), Cowboy Paper Pad (MME), White (PTI)
Other: Tattered Florals Dies (Tim Holtz), button brad (MM), pinking shears, white thread
Tuesday, January 15, 2013
Moxie Fab Itty Bitty Card Challenge
One more quick card for another Moxie Fab World Challenge. This one was challenge #23 to make an itty bitty card. I needed a card to put in a baby gift I'm mailing to my friend Alexis who had her baby Thursday (yep, Mom I forgot to tell you she had her baby...both are doing great), and an itty bitty card fit the bill perfectly. Obviously I went on the simple side for this one. It's a 3" square with just a little bit of paper piecing and stitching.
Supplies
Stamp: Baby Button Bits (PTI)
Ink: Basic Gray, More Mustard (SU)
Paper: Breeze Paper Pad (MME), Soft Stone (PTI)
Other: buttercream twine (the Twinery), pinking shears
Subscribe to:
Posts (Atom)