Sunday, September 25, 2022

Pretty Pink Posh STAMPtember Exclusive - Coffee Friends

Hello!  I'm happy to be participating in Simon Says Stamp's STAMPtember festivities today sharing the Pretty Pink Posh exclusive STAMPtember collaboration set called Coffee Friends.  This is a fun set that will carry you through the fall and winter seasons, and if coffee isn't your thing, it can surely work for hot cocoa as well.  

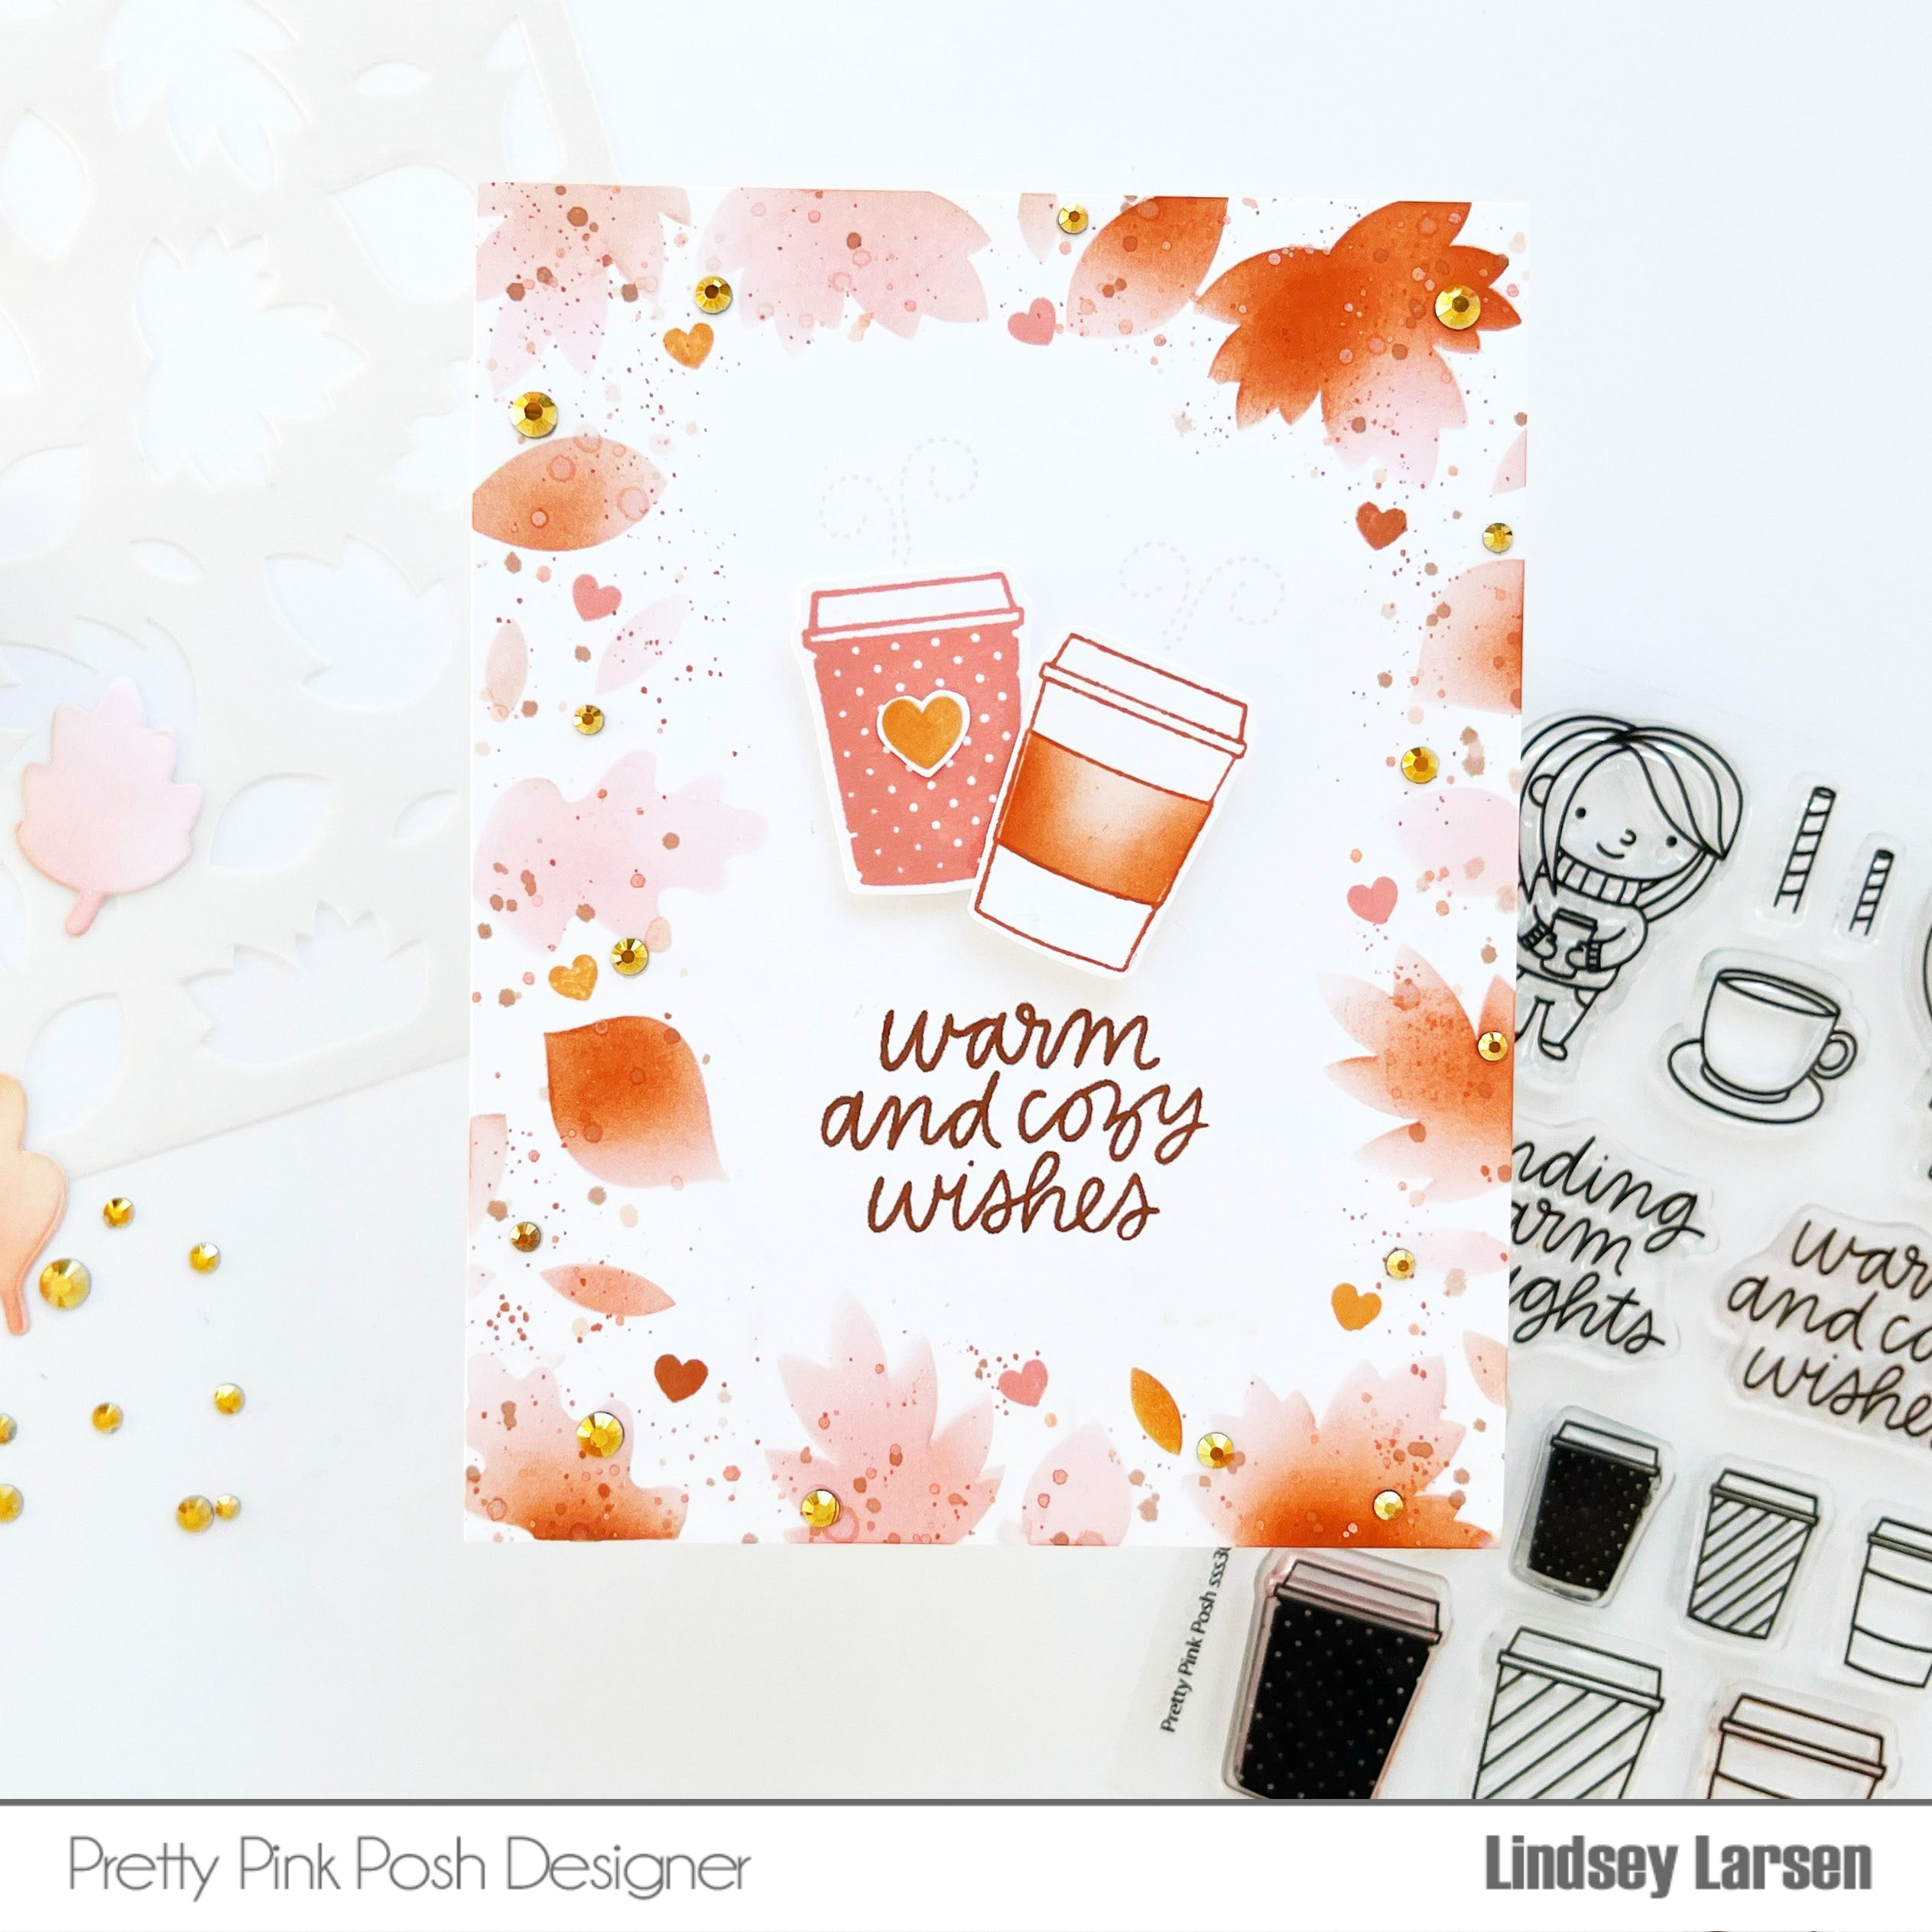
I started by stamping a couple of the cups using Altenew's Rouge and Paper Bag inks.  I dressed them up a bit by masking and blending a little color around the band of one cup and adding a little heart to the other. 

I set my cups aside and pulled out Pretty Pink Posh's Layered Foliage Stencils.  I used just the leaf stencil and blended Altenew's Caramel Toffee, Paper Bag, and Rouge inks to create a frame around my card. 

Then I used the same colors to stamp the tiniest heart stamp included in Coffee Friends around the frame.  Finally, I splattered on various inks and added some Metallic Gold Jewels.

To finish my card, I stamped one of the sentiments included in Coffee Friends, popped up the cups, and stamped little steam swirls above them.  

Thanks so much for visiting today!  Remember, there is a limited quantity of this exclusive set, so make sure you quickly head over to Simon Says Stamp to snatch up the Coffee Friends Stamps + Dies before they sell out!

Thursday, September 22, 2022

Fall Basket Christmas Style

Good morning, friends!  I've been so eager to share today's card with you! I fell in love with the Fall Basket Dies from Pretty Pink Posh the moment I saw them.  One of the reasons I liked it so much is that I knew that it could be used all throughout the year.  I've been having tons of fun using it for autumn cards, but I knew right away that I wanted to make a Christmas basket.  

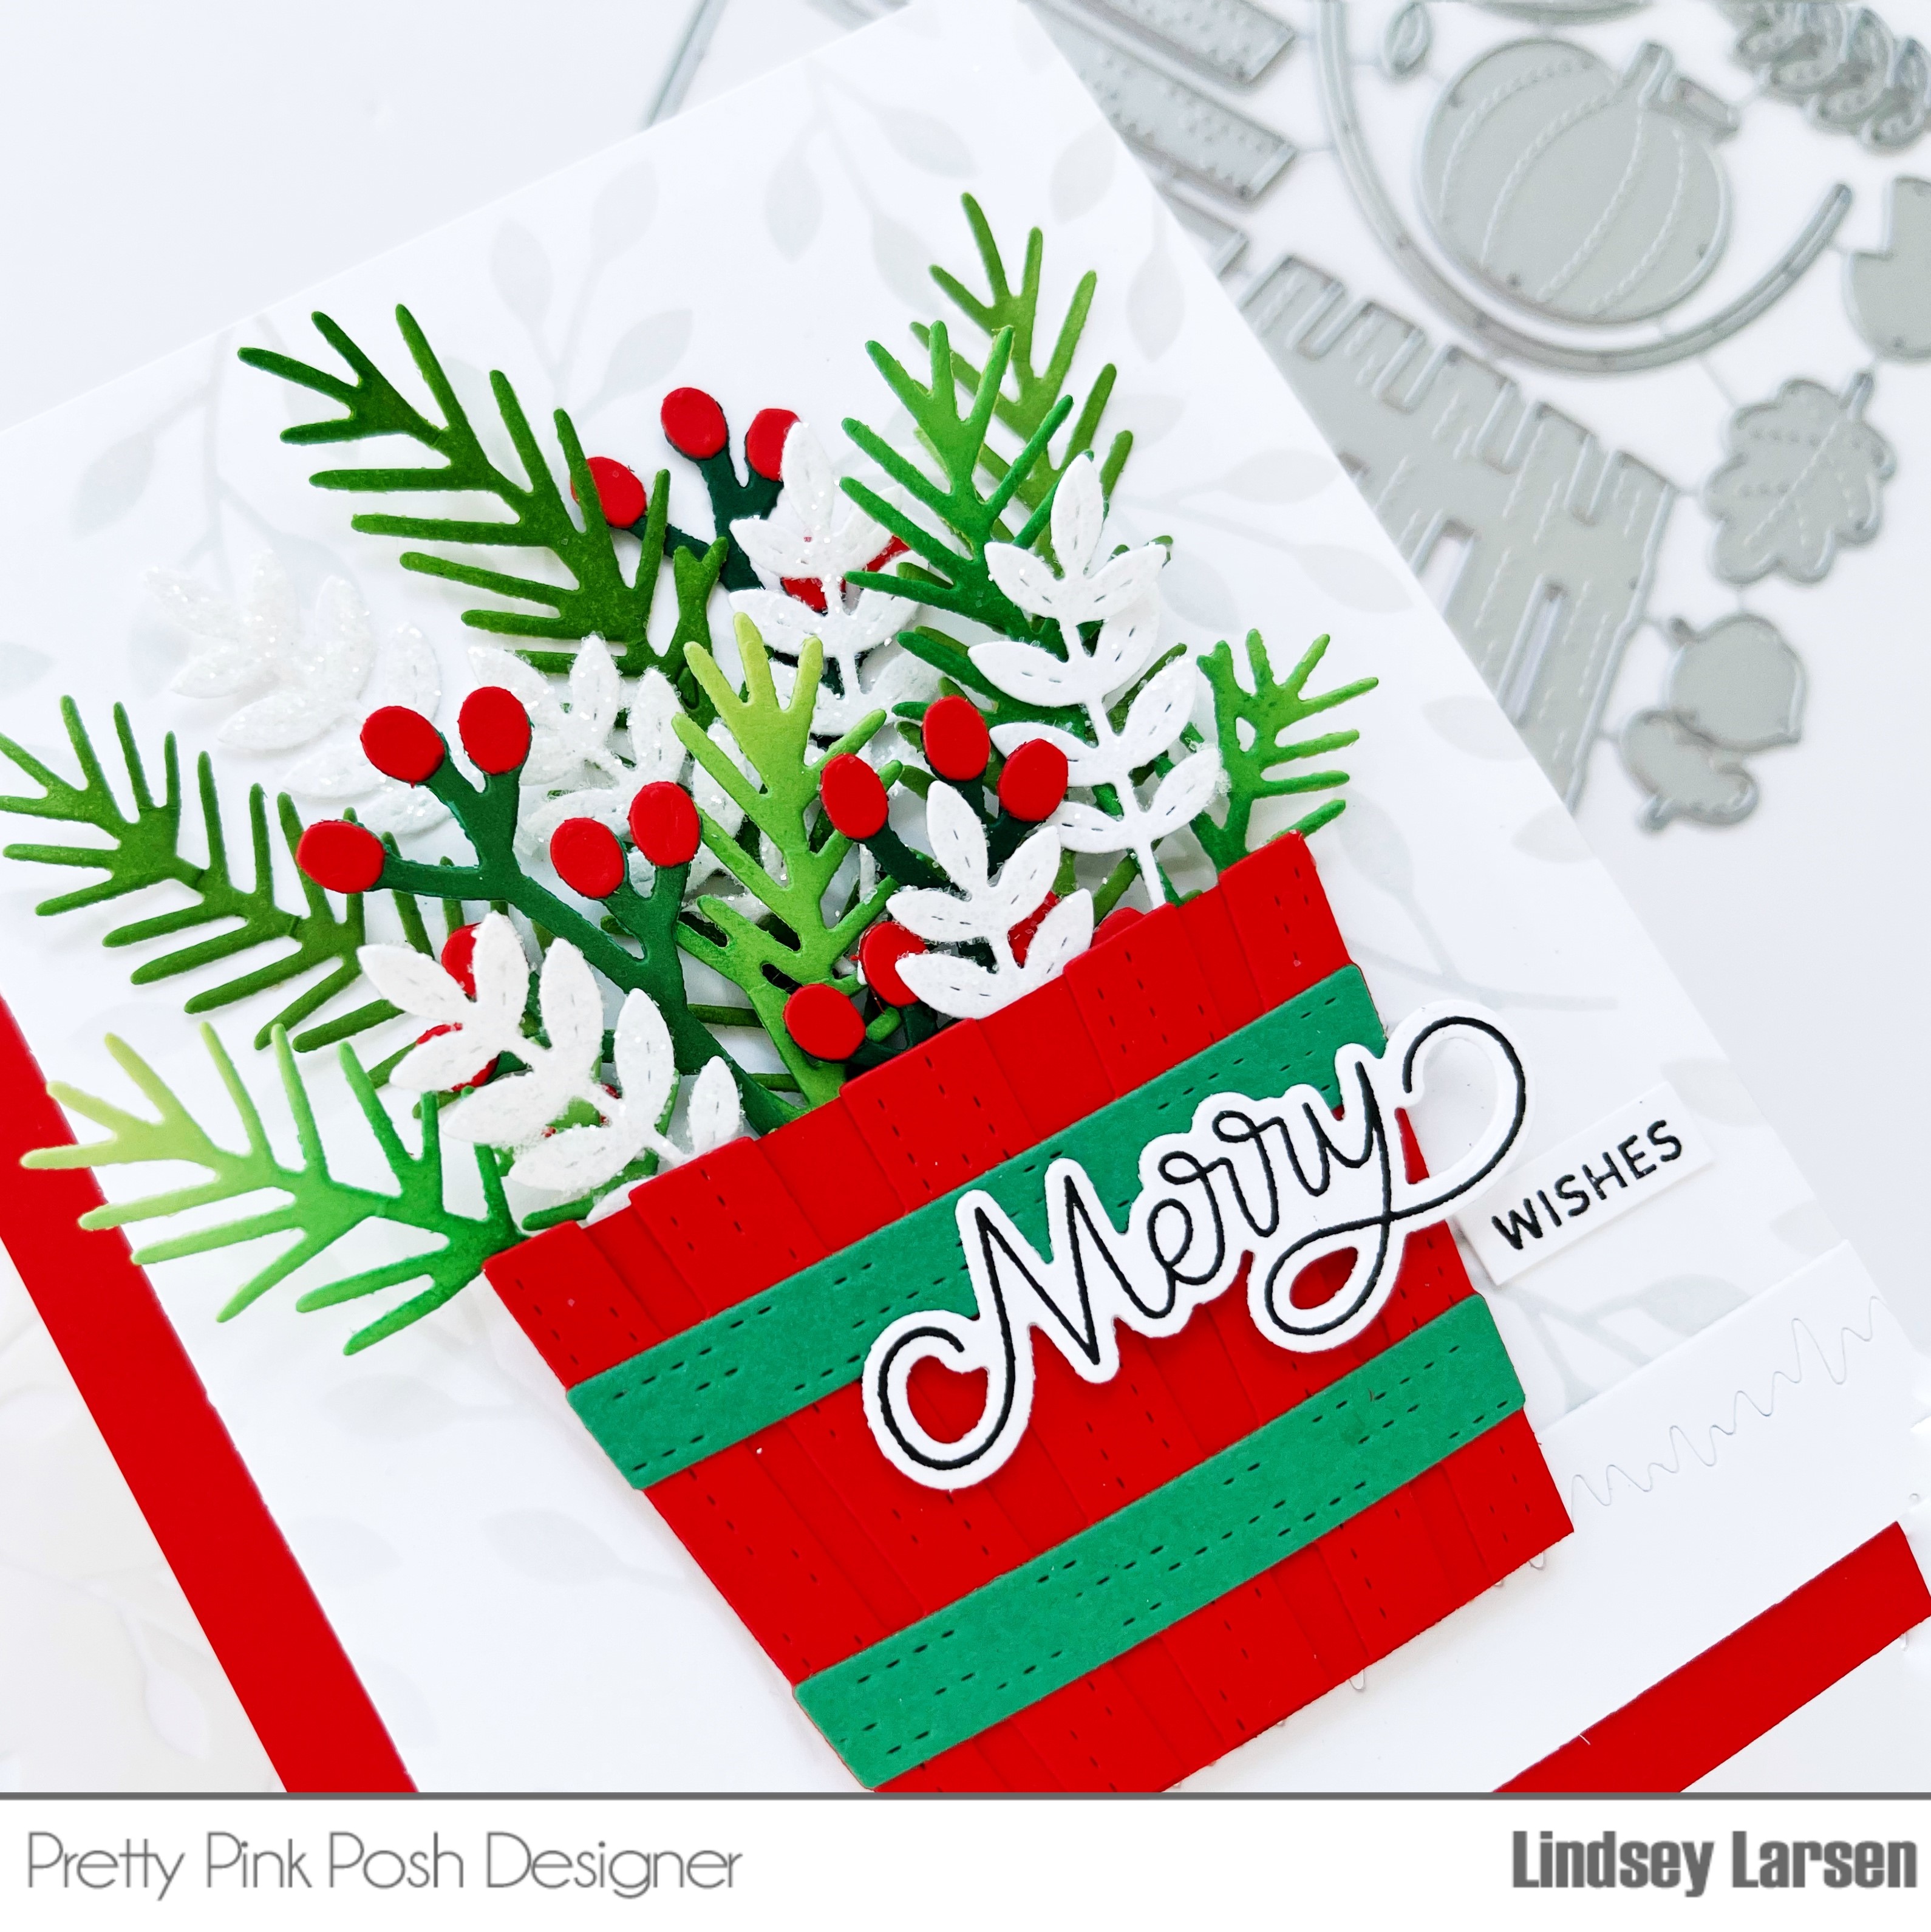
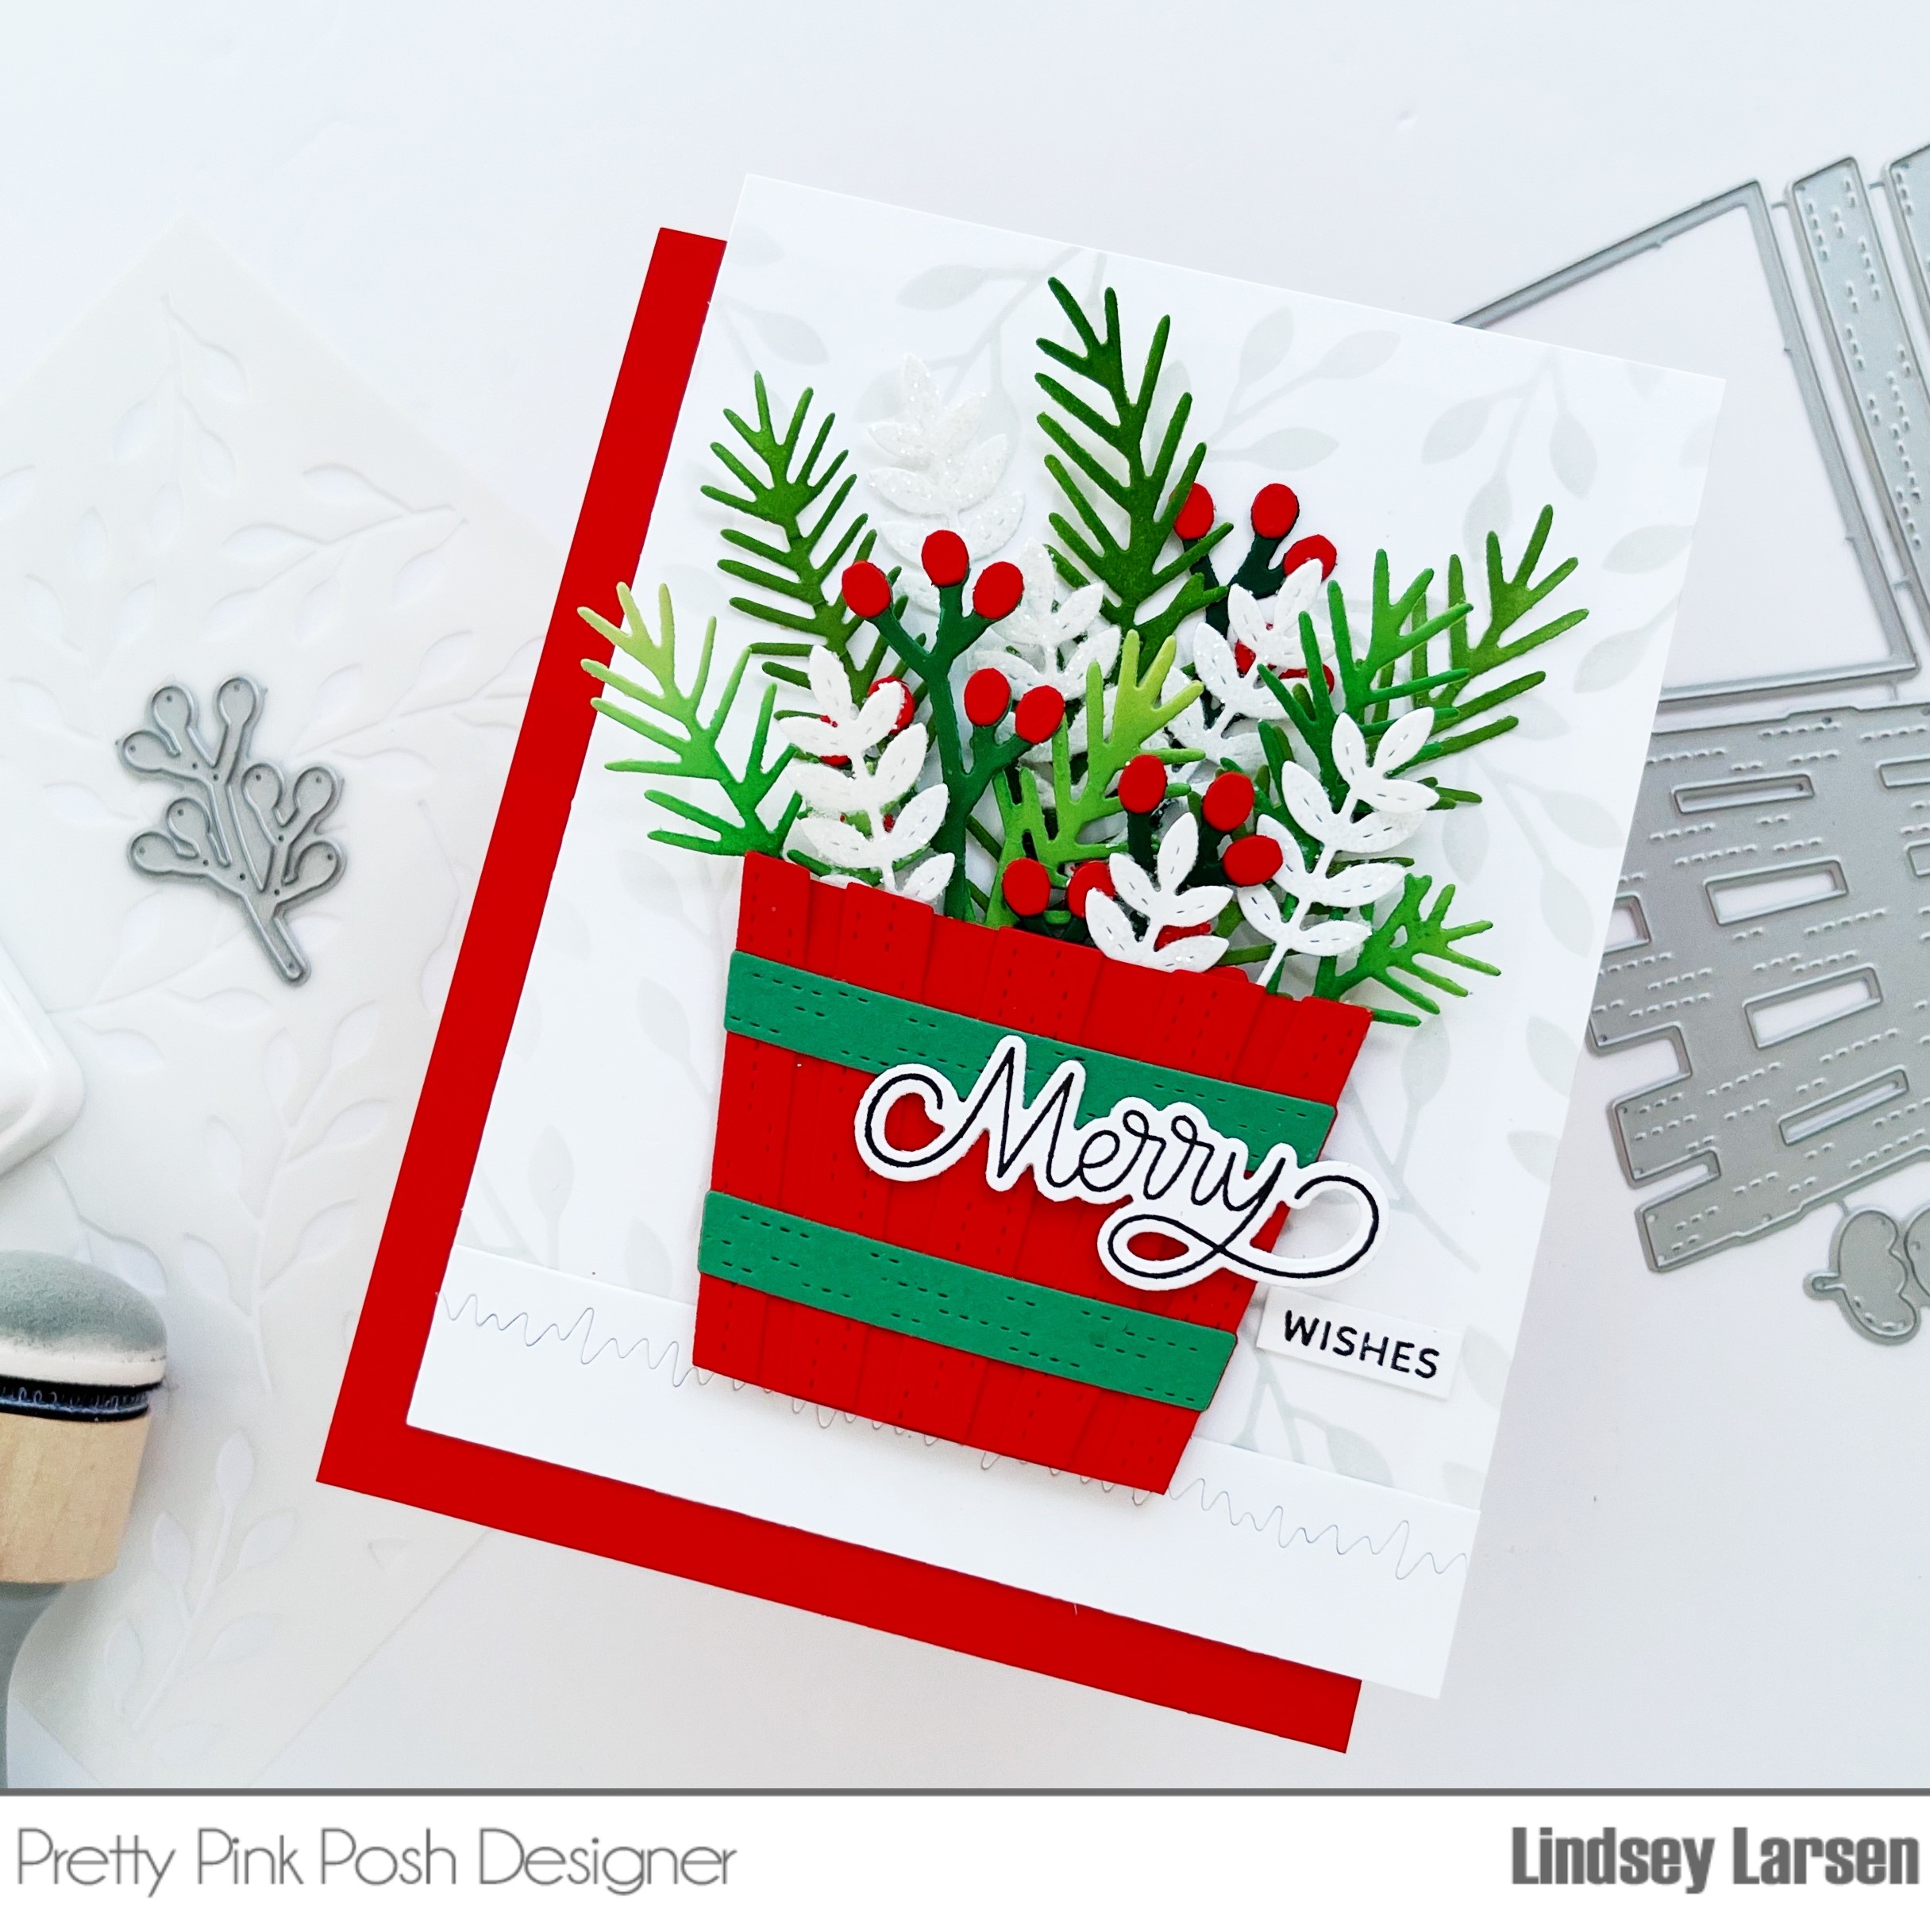
This card represents a lot of memories for me.  My mom used to have a red and green apple basket, so that's what I did here using Concord & 9th's Poppy and Clover cardstock. The filled basket reminds me so much of the trimmings for our Christmas tree.  In fact, I covered one of the branches from the Fall Basket Dies with white glitter to look just like some of the leaf picks I use. 

But even more than that, this basket reminds me of my mom and my grandma.  They both decorated the most beautiful Christmas trees each year.  Long before Pinterest or Instagram or anything of the like, my mom and grandma were changing color schemes each and making pin-worthy works of art.  Unfortunately it was also before phone cameras or many photographs in general so I don't have pictures of them, but I cherish the memories.  One of my sisters has the same talent.  I do not, and so the basket on this card makes me smile because there have been lots of years that my mom has showed up with a bag of picks or ornaments or just a little something extra that my tree "needed".  She's great at elevating what you have. :)  

Okay, so a little bit about how the card came together.   I started by stenciling the background in Dove ink with the Falling Branches Stencil (easily one of my favorite stencils to date!). Then I assembled my Fall Basket  and started die cutting fillers.   

The white leaf sprig is from the Fall Basket Dies.  The berry branch comes from the Fall Foliage Dies, and I cut it with C9's Poppy and Evergreen cardstock.  Then I cut several of the Pine Sprigs Dies using Sprout Cardstock and blended Parsley Ink and Evergreen Ink on the pines for some color variation.

I added a squiggly strip cut with the Nature Essentials Dies across the bottom of my card front.  I think it is supposed to be grass, but the positive and negative cuts together reminded me of stitching on a table cloth, so that is how I used it.  I placed my filled basket on top and finished my card with a sentiment from the Holiday Scripts Stamps Set and Dies. 

Thanks so much for reminiscing with me today.  I hope you are headed into a lovely weekend!

Friday, September 16, 2022

Pretty Pink Posh September Blog Hop + GIVEAWAY

Hello and welcome to day 3 of the Pretty Posh September Blog Hop!  You should have arrived here from the super talented Dana Kirby's blog.  Make sure you hop along as there are three $30 gift certificates up for grabs. (More details below)

It's been so much fun to see how all the designers are using the new products, and I hope that I can inspire you today.  I've pulled out some of my most favorite products from this release for today's card.  

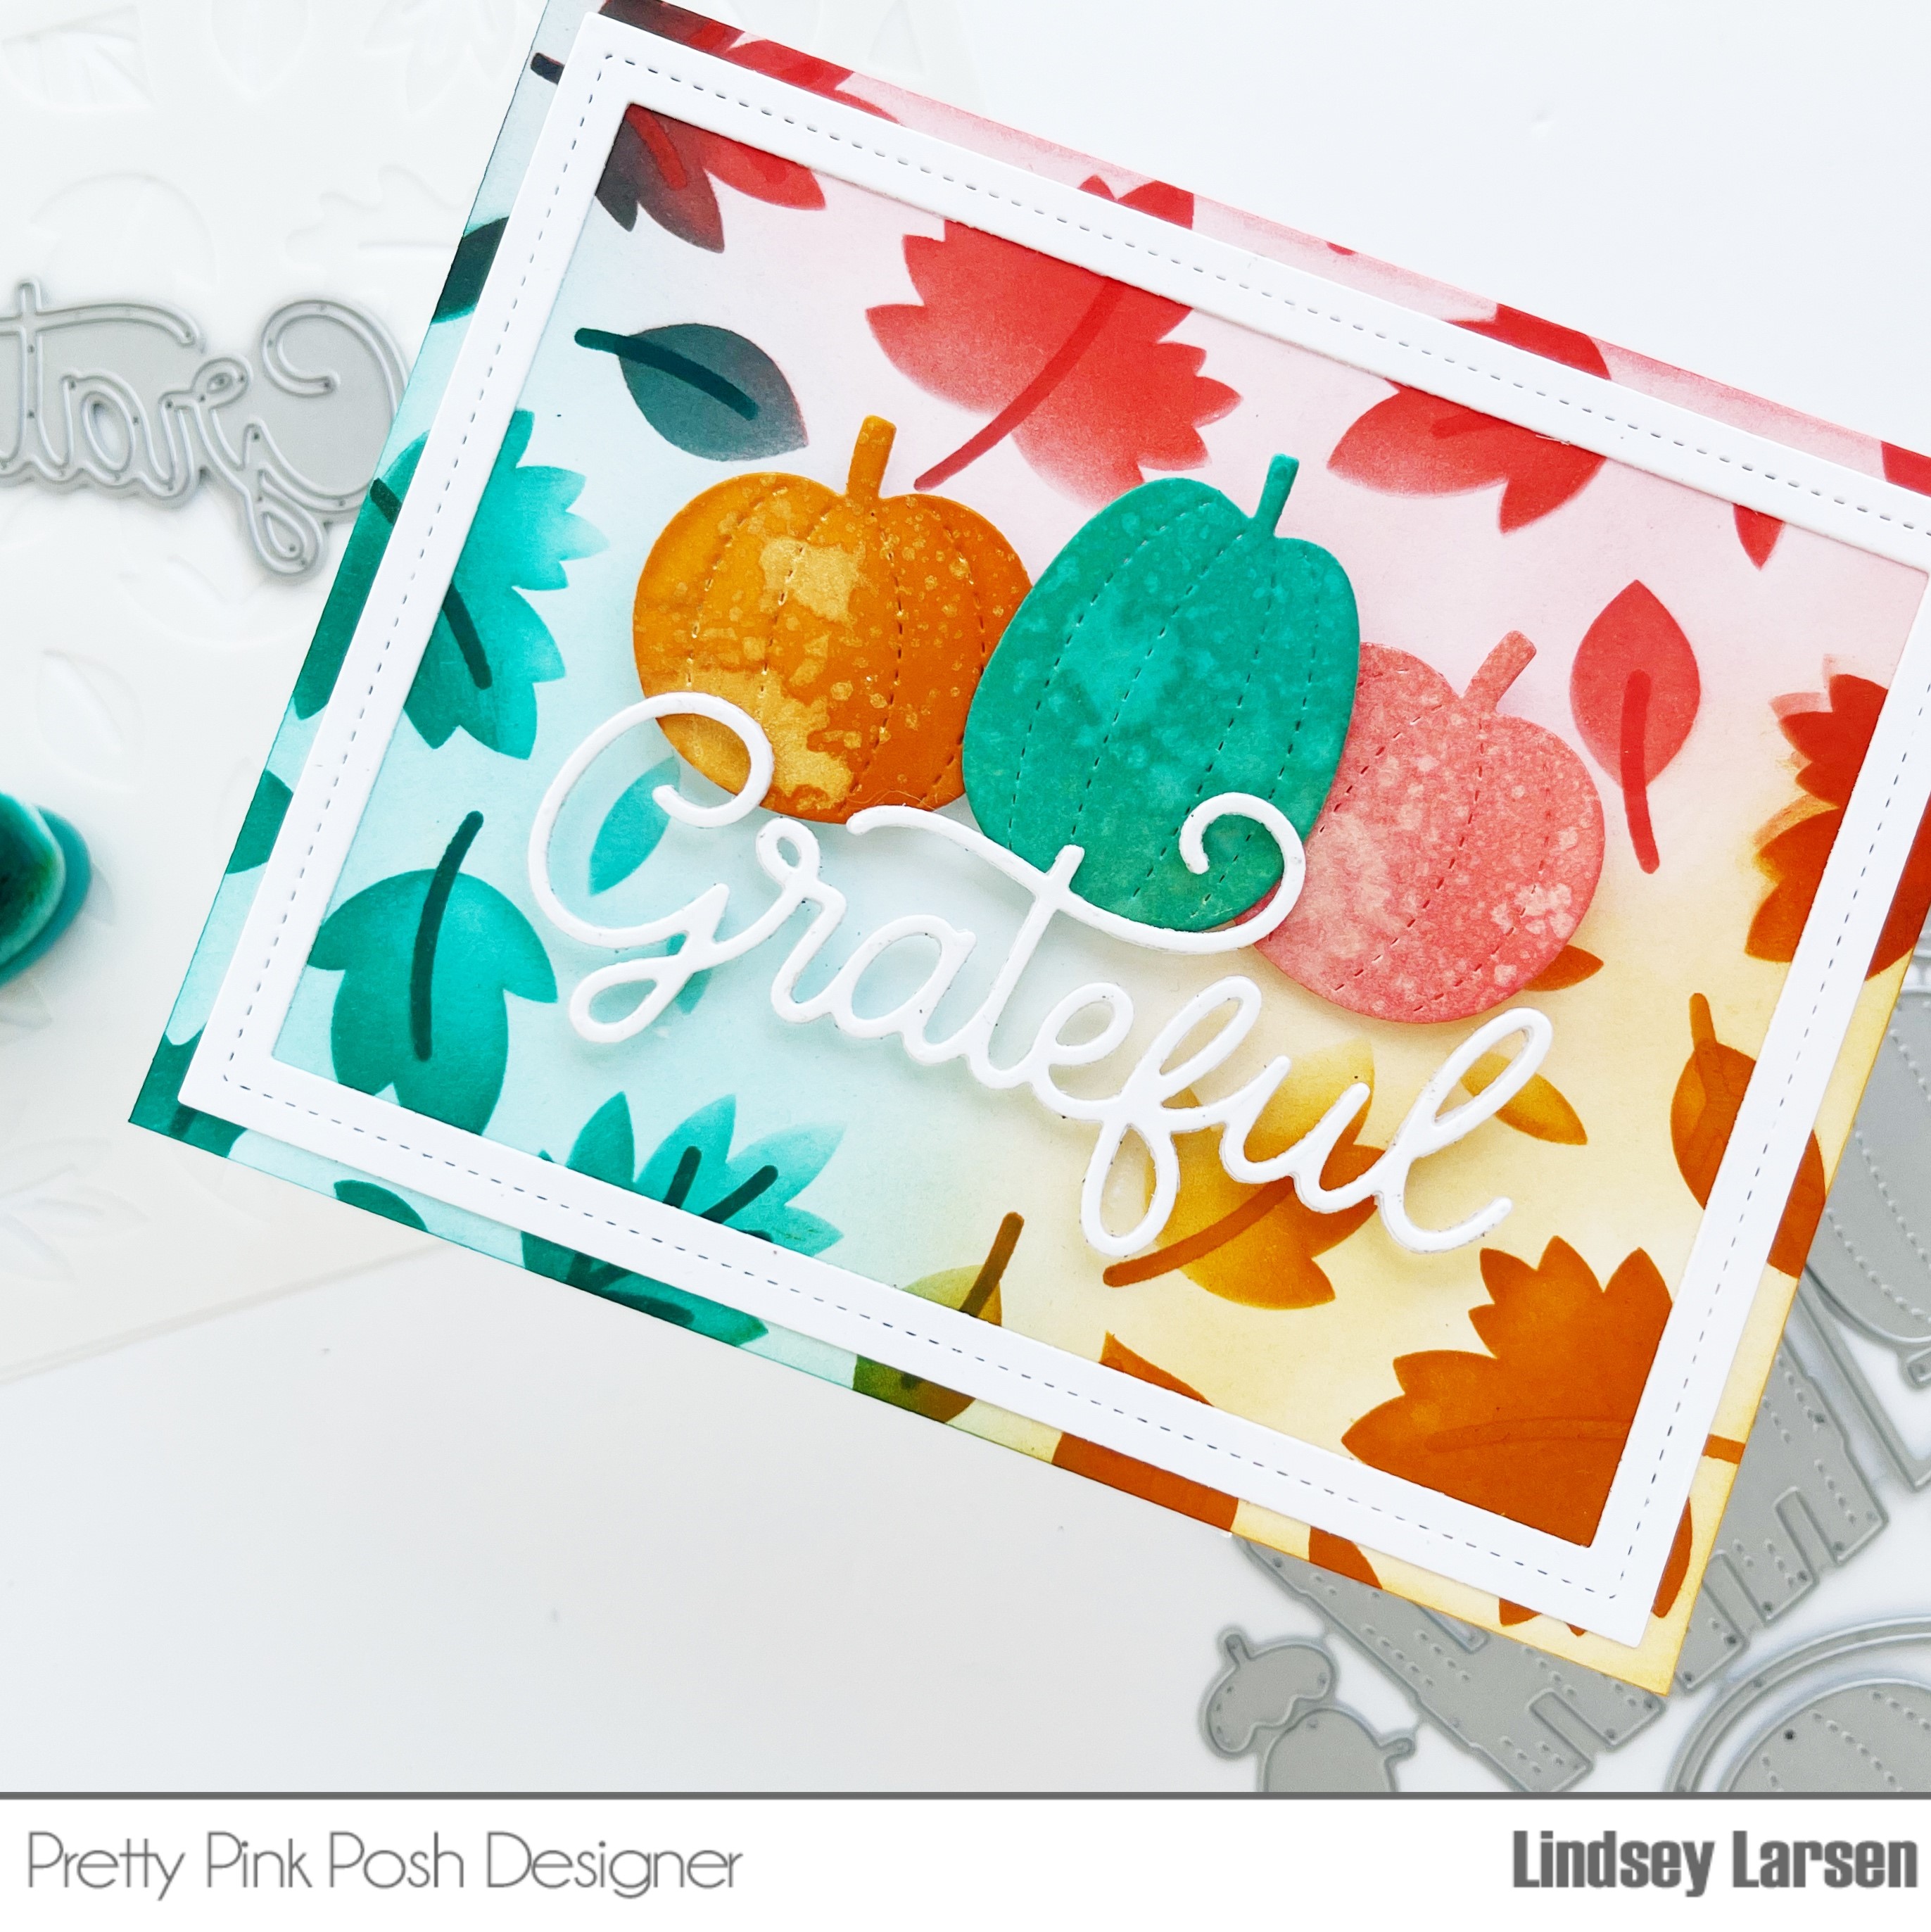
I just can't get enough of stencils lately, so I started with the Layered Foliage Stencils.  I've noticed that if the word "foliage" is in a product name I'm probably going to love it. :) I did a little unconventional blending here (at least for me) and blended three triangle shaped sections on my card base using Melon, Papaya, and Island inks from the The Stamp Market.  Then I placed the stencil layers on top and blended with a heavier hand using the same inks plus Jade. 
Next, I used the same inks to blend color onto the pumpkins in the Fall Basket Dies.  Afterward I pulled out some Heidi Swapp Color Shine Sprays and heavily spritzed the pumpkins.  I LOVE the giant blotches that resulted!! 
I arranged my trio of pumpkins on the card front and popped them up with foam tape.  Then I layered three Grateful Script Die cuts and popped them up on the card as well.  I think I could use the Grateful Script Die on every single card I make.  It definitely jumped straight into my all-time favorites category.  
The final touch was adding a frame from the Nature Essentials Dies.  It just needed a little something to draw the eye into the focal point.
Thanks so much for visiting today!  You're next stop on the hop is the amazing Melody Rupple.  And just in case you missed a stop or two along the way, I'll include the full list of stops below.  

Pretty Pink Posh Day 3 Blog Hop

Three $30 gift certificates up will be given (one winner each day).  Winners will be picked randomly along the blog hop, so make sure to visit every stop.  Comments must be left by 11:59 PM PST on 9/21/2022.  Winners will be announced on the Pretty Pink Posh blog. Wishing you luck and lots of inspiration as you hop along!

Wednesday, August 31, 2022

Trick or Treat

Good morning!  I have another Halloween card to share with you today.  And though simple, it's a favorite of mine.

I started out to make a shaker card, but after cutting Pretty Pink Posh's Cauldron Shaker Die out of some black glitter cardstock, I thought it looked pretty great on it's own and switched gears.  

I just love bold, simple designs.  They make me smile!  I used the Circles Stencil on my background.  Isn't this color pretty? Then I used the cauldron as the center of both the card and the sentiment.  Can you see how the cardstock sparkles? I don't know why that little detail makes me so happy, but it sure does! 

The sentiment was made using the older Trick or Treat Script Dies.  The scale was just right for this card.  Happy sigh.

I hope you are having a happy day wherever you are.  Thank you for spending some of your time to visit. :)

Friday, August 26, 2022

Concord & 9th Feature Friday + GIVEAWAY

Good morning!  I cannot believe that August has flown by so quickly!  It has been an absolute joy to create with Concord and 9th this month!  Today is my final Feature Friday post, but the fun news is that Concord and 9th has been kind enough to offer a $25 gift certificate to GIVEAWAY to my readers.  Just click on over to my Instagram account to get entered in to win.  

Today we are featuring two fabulous bundles: Autumn Hues and Freshly Picked.  They are easy and fun to create with and made me all excited for fall.  My cards started with a color palette that I absolutely adore: Midnight, Stardust, Sorbet, Peacock, and Wheat.

I pulled out all of the larger stitched leaf dies and cut each leaf with one color of cardstock and then began arranging them on my background.  

As it happens so often, once I finished the background, I loved it so much that I did not want to cover it up. ;) So I hemmed and hawed with how to finish my card.

Included in the Autumn Hues Dies is a great banner that coordinates with several sentiments in the Autumn Hues Stamp Set.  With a little snip on one end, I turned the banner into a tag and then punched a hole so I could thread it through some twine.  

I used two sentiments in the Autumn Hues Stamp Set, selectively inking just "thankful" on one of them and embossed them in white on Midnight and Wheat cardstock.  Because I like my bows to hang just so, I added a tiny bit of glue behind the bow tails in a few spots, so they lay exactly how I put them.  

I also think it is worth mentioning that the Autumn Hues Bundle also includes the fabulous Autumn Hues Turnabout Stencil Pack, making creating leaf backgrounds and a circle leaf wreath a cinch.  I didn't use it on this card, but you'll definitely see it in the future. 

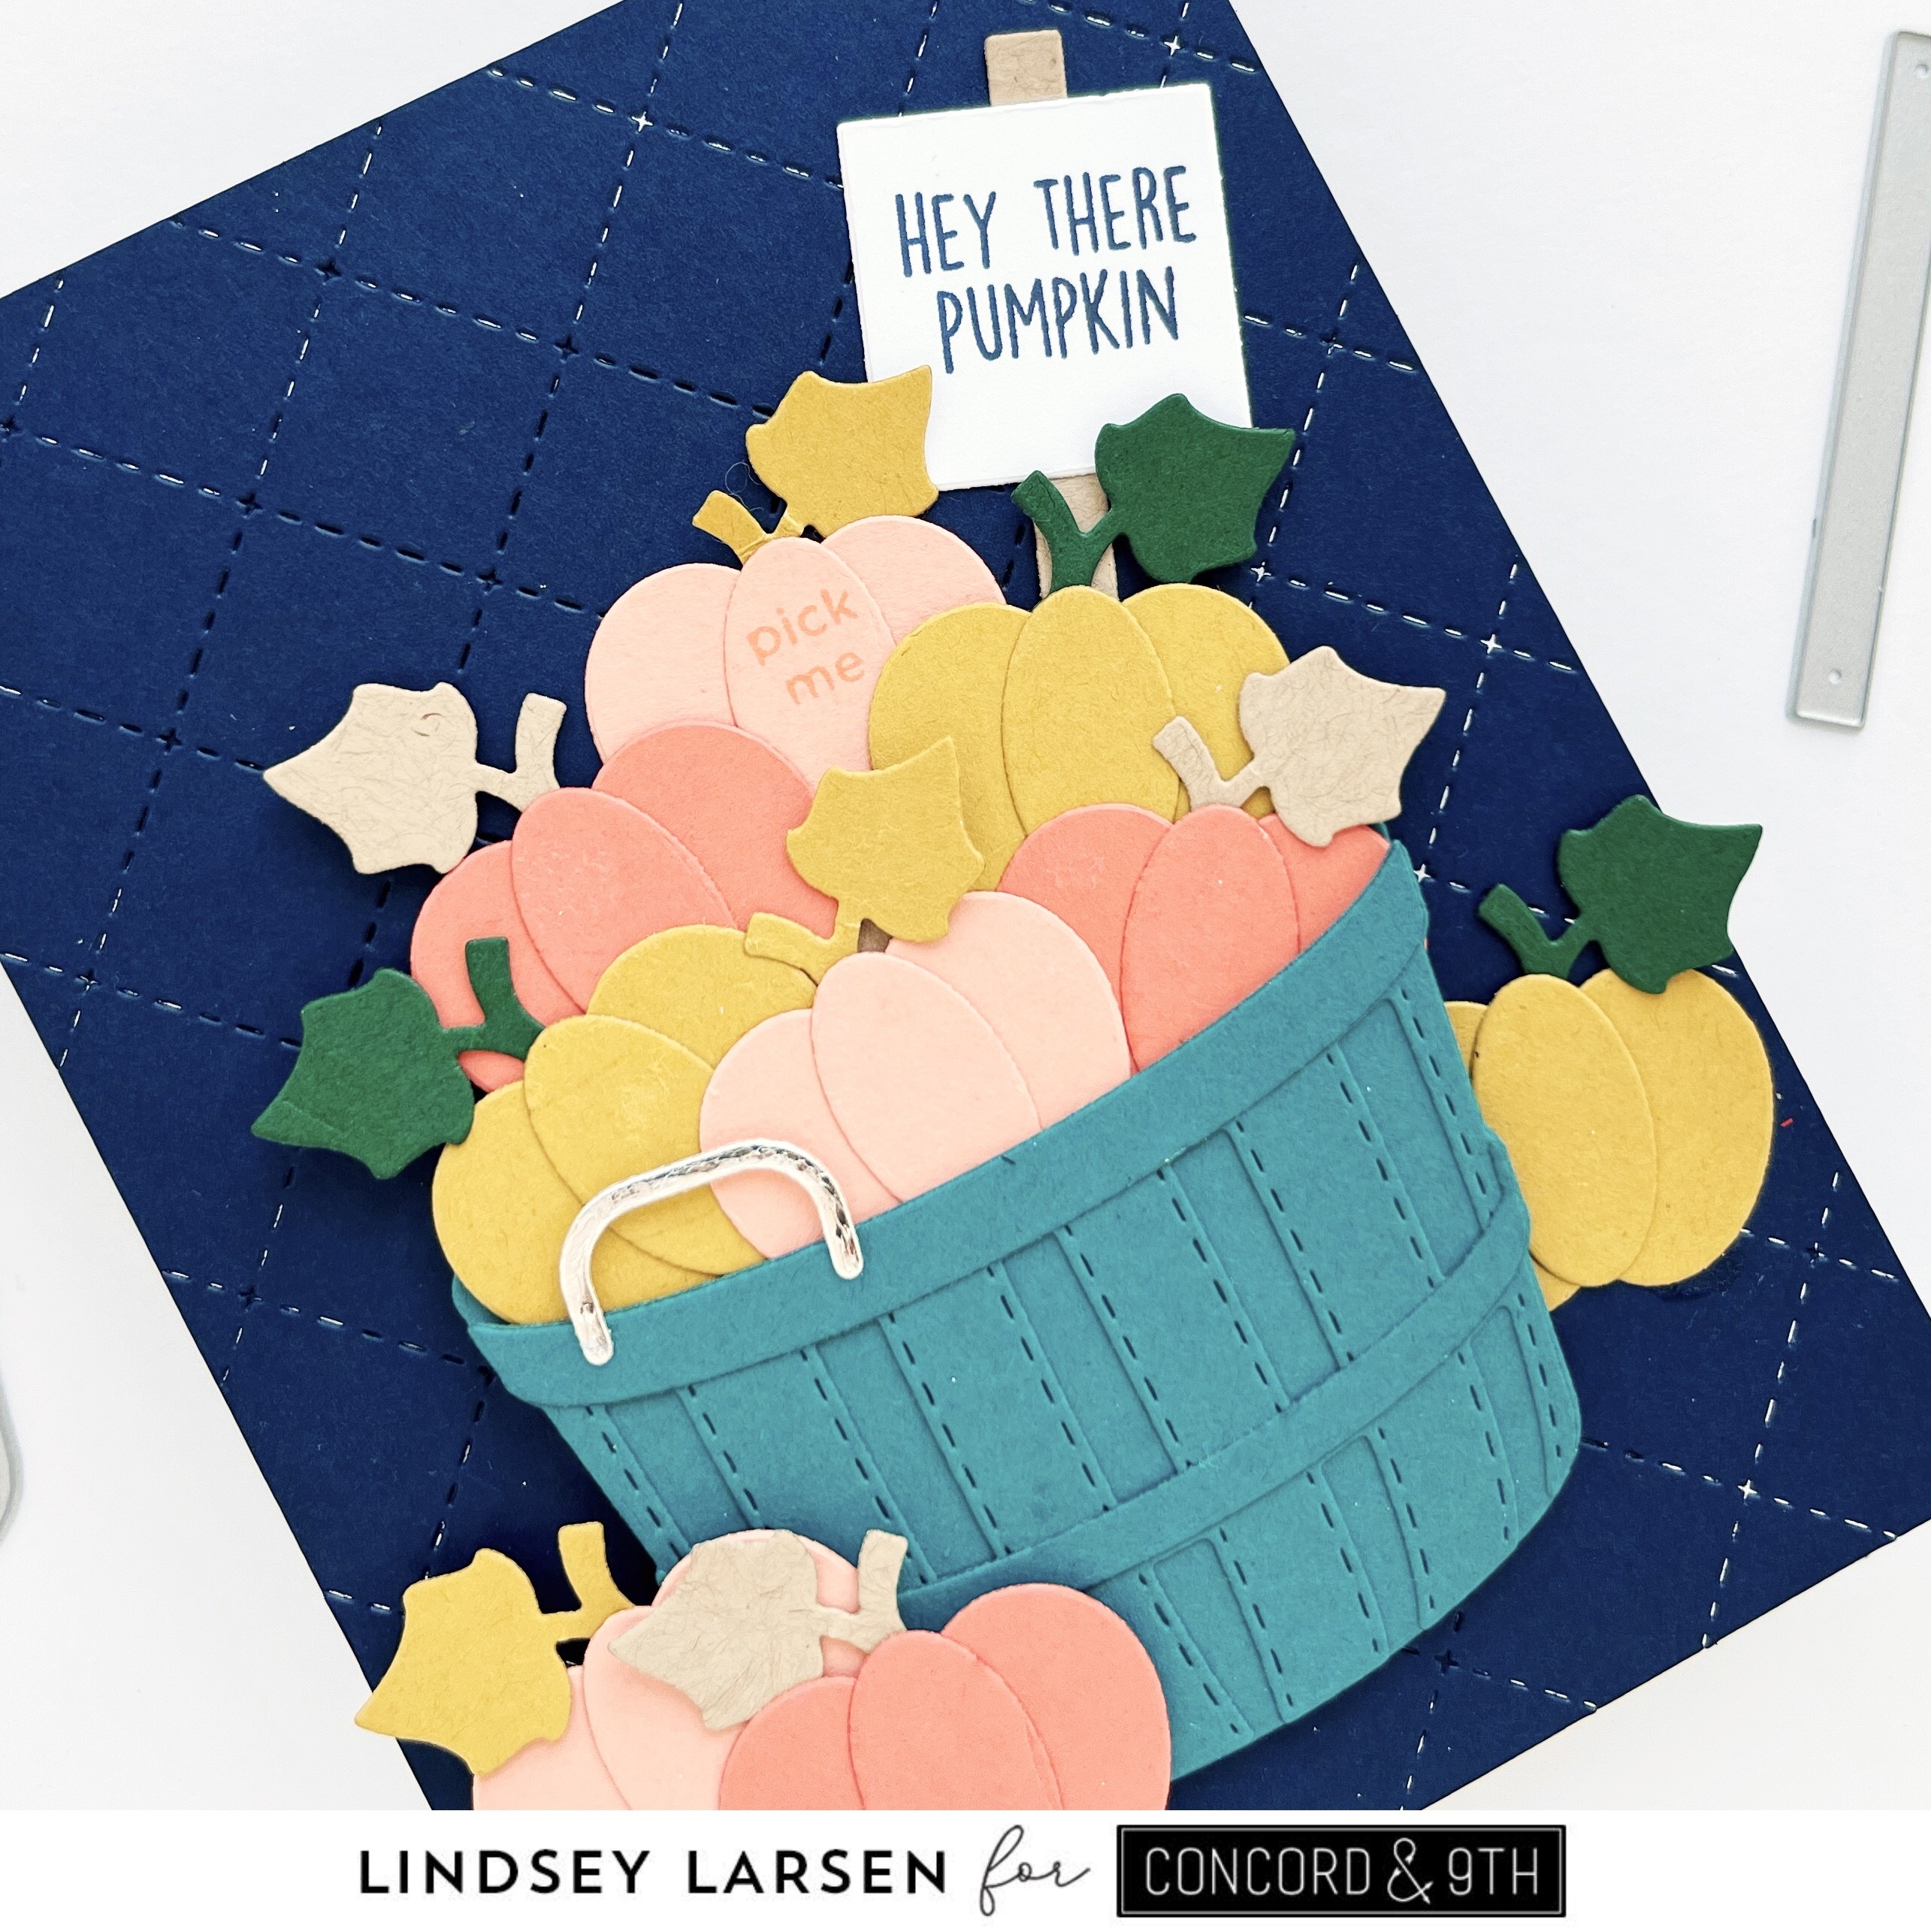
Okay, my next card uses the Freshly Picked Bundle.  This bundle is loads of fun and includes lots of options to fill the cute basket.  Plus, it has an interactive element that is brilliantly designed.  I used the same color palette as my previous card, but I expanded it by adding Grapefruit and Evergreen.

I looked through the Freshly Picked Dies and chose to fill my basket with pumpkins (which are actually the apple die cut with an oval die added to the center).  They include stems facing both directions, which I always appreciate.

After die cutting a whole bunch of pumpkins, I started on my Peacock colored basket.  The basket is made of five dies plus two handle options, but I promise they are cinch to put together.  The solid and stitched front layers line up easily and they get adhered to the back of the basket.  They even include gluing guides for you, which are especially helpful if you want to include the interactive element.  You can stop with just these three pieces (it looks cute just as is), or you can add the two basket bands and pick your handles.  I chose the short handle and cut it out of a metallic silver cardstock.  

Next, I added the sign and a sentiment from the Freshly Picked Stamp Set stamped with Midnight Ink.  They have several sentiments in this set that coordinate with the different filler options.  

Now here comes the really fun part.  Do you see that little pumpkin in the middle with "pick me" stamped on it?  When you pull it up, it reveals a second sentiment.  

Isn't that adorable?  The track they created to help this slide smoothly is absolutely brilliant and they even have gluing guides embossed into the die cut itself as I mentioned before.  The whole process is very user friendly. 

Then it all tucks right back in.  This makes me smile so much!  Oh, one last thing I forgot to mention...the background!  I chose to use Midnight  as a striking contrast. (I know what you are thinking...who am I am? And where is the typical white background? Haha.)  :) And I used the beautiful Quilted Card Front Die, a previously released favorite of mine.  

This was a long post!  Thanks for sticking with me!  Now, make sure you head on over to my Instagram account, so you can get entered in to with the Concord & 9th gift certificate.  Each designer has one up for grabs, so you have several chances to win.  :)